• About
  • Food Photography
  • Portraiture
  • Contact
Menu

Caroline Zhang Photography

  • About
  • Food Photography
  • Portraiture
  • Contact
×
Classic Chewy Brownies | Pass the Cocoa

Classic Chewy Brownies

Caroline Zhang March 16, 2015
Classic Chewy Brownies | Pass the Cocoa

I got interviewed for an article about the bakers on campus for my school paper last year, which the reporter pitched to me as a story about "the art of dessert" when she asked for an interview. It was a lovely idea, but I didn't quite agree with the concept. Yes, dessert can be beautiful, but ultimately making food--creating sustenance and satisfying that animal part of us--is a very humble thing. 

Cooking and baking can feed our artistic side, but it also provides a much more tangible, visceral satisfaction that few other activities can. I enjoy and appreciate food styling and plating (much more than when I first started blogging), but  my love for baking lies mainly in that ability to feed people. It taps into a shared experience and a shared need: everyone likes eating, everyone has opinions on food.

For me, brownies illustrate this need better than anything. (Granted, they don't actually satisfy that much in the nutritional department, but still). While I tend to be quite a snob about food, brownies might actually be one of my favorite desserts to make and eat. There's something so physical and satisfying about making them, with just you, a bowl, and a spatula, transforming some pantry ingredients into a smooth, shiny batter and then into dense, chocolate-y bars. 

Classic Chewy Brownies | Pass the Cocoa

They are plain, dark, undecorated, and unapologetically so. They're not here to look cute, but to feed that hankering for something rich and indulgent. Brownies are for the days when we feel we could absolutely murder a chocolate cake, when we just don't want to be dainty. 

Growing up, brownies were always the forbidden dessert. My mother wouldn't let them into the housing, deeming them The Epitome of Junk Food (and this is coming from the woman who let me eat cheesecake and cream puffs for breakfast on a regular basis). So of course, I ate them at every chance I got, and I have yet to grow out of that impulse.

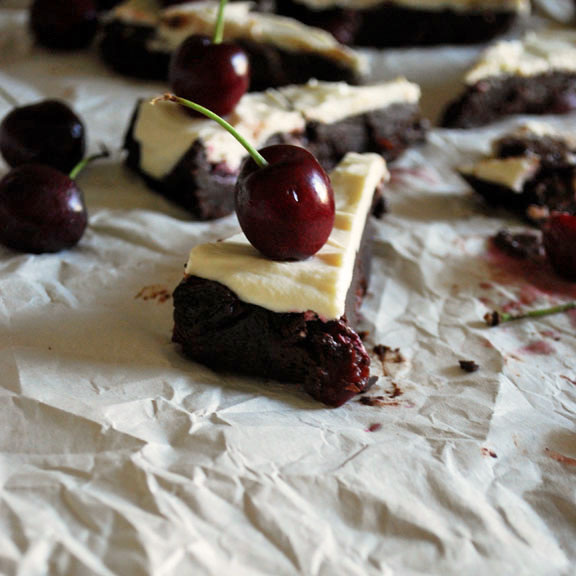
While I usually rely on Alice Medrich's cocoa brownies, I wanted to create something that was slightly less fudge-like. These brownies are still dense and chewy, but with a slightly more defined crumb, just a teensy bit further down towards the cake end of the spectrum. Looking back, these probably would have worked better for my Cherry Goat Cheese Brownies,  since the cocoa brownies were a little too dense. (I spent that post waxing poetic about literary philosophy...something about brownies seems to make me particularly chatty.)

Classic Chewy Brownies | Pass the Cocoa
Class Chewy Brownies | Pass the Cocoa

The combination of both cocoa powder and chocolate gives these brownies a more complex and deeper flavor. I like using higher quality chocolate (Lindt 90% dark for these), but you really don't have to be picky for brownies.

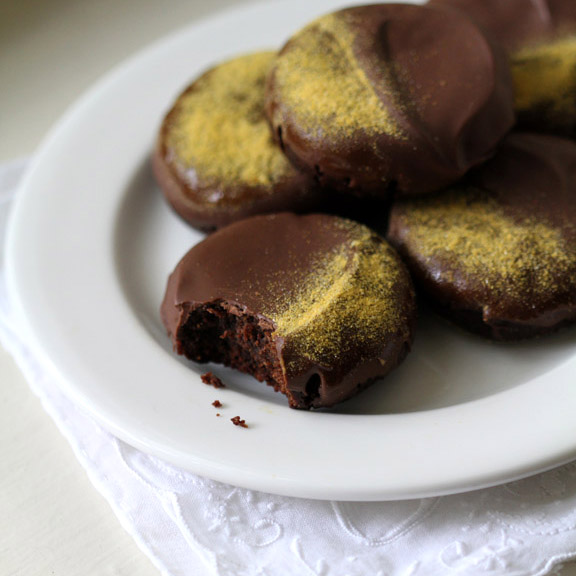
Make sure to beat the batter well after adding the eggs. It's the process of dissolving the sugar in the eggs and aerating them that creates that signature crackly crust on top. Don't break out the mixture for these; one of the joys of making brownies is putting in the elbow grease  and watching the batter transform before your eyes.

-Caroline


Classic Chewy Brownies

Click here for the printer-friendly recipe
Yields: 16 brownies
Loosely adapted from The Tart Tart

Ingredients
½ cup butter, cubed
3.5 ounces unsweetened or bittersweet chocolate, roughly chopped (at least 70% cocoa solids)
¾ cup granulated sugar
2 eggs, cold
¼ cup cocoa powder
¼ teaspoon salt
⅛ teaspoon baking powder (optional; you can omit this if you want a more dense, fudgy-er brownie)
¼ cup all-purpose flour

Directions
Preheat the oven to 350 F. Line a 9x9 inch pan with aluminum foil, and grease the foil.
In a heatproof bowl over a pot of simmering water, combine the butter and chocolate. Heat, stirring occasionally, until melted and smooth.

Mix in the granulated sugar. Beat in the eggs one at a time, and beat vigorously for about 3 minutes. The batter will look lumpy and grainy at first, but keep on beating until it turn thick, smooth, and glossy.

Mix in the cocoa powder, salt, and baking powder, then fold in the flour. 

Pour the batter into the pan, and bake for 18-20 minutes. You don’t want to over-bake them! The brownies will have set and risen oh-so slightly, but the center should not be completely firm. A toothpick inserted into the center should be covered with moist crumbs. 


Related Posts

Buckeye Brownies
Cherry Brownies with Goat Cheese Frosting
Chocolate Sour Cream Cake
Flourless Chocolate Peanut Butter Cookies
In bars and brownies Tags brownies, chocolate, bars, cocoa
Matcha Cupcakes | Pass the Cocoa

Matcha Cupcakes + Pass the Cocoa Turns Three

Caroline Zhang March 2, 2015
Matcha Cupcakes | Pass the Cocoa

One of my roommate's friends from church used to come over to our dorm last year, often with her 18-month strapped in a carrier behind her. He was at those couple months of early toddlerhood when he had become mobile, but had not yet developed the common sense to match it. 

As he came barreling through our rooms in a half-jog, half-waddle, trying to stick his fingers in light sockets, knocking the mirrors askew, and being totally oblivious to the fact that hot ovens are dangerous (and enjoying these Nutella cupcakes!), I remember wondering at the fact that we all managed to make it out of that age in one piece.

I feel a similar kind of amazement as we celebrate our third blog birthday here. I don't know how we've made it this far as we blundered through the Internet and the kitchen alike, but am pretty impressed that we have. 

Maybe it'll eventually become routine, and each birthday becomes less of a surprise as we grow out of toddlerhood, so to speak. But for now, it's still worth celebrating the year with some cupcakes.

Matcha Cupcakes | Pass the Cocoa

These cupcakes are beautiful and delicious, their bright spring color (spring is used ironically here) completely natural, thanks to a hearty dose of green tea matcha powder. The tea has a wonderfully earthy flavor that tempers the sweetness of the buttercream a little bit. I'm still not a huge fan of traditional American buttercream, but have found that using salted butter improves the flavor a little bit. 

They looked so festive and cheerful with their little green tops, sitting on my windowsill against the cold gray sky last Sunday morning, waiting for me to photograph them. A perfect celebration of three years of dessert without any electrocuted fingers.

Love,
Caroline

Matcha Cupcakes | Pass the Cocoa

Matcha Cupcakes

Click here for the printer-friendly recipe.
Yields: 24 cupcakes
Adapted from Magnolia Bakery and My Name is Yeh

Ingredients
For the Cake
2 ½ cups cake flour
½ teaspoon salt
1 teaspoon baking soda
2 teaspoons baking powder
1 ½ cups granulated sugar
2 eggs
½ cup vegetable oil
1 tablespoon vanilla extract
1 cup buttermilk
¾ cup whole milk

For the Matcha Buttercream
1 cup salted butter, cubed, at room temperature
3 cups powdered sugar
2 tablespoons matcha powder (culinary quality is fine)
2 tablespoon mil

Directions
Preheat the oven to 350. Whisk together the cake flour, salt, baking soda,and baking powder. Set aside.

Whisk together the sugar, eggs, vegetable oil, and vanilla extract until smooth. Whisk in the buttermilk.

Gradually add the liquid ingredients to the flour mixture, whisking constantly until smooth. Whisk in the milk. 

Evenly divide the batter among 24 muffin tin wells lined with cupcake liners. Bake for 22-25 minutes, or until a toothpick inserted in the center comes out clean. Let cool. Make sure the cupcakes are completely cooled before you begin to frost the them.

Make the buttercream. Whip the butter until light and fluffy, then gradually whisk in the sugar, about ½ cup at a time. Whisk in the matcha powder, then about 1 tablespoon of milk. If it is a little too stiff, whip in the remaining tablespoon of milk. 

Frost the cupcakes with a piping bag or spatula and spoon. To create the peaked top on the frosting, spoon/pipe a rounded mound of frosting in the center of the cupcake, then pat it with the back of a spoon to created a circle of frosting, then lift the spoon to create a peak.


Related Posts

Celtic Knot Cookies
Nutella-Filled Cupcakes
a. raspberry meringue cheesecake 5.jpg
a.raspberry lemonade cupcakes 7.jpg
In cake, cupcake Tags cupcake, cake, matcha, green tea, vanilla, buttercream
Egg Tart | Pass the Cocoa

Egg Tarts

Caroline Zhang February 19, 2015
Egg Tart | Pass the Cocoa
Egg Tarts | Pass the Cocoa

Though I could wax poetic about the many joys of living in Indiana (see: cornfields, cow manure, and fattening pies), it does mean that we're rather far from anywhere that made actual Chinese food. My mother always refused to eat out, insisting that she could always cook it better at home (I did inherit my food snobbery from somewhere!) 

If they did feel like store-bought food, my parents would stop by Chinatown in Chicago on the way home from business trips for meat, groceries, and of course, dessert. It was always exciting to find the white paper box from St. Anna's bakery on the kitchen counter, with grease already starting to seep through the flimsy cardboard bottom. It would open with a puff of air scented with that wonderfully distinct smell of shortening and sugar, revealing little cakes, pastries, and of course, egg tarts. 

Maybe it's nostalgia, but those egg tarts remain one of my favorite desserts. While egg tart is the literal translation from Chinese, it really is a custard tart, composed of a flaky crust with a creme brulee-like filling. Traditional egg tarts usually have a puff pastry crust, but egg tarts to me always should look like the ones from Chicago, oblong with a thick, sweet, shortbread crust.

Egg Tarts | Pass the Cocoa

Out of all the recipes I've posted on this site, these tarts are probably the ones I've made the most. I meant to share them more than two years ago, but I was never quite satisfied with the photos, and didn't feel they did these tarts justice. The pictures here are from two different times (I burned them slightly the second time, oops), but I've made them much more than that.

What with all the recipes I share here, there's very few things that I actually repeat. This is one of them, and that really is the highest recommendation I can give.

Happy Chinese New Year!
-Caroline


Egg Tarts

Yields: 12-18 tarts
Adapted from ourfamilyfoodadventures.com

Ingredients
For the Crust
½ cup butter, cubed, room temperature
¼ cup sugar
1 egg
½ teaspoon vanilla
1 ¼ cup flour
¼ teaspoon salt

For the Filling
1 ½ cup water
⅔ cup sugar
4 eggs
¼ cup whole milk
1 teaspoon vanilla extract

Directions
Make the crust. Beat together the butter and sugar until light at fluffy. Whisk in the egg and vanilla, then fold in the flour and salt. Shape the dough into a disk and refrigerate for 2 hours, or overnight. 

Preheat the oven to 400 F. Make the filling. Place the water and sugar in a saucepan, and heat until it begins to boil. Let boil for for 2-3 minutes, take off the heat, and let cool to room temperature. 

Beat together the eggs, milk, and vanilla extract. Whisk in the sugar syrup mixture from the previous step. Pour the filling through a strainer into a measuring cup.

Divide the dough for the crust into 12-18 equal pieces, depending on your large or small you tart molds are. (If using a muffin tin, divide it into 12, if using smaller tart tins, you can divide the dough into more pieces). Generously grease the tart tins with vegetable oil or butter, and shape the dough along the inside of the molds.

Place the tart molds onto a cookie sheet, then pour the filling into the molds, almost to the top. Bake for 15-18 minutes, or until the center is set but still slightly jiggly. Let cool to room temperature and serve. 


Related Posts

e.pigbread17.jpg
a.french apple tart 5.jpg
a.panna cotta 8.jpg
a. Rhubarb Cobbler 11.jpg
In pie Tags chinese, pie, tart, custard
Baci di Dama | Pass the Cocoa

Baci di Dama

Caroline Zhang February 9, 2015
Baci di Dama | Pass the Cocoa

I don't have any particular back story to these little Italian cookies; I've never had them before, never made them for some special occasion or sampled them at a special cafe. They just happened to come my way on David Lebovitz's blog one day, and made me really want to try one. It goes unsaid sometimes, because we're so busy personalizing our recipes, but one of the best parts of food blogging is, of course, inspiring others to experiment new food and recipes. So thank you, David Lebovitz, for the recipe.

Baci di Dama translate to "lady's kisses" in Italian, and are simple cookies requiring just a few ingredients that turn into a buttery and delicious sandwich cookie. I had originally meant to post them in time to include them in my top romantic desserts round-up, but of course miscounted the number of weeks to Valentine's Day and didn't plan ahead.

Baci di Dama | Pass the Cocoa

It's a low-tech recipe, requiring just a bowl and your hands (and a food processor, if your nuts aren't pre-ground). The most time-consuming part of this recipe is rolling the little balls of dough, but it's kind of soothing work, and fun to watch them spread and puff up a bit in the oven. 

So give them a try, make them for someone special, or just make a big plateful for yourself. Either sounds wonderful.

Caroline


Baci di Dama

Click here for the printable recipe
Yields: about 25 sandwich cookies
Lightly adapted from David Lebovitz

Ingredients
1 ¼ cup almonds, blanched and ground (or hazelnuts with the skins removed)
¾ cup all-purpose flour
¼ cup cornstarch
½ cup sugar
¼ teaspoon salt
6 tablespoons butter, cubed and very cold
½ teaspoon almond extract (optional)
2 ounces semi-sweet chocolate

Directions
In a food processor, grind the almonds or hazelnuts until very fine.

In a large bowl, mix together the ground almonds, flour, cornstarch, sugar, and salt. 
Add the butter and with your hands, rub the butter into the flour until it together in a dough, then work in the almond extract. At first it might seem too crumbly, but as you work in the butter, the oil from the almonds will help form the dough.

Divide the dough into 4 equal pieces. Roll each piece into a ¾-inch thick log. Wrap the logs in plastic wrap and refrigerate for at least 2 hours, or overnight. Don’t skip this step; chilling the dough makes it firm enough to roll, and allows the gluten in the dough relax in order to make a soft and flaky cookie.

Preheat the oven to 325 F. Unwrap one of the logs and cut it into centimeter-thick disks. Roll the disks into spheres, and place onto a parchment-lined cookie sheet. Repeat with the other 3 logs.

Bake the cookies for 10 -12 minutes, or until they are just barely golden around the edges. Let cool completely. 

Melt the chocolate in the microwave on medium power. Turn half of the cookies upside down, and spoon a small drop of chocolate on them. Top with the remaining cookies.


Related Posts

a. cornmeal coffee cake 7.jpg
a. fig and walnut ice cream 12.jpg
a. linzer heart cookies 8.jpg
a. abbracci cookies 7.jpg
← NewerOlder →

Search Posts

Post Archive
  • "easy"
  • "breakfast"
  • "chocolate"
  • "cookie"
  • cake
  • cookie
  • "fruit"
  • "summer"
  • "bread"
  • "Cheesecake"
  • "Oreo"
  • "dessert"
  • "fancy"
  • "Cake"
  • "blueberry"
  • pie
  • "cinnamon"
  • savory
  • breakfast
  • "berry"
  • "brownie"
  • "cupcake"
  • "holiday"
  • "nutella"
  • bars and brownies
  • "apple"
  • "birthday"
  • "pastry"
  • "pie"
  • "scone"
  • bread
  • candy
  • cheesecake
  • "banana"
  • "biscuit"
  • "citrus"
  • "ganache"
  • "lemon"
  • "macaron"
  • "muffin"
  • "strawberry"
  • "vegetable"
  • "almond"
  • "buttercream"
  • "cake mix"
  • "cranberry"
  • "cream cheese"
  • "frosting"
  • "glaze"
  • "healthy"
 

Powered by Squarespace