• About
  • Food Photography
  • Portraiture
  • Contact
Menu

Caroline Zhang Photography

  • About
  • Food Photography
  • Portraiture
  • Contact
×
Lemon and Honey Granola | Pass the Cocoa

Lemon and Honey Granola

Caroline Zhang January 13, 2016
Lemon and Honey Granola | Pass the Cocoa

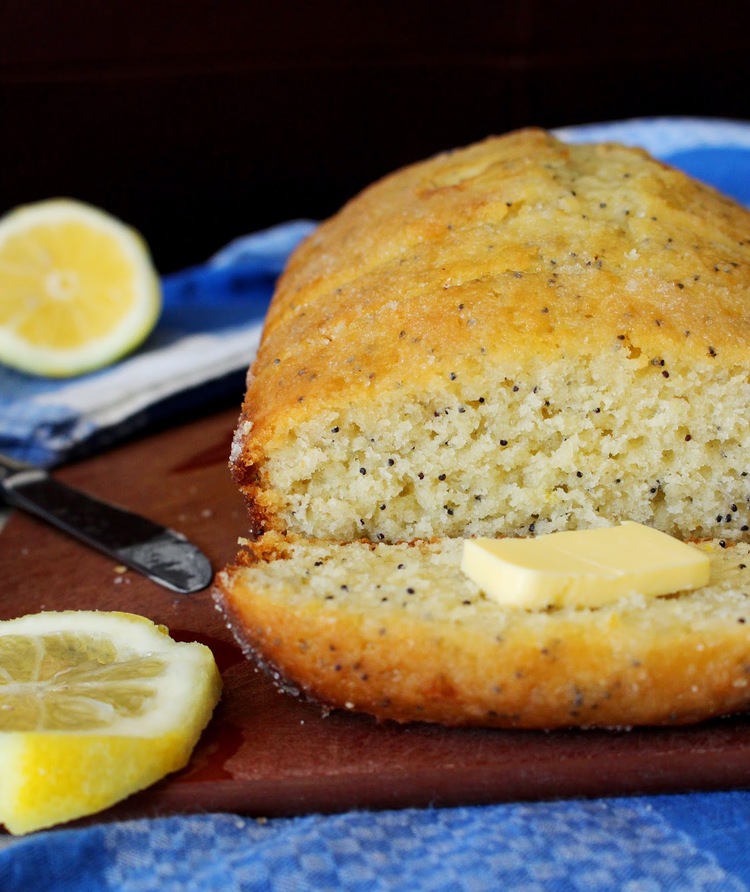
I think I might have gotten a little--just a little--tired of dessert food this holiday season. Monica and I were worked on a big baking project over break (you'll hear more about it soon!) and I turned out about a dozen cakes in two weeks. Between all the Christmas cookies and chocolate we went through, I started craving savory food and fruit. 

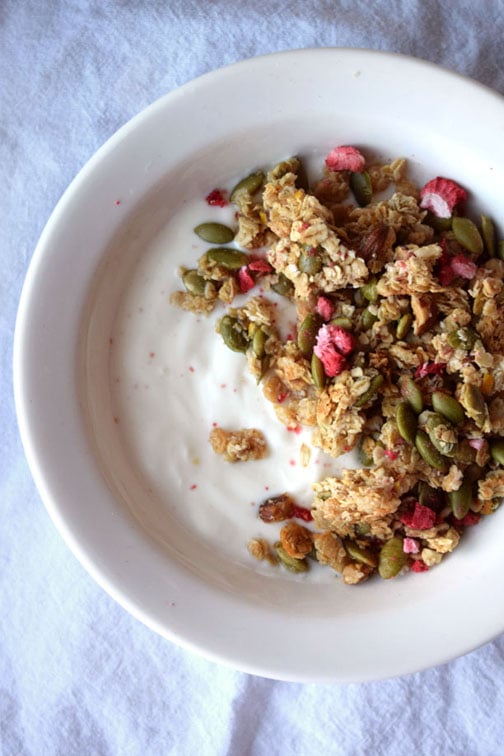
This granola fits the bill perfectly as a light, fruity breakfast to start the day. In contrast to a lot of store-bought granola, which always seems a little too sickly-sweet with dried fruit or weighed down with chocolate, this granola gets a bright flavor from both lemon juice and zest. I don't know why I never thought of introducing citrus to granola before; the lemon lifts the granola from a stale pantry food (or fished from the bottom of your backpack food) into something fresh and homemade.

Granola was one of the first things I learned how to bake completely from scratch. I remember feeling a sense of surprise that the little brown bar that seemed intrinsically linked to its foil package and corn syrup-y sweetness could actually be made at home--and what's more, was quite easy to make and had the potential to taste so good.

Lemon and Honey Granola | Pass the Cocoa

I highly recommend the addition of freeze-dried fruit to this granola; it adds a pop of color and tartness, without the sugar and funky preservative flavor of dried fruit.

You can make a pretty big batch of this granola in under an hour, even accounting for hauling your baking supplies up and down the stairs outside to the communal kitchen, almost getting locked out of the dorm, and forgetting the citrus zester in your room and zesting the lemon by hand.

The granola will keep for a few weeks, but it will probably disappear from your kitchen quite quickly.
-Caroline

Lemon and Honey Granola | Pass the Cocoa

Lemon and Honey Granola

Click here for the printer-friendly recipe
Yields about 7-8 cups of granola

Ingredients
4 cups rolled oats (see notes)
3 tablespoons vegetable oil, plus extra for greasing
¼ teaspoon salt
2 tablespoons dark brown sugar
½ cup honey
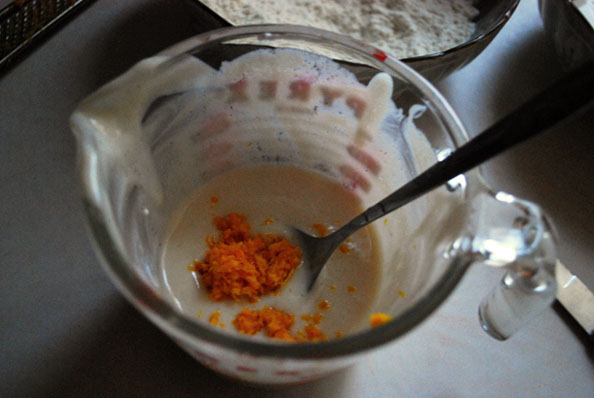
2 tablespoons lemon juice
zest of one lemon (about 2 tablespoons)
1 cup puffed rice cereal, such as Rice Krispies
1 cup finely shredded unsweetened coconut
1 cup raw pepitas
½ cup roughly chopped raw almonds
¼ cup freeze-dried strawberries or raspberries, finely chopped (optional; I just like the extra pop of color and tartness they add)

Directions
Preheat the oven to 350 degrees Fahrenheit.
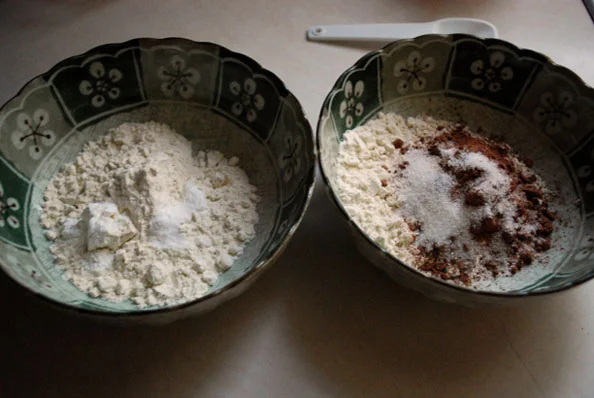
Toss together the oats, oil, and salt. Spread evenly over a large cookie sheet or jelly roll pan and bake for 15-20 minutes, shaking the pan two to three times during baking. 

Reduce the heat to 325 degrees.

In a microwaveable bowl, mix together the brown sugar, honey, lemon juice, and lemon zest. Microwave on high for about 1 minute, or until the mixture just begins to simmer. 
Place the cooked oats into a large mixing bowl. Add the rice cereal, coconut, pepitas, and almonds. Pour the honey/lemon mixture over the dry ingredients and mix until well-combined.

Line a 11x17  jelly-roll pan with foil, and grease with vegetable oil. 

Turn the sticky granola mixture onto the pan. Rub some vegetable oil into your palms, and use your hands to press the granola into an even layer. 

Bake for 20-25 minutes. Let cool. Peel the granola away from the foil and break into small chunks. Toss in the freeze-dried strawberries, if using them. Enjoy!

Notes:
Quick oats can be used in place of rolled oats. Just reduce the toasting of the oats from 15 minutes to about 7-8 minutes. To make this recipe gluten-free, make sure to use certified gluten-free oats.


In breakfast Tags healthy, breakfast, granola, lemon, citrus
No-Bake Chewy Granola Bars | Pass the Cocoa

No-Bake Chewy Granola Bars

Caroline Zhang June 15, 2015
No-Bake Chewy Granola Bars | Pass the Cocoa

To the individual who made 50 pineapple Jello shots and set them on refrigerator door in the Winthrop kitchen, which promptly spilled all over my feet when I opened the fridge:

Just so you know, putting pineapple pieces in Jello will prevent it from setting. There are enzymes in pineapple that break up the proteins in gelatin. Thus, the soupy Jello shots that I spilled all over the floor. Sorry about that—it looked like those shots took a lot of work, but they wouldn’t have worked out anyways…I hope you found another source of booze for the evening. And that next time you don’t stick all of the shots on the door of the refrigerator, which, you know, is the bit that always yanked open and closed.

I don’t mean to be passive-aggressive, Jello person, really. I think little disasters like this in a communal dorm kitchen have actually made me appreciate the simple things in baking. I tend to turn my nose up at standard cookie and muffin recipes and such when I'm at home, always looking for something fancy and new and challenging. Yet somehow a simple biscuit or banana bread suddenly gains novelty when I'm at school. I always marvel that my haphazard attempts at baking, the last-minute substitutions for ingredients I forgot to get, the lack of proper equipment, and slipping on liquid Jello on the floor (ahem), somehow are able to yield fresh, homemade scones, or a gooey, fragrant pan of brownies. Baking seems more magical, more special.

That definitely goes for homemade granola, like these no-bake chewy bars. It’s exciting to make a simple snack that tastes a hundred times better than the stuff you buy at CVS in the square. They take just a few basic pantry staples (like, maybe three more ingredients than your Jello shots), yet, as always with baking, the sum is so much greater than the parts.

No-Bake Chewy Granola Bars | Pass the Cocoa

They are chewy, sweet (but not too sweet), and crunchy from the nuts, which make these such a healthy and filling snack. Nuts contain healthy fats and fiber that are reported to help do all sorts of things, from making you feel full longer to improving cardiovascular health.  (You can read all about it here.) Don’t quote me on this, but they’d probably work as hangover food too. 

I adapted these from David Lebovitz’s recipe, which for some reason is called “no-bake granola” even though the first step is “preheat the oven to 350 F.” Very deceiving. Anyways, my version just requires a skillet, a mixing bowl, a spoon, and something to put your granola in. You could probably find all the equipment even in the Winthrop kitchen. 

It yields a wonderfully fragrant and flavorful granola—oh, and if you want to get clean slices, you can chill it for a while. Because, you know, it does actually set in the fridge. 

Hope the Jello shot making is more successful next time,
Caroline

This post was done in collaboration with nuts.com. All opinions are my own.


No-Bake Chewy Granola Bars

Click here for the printer-friendly recipe.
Yields: 16 bars
Adapted from David Lebovitz

Ingredients
½ cup whole almonds (walnuts, pecans, or a mix of all three can be substituted)
1 tablespoon butter
1 ½ cup rolled oats (if making these gluten-free, make sure to use certified gluten-free oats)
¼ teaspoon salt
½ freeze-dried (or normally dried) fruit, such as strawberries or apples
½ cup dates, pitted and chopped
2 tablespoons flax seeds
¼ cup creamy peanut butter
¼ cup honey
½ teaspoon vanilla

Directions
Toast the nuts. Place the nuts in a large skillet over medium heat, tossing occasionally to prevent them from burning, until they are lightly browned and fragrant, about 5 minutes. Let cool, then roughly chop them. Place them in a large mixing bowl.

In the same skillet, melt the butter, and add the oats and salt. Cook over medium heat for 5-7 minutes, stirring occasionally, until the oats begin to toast and turn slightly golden. Pour them in the mixing bowl as well. 

Add the fruit, dates, and flax seeds to the mixing bowl.

Place the peanut butter and honey in the skillet. Cook over medium heat, stirring occasionally, until it is smooth and combined. Mix in the vanilla extract.
Pour the peanut butter/honey mixture over the dry ingredients in the mixing bowl. Mix everything together with a wooden spoon until well-combined. It should be very thick and sticky. Press the mixture into an 8x8 inch baking pan lined with foil or parchment paper. 

Let cool completely, then slice into squares. If the granola is too sticky to slice, place the pan in the refrigerator for an hour before cutting. 


In breakfast Tags granola, easy, snacks, nuts, oats, breakfast
Gluten-Free Banana Bread | Pass the Cocoa

Gluten-Free Banana Bread

Caroline Zhang May 11, 2015
Gluten-Free Banana Bread | Pass the Cocoa

I woke up to a text from my roommate yesterday morning telling me, "I finished the banana bread. I am a monster." It was definitely one of the best compliments to my baking I've gotten in a while. 

I am being 100 percent honest when I say that this gluten-free and dairy-free banana bread is significantly better than any normal banana bread I've made. None of this it-tastes-almost-as-if-it-were-the-real-thing business. My go-to Smitten Kitchen's banana bread recipe is wonderful, but I have to say this one is significantly better.  (Admittedly, I just turned legal and always had to leave out the bourbon, so maybe I've been doing it wrong...)

It's been a while since I've gotten this excited about such a straight forward baking project (I had been planning on sharing this cool honeycomb candy but I couldn't hold back on this one). You see, the crumb and texture of this bread is beautiful. Wait, hold on...appreciate this for a moment: 

Gluten-Free Banana Bread | Pass the Cocoa

Especially take note of the bottom of the loaf. A lot of banana breads have what I call the bottom 1/3 problem. The loaf bakes up dense and moist, but the bottom fraction of the loaf actually becomes way too dense to the point that it is unpleasantly gummy. 

Not so with this banana bread recipe. I think baking with gluten-free flours can actually be an advantage for quick breads, since you don't want the gluten to develop for these recipes. The oil in place of butter also helps keep the banana bread from going dense as a doorstep. 

Gluten-Free Banana Bread | Pass the Cocoa

One of my roommates just got diagnosed with a gluten intolerance so you'll probably be seeing more gluten-free recipes around here. I still think the gluten-free health fad is silly (gluten-free does not mean healthy...we have quite. a few. really. unhealthy gluten-free recipes on this blog), but it is helpful for getting more gluten-free recipe ideas. (Packaged foods advertising to be gluten free are another story...some of them can still contain traces of gluten, which can be an issue for people who actually are allergic).

And of course, I'm always up for new baking challenge.

-Caroline


Gluten-Free Banana Bread

Yields: one 8x4 inch loaf
Click here for the printer-friendly recipe

Ingredients
2 eggs
⅓ cup packed brown sugar (you can increase this to ½ cup if you prefer a sweeter bread)
1 teaspoon vanilla extract
3 medium overripe bananas, mashed
¼ cup vegetable oil
¼ teaspoon salt
½ teaspoon baking soda
1 ½ teaspoon baking powder
1 cup almond flour
½ cup white rice flour
¼ cup brown rice flour
1 tablespoon cornstarch
½ cup chopped walnuts or pecans, toasted (optional)

Directions
Preheat the oven to 350 F. Grease a 8 inch x 4 inch loaf pan with vegetable oil. 

Whisk together the eggs, brown sugar, and vanilla. Whisk in the mashed bananas, followed by the vegetable oil.

Whisk in the salt, baking soda, and baking powder. Mix in the almond flour, white and brown rice flours, and cornstarch. Fold in the toasted nuts, if using.

Pour the batter into the loaf pan. Bake for 45-55 minutes, or until a skewer inserted into the center comes out clean. Let cool for 30 minutes, then turn out of the pan, and cool completely. 


Notes
Your bananas need to be very, very ripe to get the best results and best flavor for this bread. 


Related Posts

Almond Lemon Poppy Seed Bread
Nutella-Swirled Banana Bread
Hazelnut Mocha Macarons
Raspberry Lemon Cheesecake with a Coconut Macaroon Crust
In quick bread, breakfast, bread Tags banana bread, banana, gluten-free, nuts, easy

Chocolate-Orange Marbled Muffins

Caroline Zhang January 6, 2014

Well, it's that time of year again. You know, those couple of weeks after holiday festivities but before Valentine festivities when you're supposed to atone for all that wonderful fattening food you ate in the last couple of weeks, and to make resolutions, and be virtuous? Or something like that.

I'm not good at being virtuous about food, but I'll give it a try. Sacrificing for the greater good. For you guys. With these muffins.

Actually, I just came across a picture of these little marbled muffins, and wanted to give them a try, while also just happening to come across a yogurt-based muffin recipe. But they are delicious and taste very rich and are actually not bad for you. These muffins make a great breakfast or afternoon snack, and the chocolate and orange flavor combination is really delicious.

The only tricky part of this recipe is that you have to make two different batters, and are essentially making two different kinds of muffins. It's definitely worth the effort and the extra dirty bowl, though. The chocolate-orange flavor combination makes the muffins seem really decadent and rich, and reminds me of these Lindt chocolates.

Left: dry ingredients for the orange muffin batter. Right: dry ingredients for the chocolate batter.

Wet ingredients for the orange batter.

To assemble, place a spoonful of chocolate batter in a greased muffin tin, then a spoonful of orange batter, and keep alternating until it is filled almost to the rim. Then, give each of the muffins a little swirl with a toothpick.

Then bake, let cool, enjoy, and be virtuous.

Chocolate Orange Marbled Muffins

Click here for the printable recipe
Yields: 12 Muffins | Adapted from Sally’s Baking Addiction

Ingredients
For the Chocolate Batter:
⅓ cup all-purpose flour
⅓ cup cocoa powder
¼ teaspoon salt
½ teaspoon baking powder
½ teaspoon baking soda
½ cup plain Greek yogurt
¼ cup applesauce
1 egg white
6 tablespoons granulated sugar
2 tablespoons honey
1 teaspoon vanilla extract
⅓ cup chocolate chips

For the Orange Batter
⅔ cup all-purpose flour
¼ teaspoon salt
½ teaspoon baking powder
½ teaspoon baking soda
½ cup plain Greek yogurt
1/4 cup applesauce
1 egg white
2 tablespoons granulated sugar
2 tablespoons honey
1 teaspoon vanilla extract
1 tablespoon grated orange zest
⅓ cup pecans, chopped (optional)


Directions
Grease a 12-count muffin tin. Preheat the oven to 425 degrees Fahrenheit.

Make the chocolate batter. Whisk together the flour, cocoa powder, salt, baking powder, and baking soda. In a separate bowl, mix together the yogurt, applesauce, egg white, sugar, honey, and vanilla extract.

Add the dry ingredients to the wet until just combined. Don’t over-mix! Fold in the chocolate chips.

Make the orange batter. Whisk together the flour, salt, baking powder, and baking soda. In a separate bowl, mix together the yogurt, applesauce, egg white, sugar, honey, vanilla extract, and orange zest.

Add the dry ingredients to the wet and stir until just combined. Fold in the chopped pecans.

Add a spoonful of chocolate batter to each well of the muffin tins. Add a spoonful of orange batter. Alternate until you run out of batter.

Bake at 425 degrees for 5 minutes, then lower the oven temperature to 375, and bake for another 13 minutes, or until a toothpick inserted into the center of a muffin comes out clean.

Let cool and serve!

In breakfast Tags muffin, healthy, chocolate, orange, breakfast
Older →

Search Posts

Post Archive
  • "easy"
  • "breakfast"
  • "chocolate"
  • "cookie"
  • cake
  • cookie
  • "fruit"
  • "summer"
  • "bread"
  • "Cheesecake"
  • "Oreo"
  • "dessert"
  • "fancy"
  • "Cake"
  • "blueberry"
  • pie
  • "cinnamon"
  • savory
  • breakfast
  • "berry"
  • "brownie"
  • "cupcake"
  • "holiday"
  • "nutella"
  • bars and brownies
  • "apple"
  • "birthday"
  • "pastry"
  • "pie"
  • "scone"
  • bread
  • candy
  • cheesecake
  • "banana"
  • "biscuit"
  • "citrus"
  • "ganache"
  • "lemon"
  • "macaron"
  • "muffin"
  • "strawberry"
  • "vegetable"
  • "almond"
  • "buttercream"
  • "cake mix"
  • "cranberry"
  • "cream cheese"
  • "frosting"
  • "glaze"
  • "healthy"
 

Powered by Squarespace