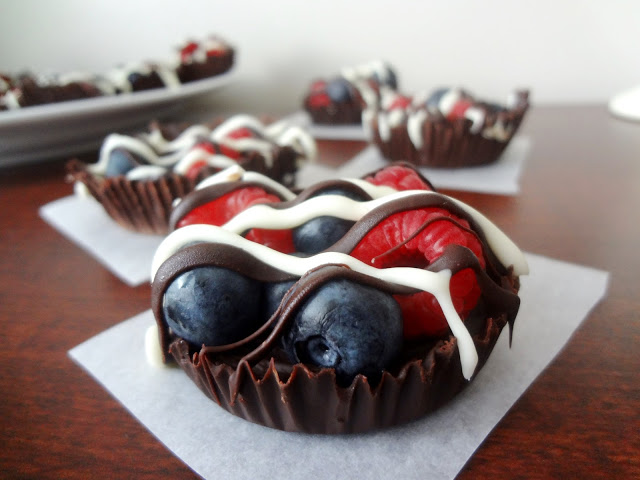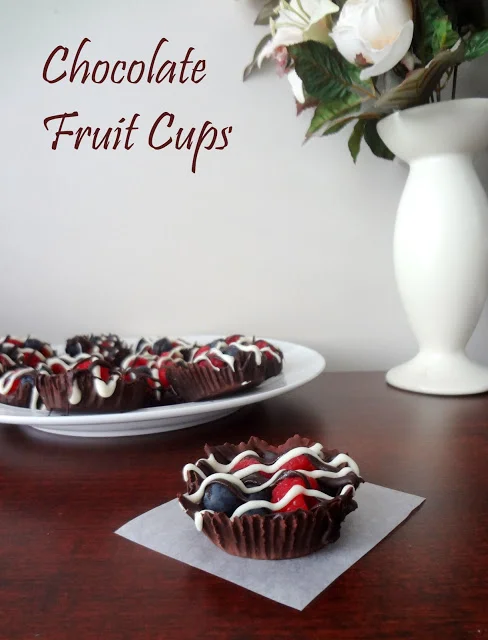
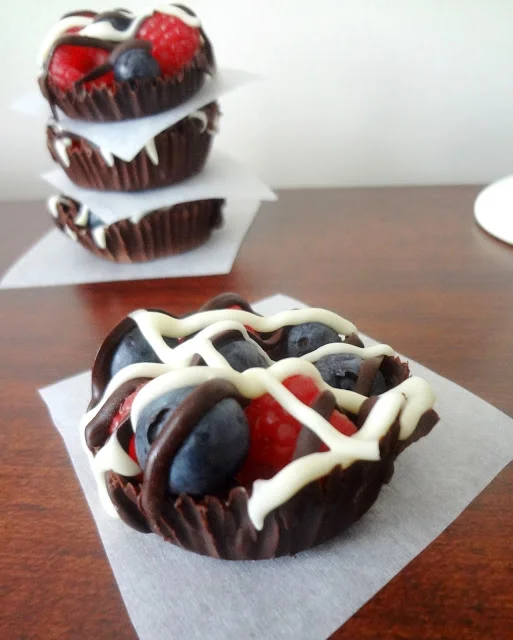
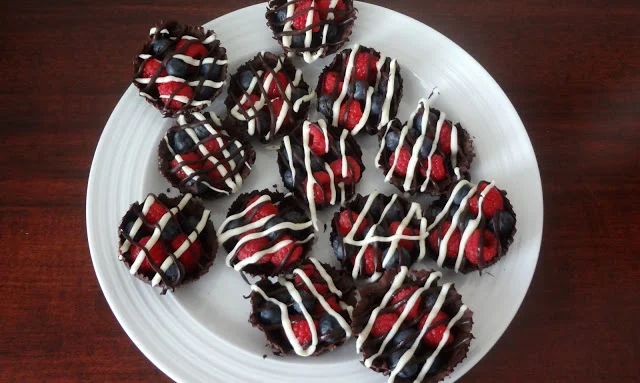
Happy 4th of July! Any exciting plans for the day or fun traditions? I'm planning on joining in on the festivities and fireworks downtown with some friends...and celebrating a potluck dinner beforehand by bringing these scrumptious dark chocolate fruit cups, filled with fresh raspberries and blueberries and topped off with milk and white chocolate drizzle. It's got all the perfectly vibrant celebratory patriotic colors -- red, white, and blue -- and the flavors work beautifully together.
Best of all, this recipe is beginner-friendly!
I've always wanted to make these ever since Caroline made some for my birthday last year. It's really quite a simple recipe, but it looks super impressive. And the white chocolate drizzle is the perfect finish if you want to go with the red, white, and blue theme.
I'm always a fan of simple, and these little fruit cups are gems when it comes to photos. Not a bad thing when you're a food blogger like moi (:
I purposely made the directions super detailed this time just so that this recipe can be repeated by anyone, beginners included. Don't be daunted by the length, because it's seriously super easy, and if you follow the tips, these fruit cups should be a delicious breeze.
Hope you enjoy, cheers, and happy fourth!
Monica
*
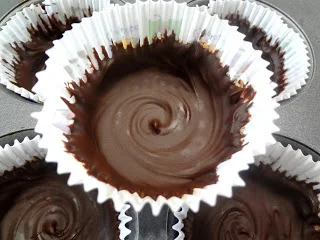
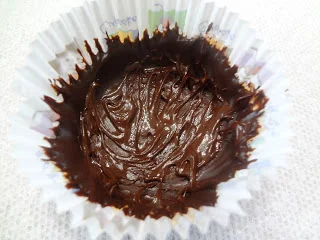
All you have to do is melt 2 cups of chocolate (I used dark chocolate chips). And paint the cupcake liners up to halfway. I find that it's easiest to simply drop a
generous
(note: generous) tablespoon dollop of chocolate on the base of the cupcake liner, and then use a fine tool like a fine tip pastry brush to draw the chocolate from the base to halfway up the sides of the cupcake liners (I used a chopstick instead of a brush, which actually worked really well).
It's extremely important to coat the sides of the cupcake liners as thick as you can because if they're too thin, you will be crying silently to yourself later on as you painfully attempt to remove the liners from the hardened chocolate (read: It won't be pretty, but hey it's still edible).
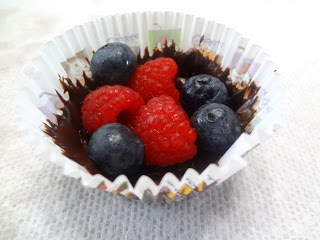
After the shells are fully chilled and hardened (I chilled mine for 1 hour in the freezer, since I wasn't in a rush), while the chocolate cups are still in the cupcake liners, smear with melted chocolate, making sure to cover any noticeably thin areas with extra chocolate. This will act as the "sticking" agent for the berries that will follow in the next step.
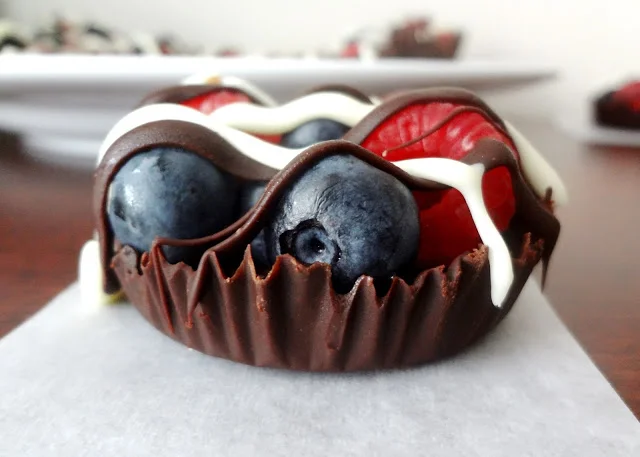
The fun part! Throw in some mixed berries. I arranged them rather randomly. I suppose you can arrange them fancily if you are feeling it (:
...And the not so fun part! I would highly recommend returning these chocolate fruit cups (still inside the cupcake liners) to the fridge to chill for an additional 15 - 30 minutes, until fully hardened. If you're in a rush, stick them in the freezer for 10 - 15 minutes. For me, this extra chilling time made the task of removing the cupcake liners a million times easier. After all, you don't want your little fruit tarts to look broken and melty like this:
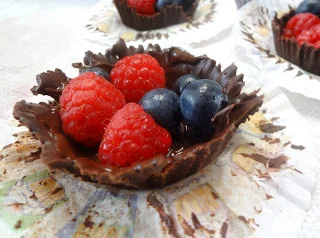
This is more like it:

But the real fun comes in when you get to the chocolate glaze. I re-melted my chocolate and placed them into a ziploc bag, cut off a tiny tiny triangle out of the corner, and used that to pipe chocolate drizzles. You want a super small opening so that the drizzle won't be too thick.
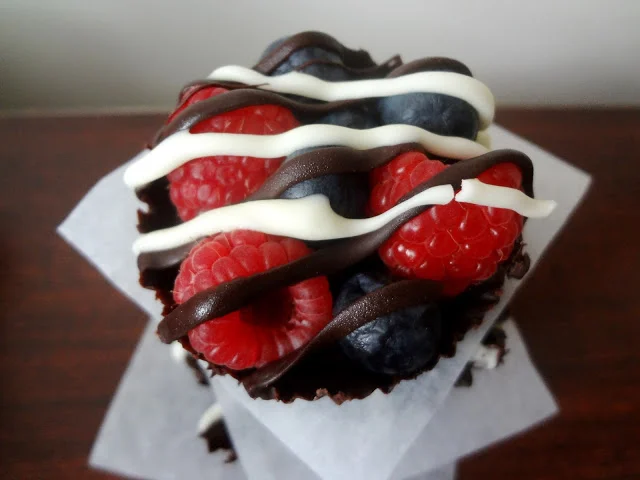
Aren't these just beautiful?
And might I add that these are delicious too? Enjoy!
Click here for the printable recipe of Chocolate Fruit Cups
.
Chocolate Fruit Cups
Simple, gorgeous, berry-licious, choco-licious fruit cups -- perfectly adaptable for the holidays
!
A Pass the Cocoa Original
Yield: 15 - 20 fruit cups
Time: 30 minutes prep, plus up to 1 hour total for chilling
Ingredients
2 cups milk or dark chocolate chips
1/2 cup white chocolate chips
1 cup raspberries
1/2 cup blueberries
Directions
1. Microwave the dark chocolate on low in 10-second intervals, stirring after each interval, until melted. Or, heat in a saucepan at medium-low heat, stirring
constantly
until melted. Once the chocolate shows the first signs of melting, turn off the heat, keep the saucepan on the stove, and keep stirring. The residual heat with melt the rest of the chocolate. If not, turn the stove back on to medium-low and stir constantly until completely melted. (Better to underheat than overheat because there’s no going back when the chocolate’s fried.) Optional but recommended: Add a little shortening or oil to the chocolate for a smoother and glossier feel and shine.
2. Line your cupcake pan with cupcake liners. Add a
generous
tablespoon dollop of melted dark chocolate to the base of each cupcake liner. Use a fine tip pastry brush (chopstick works too!) to bring the chocolate from the base to halfway up the sides of the cupcake liners. It's extremely important to coat the sides of the cupcake liners as thick as possible. A thin coat will make removing the cupcake liners later on super difficult.
3. Place the entire cupcake pan into the refrigerator or freezer to chill for at least 10 minutes, up to 30 minutes. Once the chocolate is fully hardened, while the chocolate cups are still in the cupcake liners, smear with melted chocolate, making sure to cover any noticeably thin areas with extra chocolate.
4. Throw in some mixed berries.
5. Return the fruit cups to the fridge to chill for an additional 15 - 30 minutes, until the chocolate shells are fully hardened. If you’re in a rush, try 5 minutes in the freezer. Remove carefully, loosening all around the edges before going down the sides. If the chocolate is too soft or starts to crack, dab the spot with melted chocolate and stick back to the fridge to chill until fully hardened. Be patient.
6. Once the wrappers have been removed, re-melt any remaining dark chocolate chips and drizzle across the fruit cups. Melt the white chocolate chips and drizzle diagonally the other direction across the fruit cups. To make a home-made piping bag, place the melted chocolate into a ziploc bag, cut off a
tiny
triangle out of the corner, and start drizzling! Enjoy!