• About
  • Food Photography
  • Portraiture
  • Contact
Menu

Caroline Zhang Photography

  • About
  • Food Photography
  • Portraiture
  • Contact
×
No-Bake Chewy Granola Bars | Pass the Cocoa

No-Bake Chewy Granola Bars

Caroline Zhang June 15, 2015
No-Bake Chewy Granola Bars | Pass the Cocoa

To the individual who made 50 pineapple Jello shots and set them on refrigerator door in the Winthrop kitchen, which promptly spilled all over my feet when I opened the fridge:

Just so you know, putting pineapple pieces in Jello will prevent it from setting. There are enzymes in pineapple that break up the proteins in gelatin. Thus, the soupy Jello shots that I spilled all over the floor. Sorry about that—it looked like those shots took a lot of work, but they wouldn’t have worked out anyways…I hope you found another source of booze for the evening. And that next time you don’t stick all of the shots on the door of the refrigerator, which, you know, is the bit that always yanked open and closed.

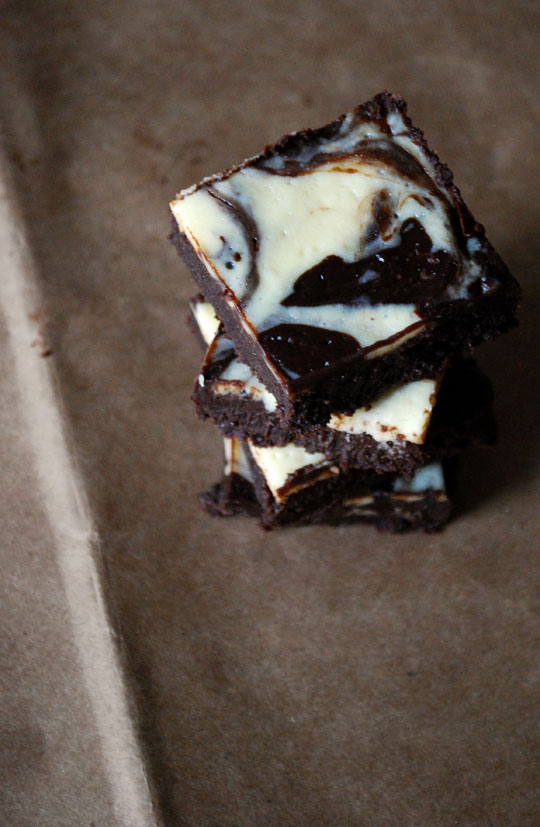
I don’t mean to be passive-aggressive, Jello person, really. I think little disasters like this in a communal dorm kitchen have actually made me appreciate the simple things in baking. I tend to turn my nose up at standard cookie and muffin recipes and such when I'm at home, always looking for something fancy and new and challenging. Yet somehow a simple biscuit or banana bread suddenly gains novelty when I'm at school. I always marvel that my haphazard attempts at baking, the last-minute substitutions for ingredients I forgot to get, the lack of proper equipment, and slipping on liquid Jello on the floor (ahem), somehow are able to yield fresh, homemade scones, or a gooey, fragrant pan of brownies. Baking seems more magical, more special.

That definitely goes for homemade granola, like these no-bake chewy bars. It’s exciting to make a simple snack that tastes a hundred times better than the stuff you buy at CVS in the square. They take just a few basic pantry staples (like, maybe three more ingredients than your Jello shots), yet, as always with baking, the sum is so much greater than the parts.

No-Bake Chewy Granola Bars | Pass the Cocoa

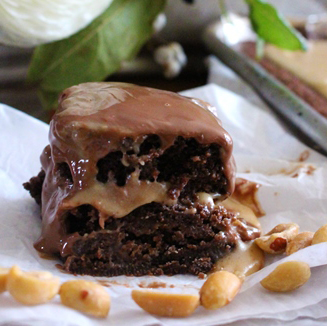
They are chewy, sweet (but not too sweet), and crunchy from the nuts, which make these such a healthy and filling snack. Nuts contain healthy fats and fiber that are reported to help do all sorts of things, from making you feel full longer to improving cardiovascular health.  (You can read all about it here.) Don’t quote me on this, but they’d probably work as hangover food too. 

I adapted these from David Lebovitz’s recipe, which for some reason is called “no-bake granola” even though the first step is “preheat the oven to 350 F.” Very deceiving. Anyways, my version just requires a skillet, a mixing bowl, a spoon, and something to put your granola in. You could probably find all the equipment even in the Winthrop kitchen. 

It yields a wonderfully fragrant and flavorful granola—oh, and if you want to get clean slices, you can chill it for a while. Because, you know, it does actually set in the fridge. 

Hope the Jello shot making is more successful next time,
Caroline

This post was done in collaboration with nuts.com. All opinions are my own.


No-Bake Chewy Granola Bars

Click here for the printer-friendly recipe.
Yields: 16 bars
Adapted from David Lebovitz

Ingredients
½ cup whole almonds (walnuts, pecans, or a mix of all three can be substituted)
1 tablespoon butter
1 ½ cup rolled oats (if making these gluten-free, make sure to use certified gluten-free oats)
¼ teaspoon salt
½ freeze-dried (or normally dried) fruit, such as strawberries or apples
½ cup dates, pitted and chopped
2 tablespoons flax seeds
¼ cup creamy peanut butter
¼ cup honey
½ teaspoon vanilla

Directions
Toast the nuts. Place the nuts in a large skillet over medium heat, tossing occasionally to prevent them from burning, until they are lightly browned and fragrant, about 5 minutes. Let cool, then roughly chop them. Place them in a large mixing bowl.

In the same skillet, melt the butter, and add the oats and salt. Cook over medium heat for 5-7 minutes, stirring occasionally, until the oats begin to toast and turn slightly golden. Pour them in the mixing bowl as well. 

Add the fruit, dates, and flax seeds to the mixing bowl.

Place the peanut butter and honey in the skillet. Cook over medium heat, stirring occasionally, until it is smooth and combined. Mix in the vanilla extract.
Pour the peanut butter/honey mixture over the dry ingredients in the mixing bowl. Mix everything together with a wooden spoon until well-combined. It should be very thick and sticky. Press the mixture into an 8x8 inch baking pan lined with foil or parchment paper. 

Let cool completely, then slice into squares. If the granola is too sticky to slice, place the pan in the refrigerator for an hour before cutting. 


In breakfast Tags granola, easy, snacks, nuts, oats, breakfast
Gluten-Free Banana Bread | Pass the Cocoa

Gluten-Free Banana Bread

Caroline Zhang May 11, 2015
Gluten-Free Banana Bread | Pass the Cocoa

I woke up to a text from my roommate yesterday morning telling me, "I finished the banana bread. I am a monster." It was definitely one of the best compliments to my baking I've gotten in a while. 

I am being 100 percent honest when I say that this gluten-free and dairy-free banana bread is significantly better than any normal banana bread I've made. None of this it-tastes-almost-as-if-it-were-the-real-thing business. My go-to Smitten Kitchen's banana bread recipe is wonderful, but I have to say this one is significantly better.  (Admittedly, I just turned legal and always had to leave out the bourbon, so maybe I've been doing it wrong...)

It's been a while since I've gotten this excited about such a straight forward baking project (I had been planning on sharing this cool honeycomb candy but I couldn't hold back on this one). You see, the crumb and texture of this bread is beautiful. Wait, hold on...appreciate this for a moment: 

Gluten-Free Banana Bread | Pass the Cocoa

Especially take note of the bottom of the loaf. A lot of banana breads have what I call the bottom 1/3 problem. The loaf bakes up dense and moist, but the bottom fraction of the loaf actually becomes way too dense to the point that it is unpleasantly gummy. 

Not so with this banana bread recipe. I think baking with gluten-free flours can actually be an advantage for quick breads, since you don't want the gluten to develop for these recipes. The oil in place of butter also helps keep the banana bread from going dense as a doorstep. 

Gluten-Free Banana Bread | Pass the Cocoa

One of my roommates just got diagnosed with a gluten intolerance so you'll probably be seeing more gluten-free recipes around here. I still think the gluten-free health fad is silly (gluten-free does not mean healthy...we have quite. a few. really. unhealthy gluten-free recipes on this blog), but it is helpful for getting more gluten-free recipe ideas. (Packaged foods advertising to be gluten free are another story...some of them can still contain traces of gluten, which can be an issue for people who actually are allergic).

And of course, I'm always up for new baking challenge.

-Caroline


Gluten-Free Banana Bread

Yields: one 8x4 inch loaf
Click here for the printer-friendly recipe

Ingredients
2 eggs
⅓ cup packed brown sugar (you can increase this to ½ cup if you prefer a sweeter bread)
1 teaspoon vanilla extract
3 medium overripe bananas, mashed
¼ cup vegetable oil
¼ teaspoon salt
½ teaspoon baking soda
1 ½ teaspoon baking powder
1 cup almond flour
½ cup white rice flour
¼ cup brown rice flour
1 tablespoon cornstarch
½ cup chopped walnuts or pecans, toasted (optional)

Directions
Preheat the oven to 350 F. Grease a 8 inch x 4 inch loaf pan with vegetable oil. 

Whisk together the eggs, brown sugar, and vanilla. Whisk in the mashed bananas, followed by the vegetable oil.

Whisk in the salt, baking soda, and baking powder. Mix in the almond flour, white and brown rice flours, and cornstarch. Fold in the toasted nuts, if using.

Pour the batter into the loaf pan. Bake for 45-55 minutes, or until a skewer inserted into the center comes out clean. Let cool for 30 minutes, then turn out of the pan, and cool completely. 


Notes
Your bananas need to be very, very ripe to get the best results and best flavor for this bread. 


Related Posts

Almond Lemon Poppy Seed Bread
Nutella-Swirled Banana Bread
Hazelnut Mocha Macarons
Raspberry Lemon Cheesecake with a Coconut Macaroon Crust
In quick bread, breakfast, bread Tags banana bread, banana, gluten-free, nuts, easy
Brownie Mosaic Cheesecake | Pass the Cocoa

Plant Biology, as Illustrated by Five Cheesecake Brownie Recipes

Caroline Zhang April 28, 2015

It's finals season again! I'm currently working on my creative final project for my plant biology class; the theme is "the rise of the sporophyte." For those of you who aren't Professor Kramer and came just for the (five!) cheesecake and brownie recipes, feel free to skip to the bottom.

As land plants evolved, the sporophyte (the diploid, spore-producing part of the plant) became increasingly dominant over the gametophyte (the haploid, gamete-producing part), a process I decided to show visually through brownies and cheesecake.

I developed five recipes to portray different plant groups, with brownies representing the gametophyte and cheesecake representing the sporophyte.

Brownie and Cheesecake | Pass the Cocoa

Land plants were originally descended from algae, which follow a haplontic life cycle. Algae are haploid, or have single pairs of chromosomes; they undergo mitosis to form gametes, which fuse to form a diploid zygote. The zygote then immediately goes through meiosis, and gives rise to a haploid algae.

I used a traditional double chocolate brownie recipe to represent algae, since the entire organism is haploid. (This is with my go-to recipe, Alice Medrich's cocoa brownies). 

Cocoa Brownies | Pass the Cocoa

A group of green algae probably gave rise to modern plants when they invaded the land around 450 million years ago.

The earliest land plants included the bryophytes, such as hornworts, liverworts, and mosses, which made several adaptations to survive life on land. Since they still relied on swimming sperm and fertilization via water, fertilization events were relatively rare. So, bryophytes developed an alternation of generations life cycle. The gametophyte was still the persistent part of their life cycle, but the plants introduced several rounds of mitosis in the fertilized diploid zygote before it underwent meiosis.

I made cheesecake-swirled brownies to represent the development of this new sporophyte generation. The diploid sporophyte (the cheesecake swirl) grew out of the haploid gametophyte (the brownie), and created haploid spores that then gave rise to more haploid plants. The main body of these bars is still the brownie, since the gametophyte is the persistent part of the bryophyte life cycle.

Cheesecake Swirl Brownies | Pass the Cocoa

Next comes this black-bottom cheesecake to represent the lycophytes and ferns, and the evolution of vascular plants.

Black Bottom Cheesecake | Pass the Cocoa

The lycophyte and fern life cycle is comprised of a persistent sporophyte generation and a transient gametophyte generation. What we think of as "the plant" is now the diploid sporophyte. So, this dessert is comprised mainly of cheesecake, which is baked on top of a thinner brownie layer.

The black bottom brownie also works well here since fern gametophytes often grow entirely underground, and the sporophyte grows out of the megagametophyte. The archegonia of the megagametophyte produces eggs, while the microgametophyte produces sperm; the fertilized egg then gives rise to the next generation of sporophyte.

The cheesecake and brownie are separate layers, since the gametophyte and sporophyte are both free-living.

Black Bottom Cheesecake | Pass the Cocoa

However, with the evolution of the gymnosperms and the development of seed plants, the gametophyte is further reduced and grows entirely within the sporophyte. Thus, the brownie is no longer a separate layer, but is completely surrounded by the cheesecake in this brownie mosaic cheesecake.

Brownie Mosaic Cheesecake | Pass the Cocoa

The diploid megaspore mother cell in the ovule undergoes meiosis to form haploid megaspores, one of which germinates to form the megagametophyte (the brownie cubes) that lives entirely within the ovule of the sporophyte (the cheesecake layer).  

I should clarify that the brownie in this cheesecake (and in the angiosperm one) represents the megagametophyte, not the microgametophyte. The microgametophyte, which is composed of two cells with three nuclei, is carried to the ovule and the megagametophyte in the form of pollen (usually via wind or insects). 

After fertilization, megagametophyte then becomes the nutritive tissue of the seed; the egg within the gametophyte is fertilized, and gives rise to the new diploid embryo.

Brownie Mosaic Cheesecake | Pass the Cocoa

The gametophyte is even further reduced in the angiosperms, and usually is only seven cells with eight nuclei within the plant's ovary, which is surrounded by sterile petals and sepals (flowers were another evolutionary development among the angiosperms). Instead of brownie chunks, this chocolate chip cheesecake only has tiny flecks of chocolate representing the angiosperm's seven-cell megagametophyte.

Chocolate Chip Cheesecake | Pass the Cocoa

These developments have helped angiosperms become extremely prolific, representing the largest number of plant species (which is understandable, because cheesecake is fabulous!)

Enjoy!

Caroline


Double Chocolate Brownies

For these double chocolate brownies, I simply added 1/2 cup chocolate chips to Alice Medrich's cocoa brownies and sprinkled another two tablespoons of mini chocolate chips on top.


Cheesecake-Swirled Brownies

Click here for printer-friendly recipe.
Yields: one 8x8 inch cheesecake
Brownie batter adapted from Alice Medrich's cocoa brownies

Ingredients
For the Brownie Layer
10 tablespoons butter, cubed
¾ cup plus 2 tablespoons cocoa powder
1 cup granulated sugar
½ teaspoon instant coffee
2 eggs, cold
¼ teaspoon baking powder (optional, see note)
½ teaspoon salt
½ cup all-purpose flour

For the Cheesecake Swirl
4 ounces cream cheese, softened
2 tablespoons sugar
½ teaspoon vanilla extract
1 egg yol

Directions
Preheat the oven to 350 F. Line an 8x8 inch square pan with aluminum foil, and then grease the foil.

For the brownies, place the butter, cocoa powder, sugar, and instant coffee in a large microwavable bowl.

Microwave until the butter is completely melted, stopping every 30 seconds to give it a stir. The mixture will be fairly thick.
Stir for about a minute to cool the batter slightly, then beat in the eggs one at a time. Beat the mixture until it is smooth, shiny, and glossy. Mix in the baking powder, flour, and salt.

Pour the batter into the pan.

Make the cheesecake swirl. Beat together the cream cheese and sugar until light and fluffy. Mix in the vanilla extract, and then the egg, until just combined. 

Spoon large dollops of the cheesecake mixture on top of the brownie batter. Run a skewer through the cheesecake to create a swirl pattern.

Loosely cover the pan with a piece of foil (this will prevent the cream cheese swirl from browning), and bake for 15 minutes. Remove the foil and bake for another 10, until the center is just set. (When you insert a toothpick into the center, it won’t come out clean; you want it to be thickly coated with moist crumbs).

Let cool completely, slice, and serve!

Notes
You can omit the baking powder for a denser brownie (they are still pretty fudgy and chewy with the baking powder), but I find that the brownie complements the cheesecake swirl better when it has a tiny bit more lift.


Black Bottom Cheesecake

Click here for printer-friendly recipe.
Yields: 16 brownies
Brownie batter adapted from Alice Medrich's cocoa brownies

Ingredients
For the Brownie Bottom Layer
5 tablespoons butter, cubed
⅓ cup plus 2 tablespoons cocoa powder
½ cup granulated sugar
1 egg, cold
1/4  teaspoon salt
¼ cup all-purpose flour

For the Cheesecake
16 ounces cream cheese, softened
½ cups sugar
1 teaspoon vanilla extract
2 egg

Directions
Preheat the oven to 325 F. Line an 8x8 inch square pan with aluminum foil, and then grease the foil.

For the brownies, place the butter, cocoa powder, and sugar in a large microwavable bowl.

Microwave until the butter is completely melted, stopping every 20 seconds to give it a stir. The mixture will be fairly thick.
Stir for about a minute to cool the batter slightly, then beat in the egg. Beat the mixture until it is smooth, shiny, and glossy. Mix in the flour and salt.

Pour the batter into the pan.

Make the cheesecake layer. Beat together the cream cheese and sugar until light and fluffy. Mix in the vanilla extract and then the eggs, until just combined. 

Carefully pour the batter over the brownie layer without disturbing the brownie batter.
Bake the cheesecake for 30-35 minutes, or until the center is just set (it should still be slightly jiggly). 

Let cool completely, then refrigerate for several hours, or overnight. For clean slices, run a knife under hot water and wipe dry before cutting the cheesecake, wiping the blade after each cut.


Brownie Mosaic Cheesecake

Click here for printer-friendly recipe.
Yields: one 8x8 inch cheesecake
Brownie batter adapted from Alice Medrich's cocoa brownies

Ingredients
For the Brownie Cubes
10 tablespoons butter, cubed
¾ cup plus 2 tablespoons cocoa powder
1 cup granulated sugar
2 eggs, cold
½ teaspoon salt
½ cup all-purpose flour

For the Cheesecake
1 cup graham cracker crumbs
4 tablespoons butter, melted
⅛ teaspoon salt
2 teaspoons vanilla extract, divided
16 ounces cream cheese, softened
½ cups sugar
2 eggs
¼ cup sour cream

Directions
Preheat the oven to 325 F. Line an 8x8 inch square pan with aluminum foil, and then grease the foil.

For the brownies, place the butter, cocoa powder, and sugar in a large microwavable bowl.

Microwave until the butter is completely melted, stopping every 20 seconds to give it a stir. The mixture will be fairly thick.
Stir for about a minute to cool the batter slightly, then beat in the egg. Beat the mixture until it is smooth, shiny, and glossy.

Mix in the flour and salt.

Pour the batter into the pan. Bake for about 25 minutes, or until the center is just set. (When you insert a toothpick into the center, it won’t come out clean; you want it to be thickly coated with moist crumbs).

Let the brownies cool completely, then refrigerate for at least 1 hour, or overnight.
You’ll only need about a third of the pan for the brownie cubes. Set aside the other two thirds to enjoy on their own! Cut the remaining third into ½-inch cubes.

Make the cheesecake crust. Mix together the graham cracker crumbs, butter, salt, and 1 teaspoon vanilla. Press the crumbs into a smooth layer on the bottom of the baking pan.

Make the cheesecake filling. Beat together the cream cheese and sugar until light and fluffy. Mix in the vanilla extract and then the eggs, until just combined. Fold in the sour cream, followed by the brownie cubes.

Pour the cheesecake batter over the crust. Bake for about 30 minutes, or until the center is just set, but still slightly jiggly. Let cool completely, then refrigerate overnight.


Chocolate Chip Cheesecake

Click here for printer-friendly recipe.
Yields: one 8x8 inch cheesecake

Ingredients
1 cup graham cracker crumbs
4 tablespoons butter, melted
⅛ teaspoon salt
2 teaspoons vanilla extract, divided
16 ounces cream cheese, softened
½ cup sugar
2 eggs
¼ cup sour cream
¼ cup plus 2 tablespoons mini chocolate chips, divided

Directions
Preheat the oven to 325 F. Line an 8x8 inch square pan with aluminum foil, and then grease the foil.

Mix together the graham cracker crumbs, butter, salt, and 1 teaspoon vanilla. Press the crumbs into a smooth layer on the bottom of the baking pan.

Make the cheesecake filling. Beat together the cream cheese and sugar until light and fluffy. Mix in the remaining 1 teaspoon vanilla extract and then the eggs, until just combined. Fold in the sour cream, followed by ¼ cup mini chocolate chips.

Pour the cheesecake batter over the crust, and sprinkle the remaining 2 tablespoons of chocolate chips on top.

Bake for about 30 minutes, or until the center is just set but still slightly jiggly. Let cool completely, then refrigerate overnight.


Related Posts

Strawberry Almond Galettes
Classic Chewy Brownies
Cheesecake with Dulce de Leche Cortada
Buckeye Brownies
In bars and brownies, cheesecake Tags brownies, cheesecake, college, chocolate chip, easy
Chocolate-Covered Strawberries | Pass the Cocoa

Chocolate-Covered Strawberries

Caroline Zhang February 2, 2015
Chocolate-Covered Strawberries | Pass the Cocoa

As you know, it's been blizzarding here in New England. As Juno dumped almost two feet of snow on us (seriously, the weather was so bad that even the tourists disappeared), I spent much of the week hibernating in the dorm, watching the snow swirl past my window. 

It's times like this that I remember just how incredibly spoiled I am as an undergrad at Harvard. We call getting caught up with school and activities "the Harvard bubble," but Harvard was quite literally a bubble during the snowstorm. I got to spend the blizzard curled up by the radiator while being fairly confident that the power wouldn't give, and if something did break, it would be fixed quite soon. I was able step downstairs and get my hot meals in the dining hall as usual, because some of the staff had slept over the night before so they could be at work during the blizzard. And the next day when we woke up for class, we found all the side walks cleared into neat channels through the deep snow, after the yard workers had worked through the night.

It really makes you realize who has the better work ethic at this place. 

Strawberries | Pass the Cocoa
Chocolate-Covered Strawberries | Pass the Cocoa

Since the communal kitchen is in another building, I decided to make some no-bake goodies that didn't require me to leave my room. These really are an ideal dessert for making in the dorm. You don't even need a microwave to melt the chocolate; I used a hairdryer, which actually works beautifully.

As you might have noticed, the Pass the Cocoa's logo has long been a chocolate-covered strawberry. Though it's taken on many guises, that strawberry has remained a constant through all our design overhauls. 

a.chocolate covered strawberries 11.jpg

There's no real story about why we chose it; I made some chocolate covered strawberries for Monica's birthday some three years ago, and later wrote this post about them. We decided it would make a cool graphic, and it's stuck around since.

Anyways, I thought it was time that we re-visited that old post. Considering how many times we've changed the graphic strawberry, it seemed fitting to take new pictures to match the new design.

Chocolate-Covered Strawberries | Pass the Cocoa
Strawberries | Pass the Cocoa

As I pointed out two years ago, these are a perfectly Valentine's treat, impressive yet requiring almost no effort. Though I know strawberries are still out of season, they're also a wonderful dessert to make on a cold winter's afternoon, sure to lend some brightness and sweetness to even the snowiest day.

Stay warm!
Caroline

One Year Ago: Abbracci Cookies
Two Years Ago: How to Make Homemade Nutella


Chocolate-Covered Strawberries

Click here for the printer-friendly recipe.
Yields: about 20 strawberries

Ingredients
4 oz. semi-sweet chocolate, roughly chopped
4 oz. white chocolate, roughly chopped
1 lb. fresh strawberries
2 tablespoons finely chopped nuts (optional)

Directions
Melt the white and dark chocolates over a double boiler, or with a hair dryer. Simple turn the blow dryer on low/medium power and hold about 10 inches from the chocolate, stirring occasionally.

Dip half the strawberries in dark chocolate, half in white. Place on a cookie sheet lined with wax paper or plastic wrap. Sprinkle the nuts of some of the strawberries, if desired.
Drizzle the white chocolate on the dark chocolate-dipped strawberries, and vice versa.

Refrigerate the strawberries for about 15 minutes, to set the chocolate. 

Enjoy!


In candy Tags strawberry, berry, chocolate, candy, easy, valentine's day
Older →

Search Posts

Post Archive
  • "easy"
  • "breakfast"
  • "chocolate"
  • "cookie"
  • cake
  • cookie
  • "fruit"
  • "summer"
  • "bread"
  • "Cheesecake"
  • "Oreo"
  • "dessert"
  • "fancy"
  • "Cake"
  • "blueberry"
  • pie
  • "cinnamon"
  • savory
  • breakfast
  • "berry"
  • "brownie"
  • "cupcake"
  • "holiday"
  • "nutella"
  • bars and brownies
  • "apple"
  • "birthday"
  • "pastry"
  • "pie"
  • "scone"
  • bread
  • candy
  • cheesecake
  • "banana"
  • "biscuit"
  • "citrus"
  • "ganache"
  • "lemon"
  • "macaron"
  • "muffin"
  • "strawberry"
  • "vegetable"
  • "almond"
  • "buttercream"
  • "cake mix"
  • "cranberry"
  • "cream cheese"
  • "frosting"
  • "glaze"
  • "healthy"
 

Powered by Squarespace