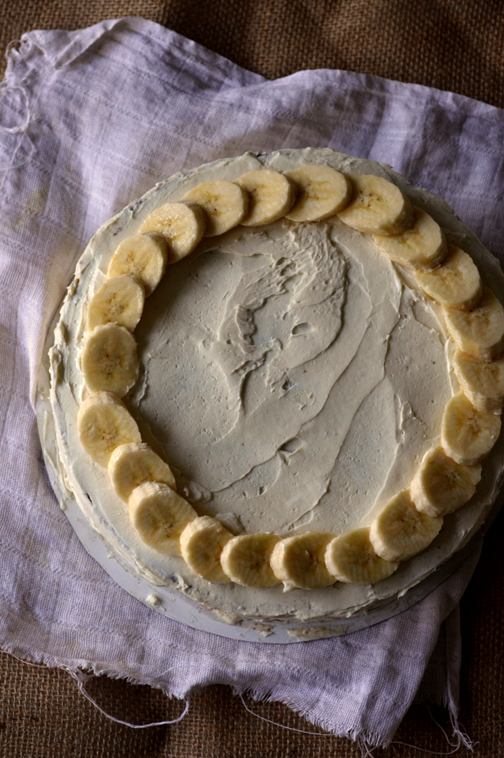
My brother and I were both born in the middle of winter, but we've long had a strange tradition of ordering ice cream cakes for our birthdays. I have a lot of fond memories of picking out ice cream flavors for my cake at near-empty shops as it snowed outside. (The local Maggie Moo's used to offer free scoops if more than an inch of snow had fallen.)
I've come to associate celebrations with not just cake, but specifically ice cream cake. It's not decadent if there's no ice cream.
I tried my hand at making an ice cream cake at home this year. It wasn't terribly hard, just fussy and requiring frequent trips to and from the freezer. The trickiest part was working quickly enough to keep everything from turning into a melty puddle.
I definitely recommend giving this one a try. Yes, now, in the middle of winter. There's something about making your on ice cream cake that makes you feel so accomplished. Maybe it's just from frantically shoving the cake into the freezer as cream begins to ooze down the sides.
The flavors of this cake is inspired by one of my brother's favorite ice cream flavors from Ben and Jerry's, Chunky Monkey, featuring banana ice cream, walnuts, and chocolate chunks.
You can, of course, swap in whatever ice cream flavors and add ins you want. A few notes, though, on ice cream cakes:
- The frosting: You'll need something that won't freeze solid, so don't use buttercream or whipped cream. Cream cheese works well, as does (forgive me for saying this) Cool Whip. Whatever fake milk thingy is in that stuff keeps it nice and fluffy even in the freezer.
- The cake layers: I've included makes a fairly thin cake (I've always liked a higher proportion of ice cream to cake), so it's a little hard to slice into layers. Here's a great tutorial on how to get even layers (unlike mine). You could also cut it into two layers instead of three, so that your top layer will be ice cream instead of cake.
- The ice cream: you'll have an easier time spreading and slicing the ice cream if you use an airier one (or, in technical terms, an ice cream with higher overrun. Read all about that here.), such as Breyer's. Since Breyer's has some three times the air pumped into it than something like Haagen Dazs, it make the final cake much easier to slice through. But by all means, break out the premium ice cream if you'd like, you may just need to let it thaw a little bit before you spread it on the cake.
Good luck, and enjoy!
-Caroline
Chunky Monkey Ice Cream Cake
Yields: one 9-inch cake
Cake adapted from Smitten Kitchen
Click here for the printable recipe
Ingredients
For the Cake
1 cup all-purpose flour
½ cup cocoa powder
2 ½ teaspoons baking powder
½ teaspoon salt
2 eggs
½ cup vegetable oil*
¾ brown sugar
1 teaspoon vanilla extract
3 medium bananas, very ripe, smashed
½ cup whole milk
For the Ice Cream
½ gallon vanilla ice cream**
1 medium banana, very ripe, mashed
¼ cup mini chocolate chips
½ cup walnuts, toasted and chopped
For Assembly
8 ounces cream cheese, room temperature
½ cup powdered sugar
1 teaspoon vanilla extract
1 medium banana, sliced
Notes
*Don’t use butter here. It’ll make the cake very hard when you freeze it.
**I’d recommend Breyers. It’s airier than most, so it’s easy to scoop, spread, and slice.
Directions
Read the entire recipe before getting started. But actually.
Make the chocolate cake. Preheat the oven to 350 F. Whisk together the flour, cocoa powder, baking powder, and salt. Set aside. In a separate bowl, whisk together the eggs and sugar until well-combined. Whisk in the oil, vanilla, and mashed bananas. Whisk in the milk.
Fold the dry ingredients into the wet until just combined. Pour the batter into a greased 9-inch springform cake pan. Bake for 25-30 minutes, or until a toothpick inserted into the center of the cake comes out clean.
Let the cake cool completely, then refrigerate for several hours, or overnight.
The next day, cut the cake into three even layers. Re-assemble the springform pan. Line the sides with plastic wrap or wax paper for easy removal of the cake so you don’t have to saw the edges of the cakes later on.
Place the top layer (the domed one) of the cake on the bottom of the cake pan. (You’ll spread a thick layer of ice cream on top of it so that this way, the top of the cake won’t be domed. Alternately, if you really want to make your layers even, cut off the dome before layering your cake.)
You’ll need to work quickly for this next part. Add about 4 cups of vanilla ice cream, half of the mashed banana, and half of the chocolate chips and walnuts to a mixing bowl. Mash them together with a wooden spoon. It doesn’t have to be perfect, its more important that the ice cream doesn’t melt. Spread the ice cream over the layer of cake at the bottom of the springform pan. Place the pan in the freezer for about 30 minutes, so that the layer of ice cream is firm.
Place another cake layer on top of the ice cream. Repeat the the step above with the remaining ice cream, banana, nuts, and chocolate chips. Top with the final cake layer. Freeze the cake for at least 2 hours, or overnight.
Make the frosting. Whisk together the cream cheese, powdered sugar, and vanilla extract.
Remove the cake from the springform pan. Spread the frosting over the cake, and decorate with banana slices. If the cake starts to melt while you’re frosting it, return it to the freezer for another 30 minutes.
Cut the cake with a sharp knife run under hot water, and serve!


