• About
  • Food Photography
  • Portraiture
  • Contact
Menu

Caroline Zhang Photography

  • About
  • Food Photography
  • Portraiture
  • Contact
×

Chocolate-Cheesecake Marble Cupcakes

Monica Cheng April 8, 2012

Cupcakes are also great for picnics, especially if you've been having fantastic weather recently like in the Midwest. This photo was taken outdoors!

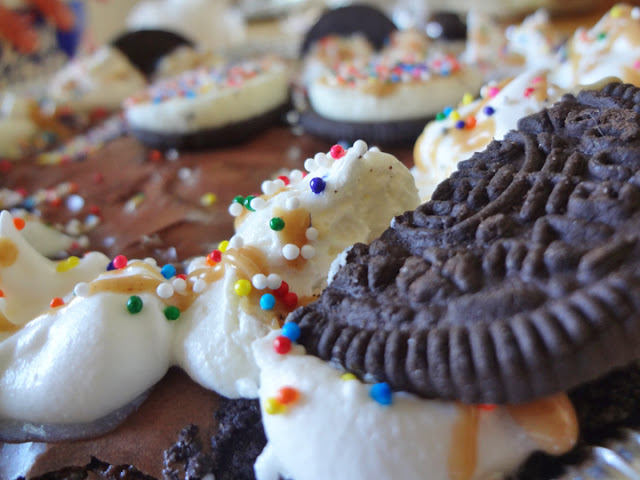
Cupcakes are the perfect treat for any occasion -- for fun, picnics, friends, family, parties, and more! Chocolate cake, with creamy filling mixed within to create the "marble" effect...

For some reason, the cheesecake filling portion of my cupcakes turned out to be a bit more runny than I'd expected. And they didn't sink. So I did a little research after the fact and realized that I should've used room temperature cream cheese instead of taking it straight from the fridge. My bad. It was a good learning experience though, and here are some other things I learned:

  1. The cream cheese should be at room temperature before you begin mixing.
  2. Using cold cream cheese also leads to over-beating (whipping too much air into the batter), which forms unattractive air bubbles on the surface, if you are making cheesecake.
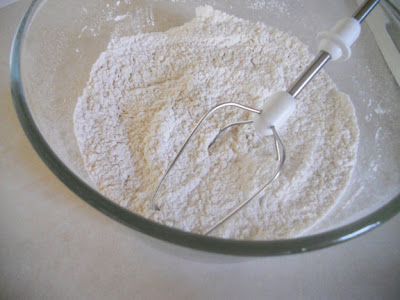
  3. If you end up with lumps in your batter, run the mixture through a sieve or give it a quick spin in the food processor and you'll have silky smooth results.

For more on how to make the perfect cheesecake, click

here

.

Click here for printable recipe of Chocolate-Cheesecake Marble Cupcakes

.

Chocolate-Cheesecake Marble Cupcakes

Yield: 24 cupcakes

Time: 1 hour

Ingredients

6 ounces Philadelphia cream cheese, room temperature

1/3 cup sugar

4 eggs

1 package devil's food cake mix*

1 1/4 cup water

1/3 cup vegetable oil

Optional

:

  • store-bought frosting or home-made frosting
  • 1 1/2 cup chocolate chips
  • any cake mix works (i.e. red velvet, white, funfetti, etc.)*

Directions

1. Heat oven to 350 degrees. Prepare paper baking cups.

2. In medium bowl, beat cream cheese, sugar, and 1 egg until smooth. (Stir in 1 cup chocolate chips). Set aside.

3. In large bowl, beat cake mix, water, oil, and 3 eggs and divide batter among muffin cups (1/4 cup each). Top each with 1 heaping teaspoon cream cheese mixture.

4. Bake 20 - 25 minutes, or until top springs back when touched lightly. Cool before frosting. (Sprinkle with remaining 1/2 cup chocolate chips). Store loosely covered in refrigerator.

Got any recipes you think we should blog about in the future? Did this recipe work for you? Feel free to comment or contact us at

passthecocoa@gmail.com

.

Bon apetit!

Caroline & Monica

In "Cheesecake", "chocolate", "dessert", "marble"

Homemade Biscuits

Caroline Zhang April 2, 2012

Hello, Caroline here. I’d like to announce I’ve finally seen the light, and mended my erroneous ways of making fattening food loaded with butter and sugar. Well...not really. I just needed something to eat for lunch today. 

We’re on spring break right now, so I was on my own in terms of food. I decided to make my favorite: breakfast for lunch! Which is probably the thing I eat most often on breaks, but mainly just because I don’t wake up early enough to actually eat a normal breakfast. 

But anyways, onward to the biscuits I made for brunch. 

Very easy, yummy, and also rather messy. But that may have been because my dough was too sticky. I'll appologize in advance for my un-thorough process shots; I'm just not organized enough! Oh, what would I do without Monica....

Mix together your flour, baking powder, baking soda, and salt.

Add the butter and shortening to the dry ingredients.

Add the buttermilk. If you don't have any, you can do what I did here, and add 1 tablespoon of lemon juice or white vinegar to milk. (I used whole milk.)

Mix in the buttermilk, until just combined. DON'T OVERMIX! It'll make you want to cry. Really.

Add additional spoonful or so of flour if the dough is too wet. Flatten the dough until it is one inch thick, and cut out around 12 circles about 2 inches wide. Lazy little me, of course, opted just to take a knife and cut the thing into squares. You can even smooth out the corners of the squares if you want, to make them look more circular, but what's the point?

Placed them on a greased baking sheet, and bake 15-20 minutes, until they're golden brown on top.

The breakfast ensemble.

Now, the biscuits are supposed to be a bit smoother on top, but like I said before, I added to much milk, so the dough was sticky. But they're still very delicious, and moist. And rather cute. Okay, I'll stop.

Click here for the printable recipe.

Homemade Biscuits

Inspired by

The Food Network

Yields: 1 dozen biscuits

Time: 40 minutes

Ingredients:

2 cups flour

4 teaspoons baking powder

¼ teaspoon baking soda

¾ teaspoon salt

2 tablespoons cold butter, cubed

2 tablespoons shortening

1 cup cold buttermilk (or 1 cup whole milk and 1 tablespoon lemon juice)

Directions:

1. Preheat oven to 450 degrees F. Thoroughly mix together flour, baking powder, baking soda, and salt.

2. Add butter and shortening. Incorporate into the dry ingredients using a fork or pastry cutter, or just rubbing it with your fingers. It should resemble coarse crumbs. It’s no big deal if some pieces of butter are still there.

3. Add the buttermilk, and mix it in until it is just combined. DO NOT OVERMIX.

4. Roll the dough on a flat surface so that it is about 1 inch thick. Cut out around 12 circles, each about 2-inch wide. Alternately, cut the dough into 12 squares.

5. Place biscuits onto a greased baking sheet and bake for 15-20 minutes, until the tops are golden brown.

Enjoy!

Caroline & Monica

In "biscuit", "bread", "breakfast", "easy", "healthy"

Peanut Butter Oreo Brownie Pie

Caroline Zhang March 26, 2012

Today, your Pass the Cocoa Chefs have baked something completely original and unprecedented -- Peanut Butter Oreo Brownie Pie. This post is sort of (belatedly) celebrating Oreo's 100th birthday on March 6 and Pi Day on March 14. But hey, this blog operates on the principle that dessert is good at any time of year!

Anyways, Pi and circles are all around us, and we could all take a couple moments out of our busy day embrace it. Here's to Oreos and pies and everything sweet and delightful.

All hail the Oreo!

So on to brownie pie. It's pretty easy to make, and is basically crust + brownie + peanut butter + Oreos. We used an amazing gooey brownie mix that gave the pie a really nice fudge-y texture.

First, make the crust. Grind up Oreos and butter in the food processor.

Press the mixture into a pie tin. Make the brownie mix, and pour it in along with the toppings.

Bake and decorate!

Printer-friendly version of Peanut Butter Oreo Brownie Pie

.

Peanut Butter Oreo Brownie Pie

A heavenly combination of peanut butter, Oreo, and brownie in pie form

!

A Pass the Cocoa Original

Yields: 1 pie

Time: 2 hours

Ingredients

1 package brownie mix (We used Ghiradelli, but you can also use your favorite homemade brownie recipe)

1 package Oreos

4 tablespoons butter

some Cool Whip (or frosting of your choosing)

3 tablespoons peanut butter

Directions

1. Preheat oven to 325 degrees.

2. Place approximately 20 Oreos into food processor and blend until fully crumbled. Then, add butter and mix that into the crumbled Oreos.

3. Spread the Oreo mixture on the bottom of a 9-inch pie pan and knead until it forms a firm base. This constitutes the Oreo pie crust.

4. Prepare brownies according to package directions. Spread ⅓ of the brownie batter evenly on top of Oreo crust.

5. Crumble 2-3 Oreos by hand and sprinkle on top of brownie mixture. Then, drizzle melted peanut butter on top. To make the peanut butter drizzle, microwave the peanut butter on HIGH for about 25 seconds.

6. Pour half of the remaining brownie batter on top.

7. You may choose to do whatever you please with the rest of the brownie batter. We decided to make some plain brownies.

8. Wrap the edges of the pie tin with foil so that the edges of the brownie pie won’t burn in the oven.

9. Bake the pie for 40 - 45 minutes, until the center of the pie is ALMOST set. It shouldn’t be jiggly, but it shouldn’t be too firm either.

10. Let cool entirely before decorating. We frosted it and added Oreo pieces, sprinkles, and peanut butter drizzle. Enjoy!

Bon apetit!

Monica and Caroline

In "Oreo", "brownie", "chocolate", "easy", "peanut butter", "pie"

Classic Oreo Truffles

Monica Cheng March 16, 2012

Today, we're going to resort to the old favorite: Oreo truffles! After scouring Pinterest and the web for recipes that included copious amounts of chocolate, Oreos, sugar, or all three, we finally settled on one.

We present to you a classic but delicious recipe…Oreo truffles. Gooey, chocolate-y, and utterly amazing.

Love,
Monica & Caroline


Left photo: The ingredients. Pretty simple! (Imagine vegetable shortening is in the picture.)

Center photo: Oreo plus cream cheese in the food processor, partially ground. Mashing the Oreos with the cream cheese may take a while. Try stopping the food processor occasionally and stir around the mix with a spoon.

Right photo: The Oreo truffles, before being dipped.


Oreo Truffles

Oreo and cream in truffle form. Simply divine!

Time: around 1 hour   |   Yield: approximately 40 Oreo truffles

Ingredients

1 stick (8 oz) Philadelphia cream cheese
1 package “double stuf” Oreos*
approx. 20 oz. white chocolate chips**
vegetable shortening

Variations
*Try using “berry ice cream” Oreos or other Oreo flavors.
**Try using layering techniques with milk chocolate or dark chocolate.

Directions

1. Add cream cheese and the entire package of Oreos into the food processor. Blend until smooth.

2. Freeze for 30 minutes to one hour until relatively solid. This will depend on the type of Oreos you used (“double stuf” Oreos take longer).

3. Take the chilled Oreo mixture and form balls (approx. 1 inch in diameter, but it’s a matter of personal preference).

4. Place Oreo balls in any size tray lined with foil paper and freeze for 30 – 45 minutes, or until the truffles are firm enough to dip without falling apart.

5. Meanwhile, heat the white chocolate chips in a small microwave safe container until melted into a thick mixture. Add a spoonful or two of shortening until the mixture has thinned enough to be dip-able.

6. Dip the Oreo balls in the chocolate, and place on the tray. This will be messy!

7. Add any other garnishments. Let cool, until the chocolate is firm. Serve & enjoy!

In "Oreo truffles", "Oreo", "candy", "truffles"
← NewerOlder →

Search Posts

Post Archive
  • "easy"
  • "breakfast"
  • "chocolate"
  • "cookie"
  • cake
  • cookie
  • "fruit"
  • "summer"
  • "bread"
  • "Cheesecake"
  • "Oreo"
  • "dessert"
  • "fancy"
  • "Cake"
  • "blueberry"
  • pie
  • "cinnamon"
  • savory
  • breakfast
  • "berry"
  • "brownie"
  • "cupcake"
  • "holiday"
  • "nutella"
  • bars and brownies
  • "apple"
  • "birthday"
  • "pastry"
  • "pie"
  • "scone"
  • bread
  • candy
  • cheesecake
  • "banana"
  • "biscuit"
  • "citrus"
  • "ganache"
  • "lemon"
  • "macaron"
  • "muffin"
  • "strawberry"
  • "vegetable"
  • "almond"
  • "buttercream"
  • "cake mix"
  • "cranberry"
  • "cream cheese"
  • "frosting"
  • "glaze"
  • "healthy"
 

Powered by Squarespace