• About
  • Food Photography
  • Portraiture
  • Contact
Menu

Caroline Zhang Photography

  • About
  • Food Photography
  • Portraiture
  • Contact
×

Chocolate-Dipped Strawberries

Caroline Zhang January 28, 2013

A last-minute Valentine's treat: chocolate-covered strawberries! They look amazing with very little effort on your part. 

No recipe today, just melt some chocolate (dark, milk, white, doesn't matter), dip the strawberries, and decorate with chocolate drizzle, nuts, sprinkles, or whatever you want. Be creative!

You could also make these cute berry cups. Just brush mini cupcake liners with chocolate, let it set, and  repeat. Take off the liner, and add a little melted chocolate at the bottom, then add in whatever sort of berry you want, and drizzle chocolate on top. So cute!

Do you know how much one of these babies cost at Godiva? FIVE DOLLARS. For ONE strawberry. You could make a ton of these for five dollars. See, easy, beautiful, AND frugal!

Now, put these in a fancy box, and impress everyone!

Happy Valentine's Day!

Caroline

In "berry", "chocolate", "easy", "fancy", "holiday", "strawberry", "valentine's day"

Chocolate Mousse Cheesecake

Caroline Zhang January 14, 2013

Guess who's still on winter break? This girl. And this is what I've been doing!

This ridiculously rich cheesecake has four layers: an Oreo crust, creamy cheesecake, chocolate mousse, and chocolate ganache. It requires some time to put together, but you will find it totally worth it because the combination of flavors and textures are incredible. The slightly tart and smooth cheesecake balances out all the fluffy chocolate mousse and the heavy ganache.

Okay, get ready for tons of pics...this cake has lots of steps, but it's not too difficult to make.

To make the crust, add Oreos and melted butter to a food processor and blend well until you have fine crumbs.

Press into a springform pan, and bring the crust up the sides a bit. Bake about 10 minutes at 350 degrees.

And layer two: make the cheesecake! Beat the softened cream cheese...mine wasn't soft enough, hence all the cream cheese on the mixers.

Add sugar. Beat.

Sugar. Beat.

Add eggs one at a time. Beat till smooth.

Beat in the sour cream.

Pour it into the spring form pan.

Bake at 325 F. The recipe said 30 minutes, but I found it needed 35-40. And if you get cracks, no worries! We'll be putting stuff on top of it. Now, let this cool, and then put in the fridge.

And now for layer 3: the chocolate mousse! Melt the chocolate and butter. Mix well. I apologize in advance for the crappy quality of the following pictures. I had to do this part at night.

 Beat in the egg yolks one at a time.

Beat the heavy cream until it form soft peaks, and set it aside in the fridge.

You're not tired of beating things yet, are you? Beat the egg whites, add the cream of tartar, gradually add the sugar. And then beat it some more.

Add about a quarter of the egg white mixture to the chocolate mixture. Now, the recipe says the fold it in, but the chocolate is kind of hard, so I'd suggest...yep, beating it. Then fold in the rest of the egg whites.

 Fold in the heavy cream.

Ta-da!

Now, the cheesecake must be COMPLETELY cool before you put the mousse on it. Or else the mousse will get all melty and sad. And that would be tragic.

Let the cheesecake chill in the fridge for a couple hours before making the ganache, or stick the cheesecake in the freezer for about 20 minutes.

And finally, layer 4: the chocolate ganache! Heat the cream until it is just below boiling, and mix in the instant coffee and vanilla extract.

Add the chocolate and stir as it melts.

Working quickly, pour the ganache on the cake, and spread it smoothly with a spatula.  And we're done! If you want to show off the pretty layers, cut it with a very sharp knife.

Enjoy!

-Caroline

Printable recipe of Chocolate Mousse Cheesecake.

Chocolate Mousse Cheesecake

Smooth, creamy, and rich chocolate mousse cheesecake.
Adapted from The Flour Sack
Yields: one 9-inch cake

Ingredients
For the Oreo Crust:
20 Oreos
4 tablespoons butter, melted

For the cheesecake:
16 ounces cream cheese, softened
½ cup sugar
2 eggs, at room temperature
1 teaspoon vanilla
⅔ cup sour cream

For the chocolate mousse
6 ounces semi-sweet chocolate, chopped
3 tablespoons unsalted butter, cubed
3 eggs, separated
1/2 teaspoon cream of tartar
1/4 cup + 2 tablespoons powdered sugar
1/2 cup heavy cream, cold
1/2 teaspoon vanilla

For the chocolate ganache
1/2 cup heavy cream
5 ounces bittersweet chocolate, chopped
1 teaspoon vanilla
1 teaspoon instant coffee

Directions
For the crust:

  1. Preheat oven to 350 F.
  2. Finely crush Oreos and melted butter in the food processor. Press into a greased 9-inch springform pan. Bake for 10 minutes. Let cool completely.

For the cheesecake layer

  1. Lower oven to 325 F.
  2. Beat cream cheese, with the mixer on medium speed. Add sugar and vanilla. Beat well.
  3. Add eggs one at a time, beating well after each.
  4. Beat in sour cream on low speed.
  5. Pour the batter in springform pan over the Oreo crust. Bake for about 30 - 35 minutes.
  6. Let the cheesecake cool completely, and refrigerate at least 4 hours.

For the chocolate mousse layer (make after the cheesecake has completely cooled):

  1. With the microwave at 50% power, microwave the chocolate for about 1 ½ - 2 minutes, stopping every 30 seconds to stir the chocolate. After 1 minute, stir in the butter before returning the chocolate to the microwave.
  2. In another bowl, beat the egg whites until foamy. Add the cream of tartar and continue to beat. Gradually add in 1/4 cup sugar and continue beating until stiff peaks form. Set aside.
  3. In another bowl, beat the heavy cream until it begins to foam. Add the vanilla and remaining 2 tablespoons  sugar. Continue to whip the cream until it holds soft peaks. Set aside.
  4. Gently beat in 1/4 of the egg whites into the chocolate mixture to lighten it. Fold in the remaining egg whites. Then, fold in the whipped cream. Take care to not over -work the mousse, but make sure the cream is blended in well.
  5. Using a rubber spatula, spread the mousse on top of the cooled cheesecake while still in the springform pan. Cover with plastic wrap, and refrigerate.

For the chocolate ganache layer:

  1. Place the cheesecake in the refrigerator for several hours before making the ganache, or firm up the cheesecake by placing it in the freezer while making the ganache (don’t leave it in there for more the 30 minutes).
  2. Heat the heavy cream until it is just below boiling.
  3. Stir in instant coffee and vanilla.
  4. Stir in chocolate, and mix until smooth.
  5. Let cool for about 15 minutes, mixing it occasionally.
  6. Remove mousse cheesecake from the freezer or refrigerator. Pour the ganache over the cake and spread it over the cake with a spatula. The cold temperature of the cake will cause the ganache to firm up, so work fairly quickly.
  7. Release from the pan and serve!
In "Cake", "Cheesecake", "Oreo", "chocolate", "cream cheese", "fancy", "ganache"

Golden Blueberry Vanilla Cake

Monica Cheng January 9, 2013

You know how they say a picture is worth a thousand words? Well, let me tell you -- there is a whole story to be told about this blueberry vanilla cake you see in this photo above. It started out as a simple idea. My friend Henry suggested that since Caroline's birthday is coming up on January 5, we buy a cake from Marsh or Costco to celebrate. But I thought, "Well, Caroline is my co-chef, and it doesn't feel quite right to buy a cake for her when we can make one from scratch!" And so, it became our mission to make the ultimate golden blueberry vanilla cake for Caroline's 19th birthday.

As in any mission, Henry and I needed to recruit some people to help out and make it a success (but actually, it's because it's more fun this way). So Nikhil, Katie, and Nimisha were invited to lend their expertise.

I did some research on my own before baking day and found this promising recipe from

Bakerella

, espousing this glorious cake dubbed, "Moist Yellow Cake." We didn't end up following the instructions exactly from first letter to period--we even added a few of our own innovations--but the cake still turned out tasting and smelling delicious, which is all that mattered. The funny thing about this recipe is that it uses sugar water spray to keep the cake ultra moist throughout the entire process. I don't know about you, but that's the fanciest thing I'd ever heard of. Nikhil, for one, was

fascinated

with the sugar water trick, and we would've done it too, if it weren't for the fact that we didn't actually end up with a layered cake as the directions called for (you'll see, read below).

First alteration came along right before we poured the cake batter into the pan. We wanted to add a little twist to the recipe so that it's not just plain ol' vanilla cake. Nikhil highly recommended blueberries, so blueberry it is.

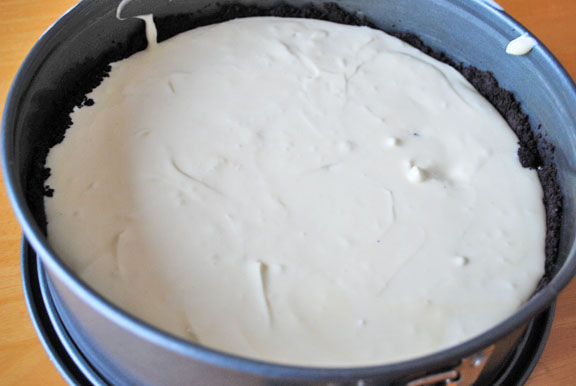
Next alteration is quite a bit more impacting on the final result. This might be an amateur mistake, but we ended up using a springform pan that's typically used for making cheesecake. You see, there's a huge problem with this decision. Springform pans naturally bake from outside to inside, while regular pans bake from bottom to top. Needless to say, when we took the cake out of the oven after 50 minutes, the outside was golden and definitely done, but the center was still pudding-like -- pretty much done, but not really done. Which is a problem.

Solution?

Take out the center and make it a donut cake! Well, what a waste, right? How can we just throw away perfectly delicious-looking cake that's pretty much cooked (but not quite)? There's only one thing to do...eat it. Yay! Yummy.

So...now, we have this gaping hole in our perfectly delicious blueberry vanilla cake. What to do?

Frosting time!

Our idea was to frost the inside of the cake, and ideally everywhere on the cake, to cover the crumbs. Except, the frosting didn't work for whatever reason. It tasted okay, but something seemed to be off. It was kind of sad, actually. Which is why I'm not going to post the frosting recipe we used. :P

So that didn't work. But then Nimisha suggested instead that we fill the inside with bananas! It's perfect. It's simple. It's delicious. It's beautiful.

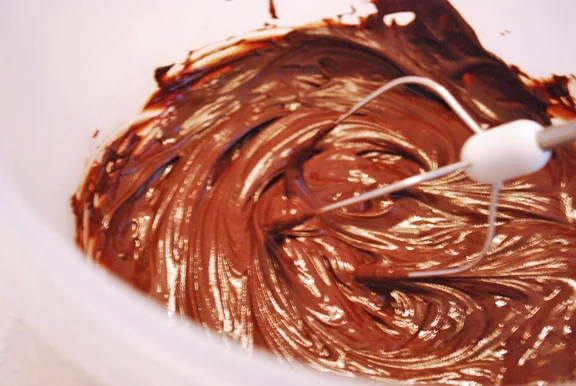
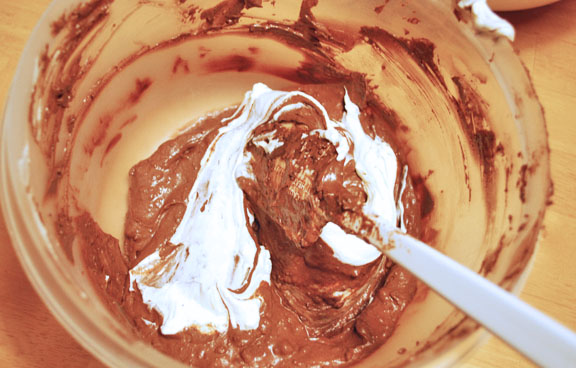
Our final step was to add chocolate garnish to the top, along with powdered sugar. What we did was melt chocolate and pipe abstract swirlies, stars, hearts, and other designs onto wax/aluminum foil. At this point, we've been winging it in many respects, so we decided to use this exotic African milk chocolate my dad brought back for me because he knows I love chocolate (he knows me so well). But this chocolate...it had the scent of rose germanium flowers. I'm not kidding. That chocolate literally smelled

fragrant

. Which I find absolutely mind-blowing. But hey, it works, and it tastes decent (:

Let the chocolate designs cool and harden in the freezer for 1 minute, and then take apart and place onto cake before dusting with powdered sugar. All in all, I'm extremely pleased with the final result. Doesn't look half-bad, and it tastes more than amazing.

Happy birthday, Caroline!

Love,

Monica

Printer-friendly recipe of Golden Vanilla Cake

.

Golden Blueberry Vanilla Cake

Moist, golden, delicious vanilla cake with blueberries (and banana center).

Adapted from

Bakerella

Time: at least 2 hours

Yield: 3 layer cake, or 1 big cake

Ingredients

2 sticks butter, room temp

2 cups sugar

4 eggs, room temp

3 cups self-rising flour*

1 cup whole milk

1 teaspoon vanilla

1-2 cups blueberries

some bananas (if you choose to have a donut center)

*Note: You may substitute with 3 cups all-purpose flour, 1 tablespoon baking powder, and 1 teaspoon salt.

Directions

1. Cream butter until fluffy. Add sugar and mix until completely incorporated. Add eggs one at a time, beating well after each one.

2. Add flour and milk (alternating to creamed mixture), beginning and ending with flour.

3. Add vanilla and mix until just incorporated. Don’t overmix!

4. Wash the blueberries and coat lightly in flour. Carefully incorporate blueberries manually into the batter to make sure the blueberries don’t break and leave blue streaks across the batter.

5. Grease three 8-inch cake pans. Divide batter equally. Preheat oven to 350 degrees. Bake for 25-30 minutes (if in 3 separate pans), or 40-50 minutes (if 1 giant pan), until done.

6. Cool in pans for 5-10 minutes. Remove and completely wrap each layer in plastic wrap to seal in the moisture. Cool completely and then assemble the three-layer cake. Or, if you made the cake in one giant pan like us, you’re done!

Frost with any type of frosting, garnish in chocolate, sprinkle powdered sugar, beautify, add bananas, and enjoy!

In "Cake", "banana", "birthday", "blueberry", "vanilla", "yellow cake"

Pecan Pie

Monica Cheng December 22, 2012

After a roller coaster ride through the first se

mester/quarter of college, your Pass the Cocoa chefs are back in town for the holiday season! I'm not gonna lie; college is not the stroll in the park you'd like to envision. First of all, the academic rigor is at least five times that of high school (seriously). If you're like me, it's the first time you've been away from home for such an extended amount of time. And overall, everything is just different, and you have to adjust your eat, study, and play habits accordingly. But all that aside, these first few months have been an amazing experience. I made new friends, figured out the El transportation system, competed at my first synchronized figure skating competition (we placed!), went to a college "party" (interesting, to say the least), explored the campus, and it was just a great time.

That being said, the college experience also allowed 

me to gain a greater appreciation for my family at home who has constantly supported me in my every endeavor. I missed my friends, my family

,

my roo

m, 

home food, ice dance...But 

most of all, I 

missed baking for Pass the Cocoa! 

So this winter break, I have one thing to say: Never has it felt so good to be ho

me. 

*

Greetings! This holiday season, your Pass the Cocoa chefs present to you a simple, classy, ooh-y-goo-y, yummilicious dessert that is a 

must try

. 

Ahh, pecan pie.

You're either drooling with just the thought of this drea

my dessert, or you might be 

one of those poor unfortunate souls who have never tried peca

n pie. Either way, g

ive it a try. Pecan pie is just so delicious; you really shouldn't pass up this opportunity. The recipe's fro

m The Pioneer Woman, so quality assurance guaranteed.

I 

made the pie crust by scratch because I felt like taking on a challenge this winter break. But if you'd like to cut some time off the prepwork, you can buy a pre-made crust from the grocery store. The main reason why I chose to make mine by scratch is that I wanted to see if it'd taste better. Keep reading for the verdict.

Gradually work vegetable shortening (or in my case, butter) into the flour until it resembles a coarse meal.

Beat egg and add to flour mixture. Add cold water, vinegar, and salt.

Incorporate ingredients and m

ake into dough.

Split into thirds and put inside plastic bags to freeze for about 15 minutes. Oh yeah, flatten the balls before putting them in the freezer. It'll make life much easier in later steps. 

The brilliance of this pie crust recipe is that you can store the dough in the freezer for however long you'd like until you need it. As far as I'm aware of, you can store it forever. Just be sure to allow at least 15 minutes to thaw when you take it out of the freezer. 

Roll out the dough on a floured surface, starting from the center and working your way out. Don't do the play-dough rollypolly thing. Continue rolling until it's about 1/2 inch larger in diameter than your pie pan.

Make it look pretty, like so.

Add the pecans.

Add your syrup mixture consisting of white sugar, brown sugar, salt, corn syrup, vanilla, butter, and eggs. Bake for instructed amount of time. Your slice of pecan pie should look a little something like this if you followed all the instructions correctly.

As you can tell, I spent the majority of the time making the pie crust. The verdict? It definitely tastes good with the pecan filling. But honestly, I don't know if the hand-made crust worth all that extra time and effort I put into it

. Who knows if it would've been better to just save yourself the

 energy and buy the store-bought version. But then again, I did opt to ignore the part of the instructions that advised against using butter to replace vegetable shortening (I was out of stock).

But the pecan pie itself? Simply d

elicious.

Happy Holidays!

Caroline & Monica

Printer-friendly recipe of Pecan Pie

.

Pecan Pie

Sweet, custardy, sugary—almost caramely—goodness

. 

From

The Pioneer Woman

Pie crust based

this Pioneer Woman recipe

(takes about 1 hour prep time)

Prep Time: 10 minutes (with pre-made crust)

Baking Time: 50 - 70 minutes

Total Time: 1 - 1½ hours

Ingredients

pie crust (make yourself, or buy pre-made)

1 cup white sugar

3 tbsp brown sugar

1/2 tsp salt

1 cup corn syrup

3/4 tsp vanilla

1/3 cup salted butter, melted

3 eggs, beaten

1 cup chopped pecans

Directions

1. Prepare pie crust (either store-bought or hand-made). Pour chopped pecans in the bottom of the unbaked pie shell.

2. Mix sugar, brown sugar, salt, corn syrup, butter, eggs, and vanilla together in a bowl. Pour syrup mixture over the pecans on the pie crust. Cover gently with foil and place on top of a larger pan to prevent spilling. 

3. Bake at 350 degrees for 30 minutes. Remove foil and continue baking for 20 minutes. Be careful not to burn crust or pecans. Cool for a couple hours or overnight. Pecan pie is one of those desserts that taste best not straight out of the oven but after it has cooled adequately. 

***Note: PIE SHOULD NOT BE OVERLY JIGGLY WHEN YOU REMOVE IT FROM THE OVEN. If it shakes a lot, cover with foil and bake for an additional 20 minute or until set. Cooking time varies from oven to oven. For me, it took around 70 minutes total to bake.

In "easy", "holiday", "pecan", "pie crust", "pie", "pioneer woman", "simple"
← NewerOlder →

Search Posts

Post Archive
  • "easy"
  • "breakfast"
  • "chocolate"
  • "cookie"
  • cake
  • cookie
  • "fruit"
  • "summer"
  • "bread"
  • "Cheesecake"
  • "Oreo"
  • "dessert"
  • "fancy"
  • "Cake"
  • "blueberry"
  • pie
  • "cinnamon"
  • savory
  • breakfast
  • "berry"
  • "brownie"
  • "cupcake"
  • "holiday"
  • "nutella"
  • bars and brownies
  • "apple"
  • "birthday"
  • "pastry"
  • "pie"
  • "scone"
  • bread
  • candy
  • cheesecake
  • "banana"
  • "biscuit"
  • "citrus"
  • "ganache"
  • "lemon"
  • "macaron"
  • "muffin"
  • "strawberry"
  • "vegetable"
  • "almond"
  • "buttercream"
  • "cake mix"
  • "cranberry"
  • "cream cheese"
  • "frosting"
  • "glaze"
  • "healthy"
 

Powered by Squarespace