• About
  • Food Photography
  • Portraiture
  • Contact
Menu

Caroline Zhang Photography

  • About
  • Food Photography
  • Portraiture
  • Contact
×
Cinnamon Apple Scones | Pass the Cocoa

Scone - ology Part 3: Cinnamon Apple Scones

Caroline Zhang April 15, 2013

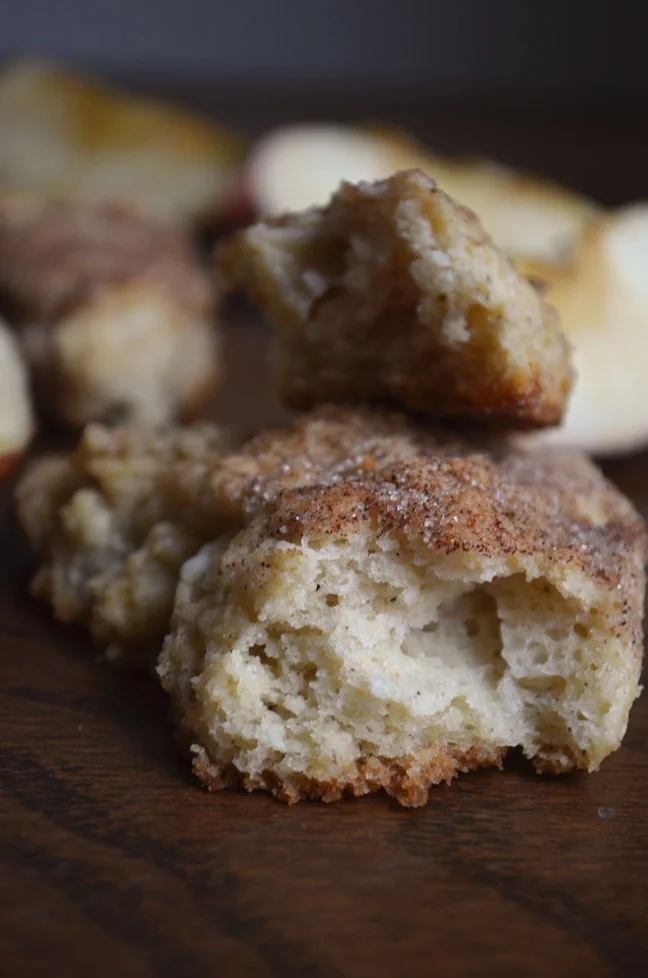
If you make any of the scone recipes on this site (We have quite a few!), make this one. This scone is a light, fluffy biscuit with pieces of juicy, sweet apples and cinnamon throughout, and topped with cinnamon sugar. In other words, delicious!

The difference between this recipe and lots of other recipes with apples is the fact that they are cooked with sugar before being added to the batter. In most recipes, the uncooked apples are added straight in, and they are still rather hard and sour after they are baked. This way, they are still slightly tart, but also soft and sweet and flavored with cinnamon, and don't distract from the scone itself.

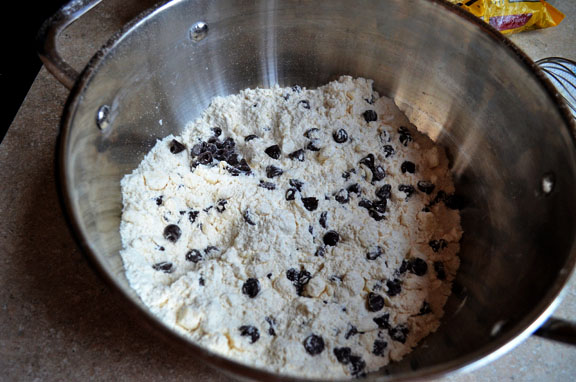
This recipe also follows the master scone recipe, but has the extra step with the apples, and decreases the amount of cream a little because of the juice from the apples. Peel and dice two tart cooking apples, such as Granny Smith. Place them in a microwavable bowl, add 1/4 cup brown sugar and 1 teaspoon cinnamon, and stir.

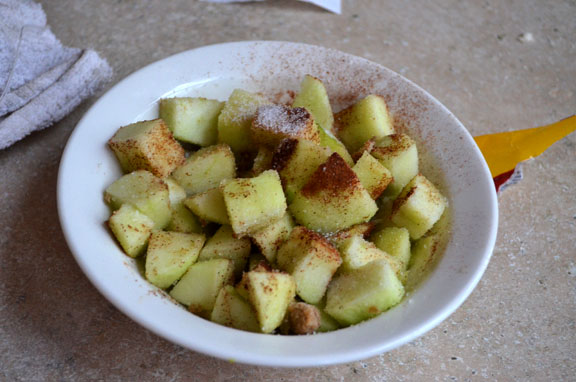
Microwave it for about 2 minutes, stopping at 1 minute to give it a good stir. They'll look like really yummy cinnamon apples, but don't eat them yet! Let cool while you make the dough.

Follow the same process for making the dough as with the master scone recipe. Mix together the flour, baking powder, and salt (omit the sugar since you add sugar in the apples). Work in the cold butter with your hands or a pastry cutter. Then mix together the cream, egg, and vanilla. Add in the cooled cinnamon apples, juices and all, and stir.

Add the liquid ingredients to the dry, and mix just until the dough comes together.

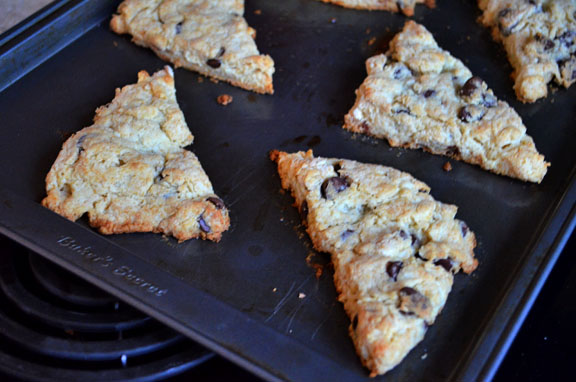
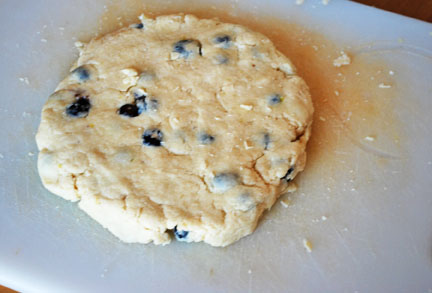
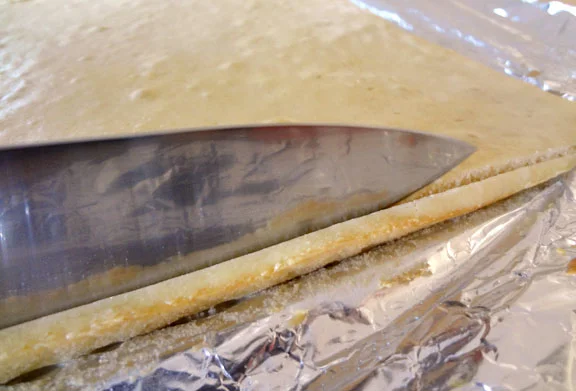
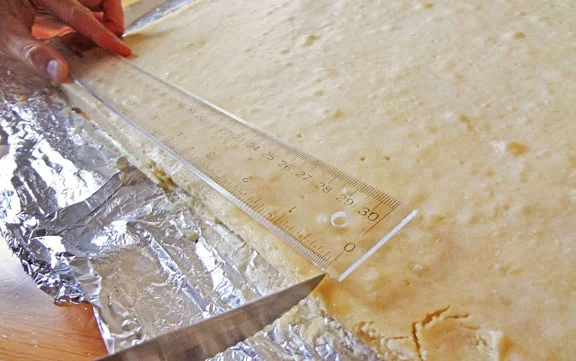
Shape the dough into a 10-inch circle. Mix together 1/4 cup of sugar and 1 teaspoon cinnamon. Sprinkle it over the dough, and lightly pat it into the dough. Cut into 12 wedges. (You could also shape the dough into a rectangle like I did for the chocolate chip scones.)

Bake for 15-18 minutes at 375 degrees Fahrenheit, let cool, and eat!

Cinnamon Apple Scones | Pass the Cocoa

While I was taking these photos, I got distracted by all the tourists crossing the street in Harvard Square outside my window. Just so you know. I want you to experience the whole scone-making process and all.

And yes, it was snowing. And yes, it was taken a month or two ago. I'm a procrastinator, okay?

Cinnamon Apple Scones | Pass the Cocoa

Enjoy!

-Caroline


Cinnamon Apple Scones

Click here for the printer-friendly recipe.
Yields: 12 scones

Ingredients:
For the Dough
1/4 cup granulated sugar
1 teaspoon cinnamon
2 medium-sized cooking apples, such as Granny Smith or Jonathan, peeled and diced
2 cups flour
1 tablespoon baking powder
½ teaspoon salt
8 tablespoons butter, cold
1/2 cup half-and-half, or heavy cream, cold
1 egg
½ teaspoon vanilla

For the Cinnamon Sugar Topping:
1/4 cup granulated sugar
1 teaspoon cinnamon

Directions:
Preheat the oven to 375 degrees Fahrenheit. Mix together the apples, sugar, and cinnamon. Microwave on high for about 2 minutes, until the apples are cooked. Let cool.

Sift together the flour, baking powder, and salt.. Cut the butter into ½-inch cubes. Make sure it remains cold. Add the butter to the dry ingredients.

Using a pastry cutter, two knives, or your hands, cut the butter into the flour. It’s okay if a few lumps remain. Work quickly so that the butter doesn't melt.

In a separate bowl, whisk together the half-and-half or cream, the egg, and vanilla. Mix in the cooled apples.

Pour the wet ingredients into the dry ingredients.

Use a fork or wooden spoon to mix it until the dry ingredients are moistened and the dough barely holds together. DO NOT OVER-MIX.

Turn the dough onto a floured surface. Shape the dough into a circle 10 inches in diameter. Cut the circle into 12 wedges.

For the cinnamon sugar, mix together the sugar and cinnamon, sprinkle it over the dough, and lightly pat it in.

Place the scones onto a greased baking sheet and bake for 15-18 minutes, until golden. Let cool.

Give yourself a huge congratulations! You just made scones!


In "apple", "breakfast", "cinnamon", "pastry", "scone"
Chocolate Chip Scones | Pass the Cocoa

Scone - ology Part 2: Chocolate Chip Scones

Caroline Zhang April 10, 2013
Chocolate Chip Scones | Pass the Cocoa

Wow, this post is really late...I was supposed to get this done a week ago, but it's been a super hectic week (can anyone say midterms?) But anyways, presenting: Delicious Scones Part 2. Last week, I introduced the master scone recipe: just the ingredients and process of the making a light, fluffy scone, leaving the add-ins and creativity to you. Now, we're going to use the master recipe to make chocolate chip scones! 

This is super easy and delicious. Just do the same thing as with the basic scone recipe, but add chocolate chips to the flour mixture after you cut the butter in.

Mix together the cream, egg, and vanilla, and pour it into the dry ingredients. Don't over-mix!

 Now, instead of shaping the dough into a circle and cutting it into wedges, I decided to make a rectangle and cut it into triangles. But you can shape it into a circle if you want.

Shape the dough into roughly a 6 x 9 inch rectangle, cut it into 6 three-inch squares, and cut each square in half.

Bake for 15-18 minutes at 375 Fahrenheit, until golden.

I switched up the glaze a bit, making a chocolate mocha glaze, instead of just a plain sugar glaze. To make it, heat 3 tablespoons of cream in the microwave, until it is scalding, but not boiling. (I heated it a little too much, and it's no big deal if you go a little over).

Mix in 2 tablespoons of chocolate chips, and 1/2 teaspoon instant coffee. Stir until smooth.

Drizzle it over the scones, and serve! They're best warm, so you better start eating!

Enjoy these, everyone! Stay tuned for Scones part 3!

Love,
aroline


Chocolate Chip Scones

Light & fluffy, drizzled with a chocolate-mocha glaze
Click here for the printer-friendly recipe of Chocolate Chip Scones.
Yields: 12 scones

Ingredients
For dough:
2 cups flour
1 tablespoon baking powder
1/2 teaspoon salt
3 tablespoons granulated sugar
8 tablespoons butter, cold
2/3 cup semisweet chocolate chips
2/3 cup half-and-half, or heavy cream, cold
1 egg
1/2 teaspoon vanilla

For chocolate glaze:
3 tablespoons milk or cream
1/4 cup powdered sugar
2 tablespoons chocolate chips
1/2 teaspoon instant coffee (optional)

Directions
Preheat the oven to 375 degrees Fahrenheit.

Sift together the flour, baking powder, salt, and sugar. Cut the butter into ½-inch cubes. Make sure it remains cold. Add the butter to the dry ingredients.

Using a pastry cutter, two knives, or your hands, cut the butter into the flour. It’s okay if a few lumps remain. Work quickly so that the butter doesn't melt. Add the chocolate chips.

In a separate bowl, whisk together the half-and-half or cream, the egg, and vanilla.
Pour the wet ingredients into the dry ingredients.

Use a fork or wooden spoon to mix it until the dry ingredients are moistened and the dough barely holds together. DO NOT OVER-MIX.

Turn the dough onto a floured surface. Shape the dough into a 6-in x 9-in rectangle.
Cut the rectangle into six 3-inch squares. Cut each of the square diagonally so you get 12 triangles.

Place the scones onto a greased baking sheet and bake for 15-18 minutes, until golden. Let cool.

For the glaze, heat the cream or milk until it is just below boiling. (You can do this in the microwave or on the stove). Stir in the instant coffee (if you are using it), powdered sugar, and chocolate chips. Mix well until the chocolate is melted and you get a smooth glaze.

Drizzle the glaze over the scones, and serve. Give yourself a huge congratulations! You just made scones!


In muffins and scones, step by step Tags scone, pastry, chocolate, breakfast

Scone - ology Part 1: The Basics of Making an Amazing Scone

Caroline Zhang April 1, 2013

There's this part of Harry Potter that always has confused me: Harry and his friends go down to have tea with Hagrid, and he serves them these things called "rock cakes" that they nearly break their teeth on. Rock Cake? Like, cakes made out of marble? What?

It was only recently that I finally found out what rock cakes were: SCONES. Rock cakes are what the British called

scones.

And it's not the only baked good that has a different name on the other side of the pond. To clarify, I, Caroline, am posting this handy glossary:

Britain

United States

Rock Cakes

Scones

Scones

Biscuits

Biscuits 

Cookies

Confusing, huh? But don't worry, scones/rock cakes are actually super easy to make! It's amazing how educational Harry Potter is.

Today, I'm giving you a basic scone recipe, or a master recipe, and I'll show you the process of making the dough. You then can decide to add in whatever you like to make scones to your taste! Be creative!

Tomorrow, I'll also post a scone recipe that uses this master recipe as a starting point.

But first, the basic scone! Here are two tips that are essential to a light, fluffy scone:

  1. The butter must be very cold. Do not let it warm up too much while making the dough.
  2. Do not over-mix when you add the wet ingredient to the dry ingredients. You want to mix it just to the point that the wet ingredients are incorporated into the dry.

And now here's the process:

(These photos may look familiar...they're from my blueberry scones post, but the recipe I'm posting is somewhat different.) 

Whisk together your dry ingredients: flour, baking powder, salt, and sugar

Cut your butter into 1/2-inch cubes, and add that to the bowl. The butter should be very cold.

Using a pastry cutter or your hands, work the butter into the flour mixture. It's okay if there are lumps. Work quickly so the butter doesn't melt.

Add your mix-ins, such as chocolate chips or fruit. The exception is citrus zest, which you'll add in later.

Mix in whatever you are adding to the scones.

Then, in a separate bowl, whisk together the cream, egg, vanilla extract, and citrus zest, if you are using it.

Add the wet ingredient to the dry, and mix them together just until the dry ingredient are moistened. DO NOT OVER-MIX!

Turn the dough onto a floured surface and shape it into a circle that is about 10-inches in diameter.

Cut the circle into 12 wedges.

Place the scones onto a greased baking sheet. If you are not making a glaze to drizzle over it later, then sprinkle some sugar over the scones.

(Originally, I suggested first brushing the scones with milk, but with this new recipe I think it is unnecessary).

Bake for about 15-18 minutes at 375 degrees Fahrenheit, until they are golden.

If you are making a glaze instead of sprinkling sugar, mix together the powdered sugar and milk or citrus juice, and brush it generously over the the scones.

Have fun experimenting with this recipe!

-Caroline

Click here for the printer-friendly recipe

Master Scone Recipe

A Pass the Cocoa Original

Yields: 12 Scones

Ingredients:

Dough

2 cups flour

1 tablespoon baking powder

½ teaspoon salt

3 tablespoons granulated sugar

8 tablespoons butter, cold

One or two add-ins, such as: 1 cup fresh fruit such as blueberries, cherries, or raspberries, ⅔ cup chocolate chips or dried fruit such as cranberries, or 1 tablespoon citrus zest

2/3 cup half-and-half, or heavy cream, cold

1 egg

½ teaspoon vanilla

sugar, for sprinkling or a simple glaze (see below)

Basic glaze:

1 cup powdered sugar

¼ cup milk, or lemon/orange juice

Directions:

  1. Preheat the oven to 375 degrees Fahrenheit.
  2. Sift together the flour, baking powder, salt, and sugar.
  3. Cut the butter into ½-inch cubes. Make sure it remains cold.
  4. Add the butter to the dry ingredients.
  5. Using a pastry cutter, two knives, or your hands, cut the butter into the flour. It’s okay if a few lumps remain. Work quickly so that the butter doesn't melt.
  6. Fold in any add-ins, unless you are adding citrus zest.
  7. In a separate bowl, whisk together the half-and-half or cream, the egg, vanilla, and citrus zest, if you are using it.
  8. Pour the wet ingredients into the dry ingredients.
  9. Use a fork or wooden spoon to mix it until the dry ingredients are moistened and the dough barely holds together. DO NOT OVER-MIX.
  10. Turn the dough onto a floured surface.
  11. Shape the dough into a circle 10 inches in diameter.
  12. Cut the circle into 12 wedges.
  13. Place the scones onto a greased baking sheet and bake for 15-18 minutes, until golden. Let cool.
  14. For the glaze, mix together the powder sugar and milk (or lemon juice or orange juice). Brush the glaze over the scones.
  15. Give yourself a huge congratulations! You just made scones!
In "breakfast", "easy", "pastry", "scone"
Petit Fours | Pass the Cocoa

Petit Fours

Caroline Zhang March 25, 2013

Grab your tea sets and stick out your pinkies: we're making petit fours today! These little cakes are time-consuming, but completely worth it. They consist of  very thin layers of cake spread with jam, cut into small cubes, and covered with fondant. In other words, delicious and very cute!

We made these together over spring break, and it was a super fun project! It definitely went faster with both of us (Monica and Caroline) working on it together. So if you have a few free hours, you should definitely consider making these little treats.

First make, the cake. We used a half-recipe of Bakerella's pound cake, and baked it in a jelly roll for about 15-20 minutes. 

The cake is very thin and bakes very quickly, so don't let it go for too long. Ours was still pretty pale on top when it was done.

Trim off the edges.

Cut the cake into 3 even sections. A ruler is very helpful.

You're going to stack the cake, so brush jam on the bottom two layers.

Carefully stack the three layers.

Cut the cake into cubes. Our squares were about 1.5 x 1.5 inches, and yielded 32 little cakes.

Place them into a pan, and freeze them for about 10 minutes, while you make the fondant.

The fondant we used came from King Arthur Flour, and contained white chocolate, so it wasn't the traditional sugar-only fondant.

Melt the white chocolate. Mix together the powdered sugar, corn syrup, and hot water. We forgot the vanilla extract, but it would have been a nice addition.

Add the white chocolate to the powdered sugar mixture, and mix well.

Now you're ready to dip! We found it best to dip the four sides of the petit fours in the fondant, and then spoon a little over them to cover the top. The fondant sets very quickly, so you'll probably have to re-heat it in the microwave a couple of times.

Oh, and feel free to add some food coloring to the fondant. We went with pink (:

We added a few drops of color, dipped some cakes, and then added some more, so our cakes got progressive pinker.

Ombre Petit Fours (:

We drizzled some fondant over the petit fours for decoration. Then let them dry, serve them up on a fancy tea tray, and impress everyone!

And some Pass the Cocoa love (:

Enjoy!

-Monica and Caroline


Petit Fours

Click here for the printer-friendly recipe of Petit Fours.
Pound Cake adapted from Bakerella, Fondant from King Arthur Flour

Ingredients
Cake:
½ cup butter, softened
4 oz. cream cheese, softened
3 eggs, room temperature
1 cup sugar
½ teaspoon vanilla
½ cup milk
1 ¾ cups all-purpose flour
½ teaspoon baking powder
pinch of salt

Fondant:
4 cups powdered sugar
¼ cup corn syrup
¼ cup hot water
1 cup white chocolate chips
food coloring (optional)

For Assembly:
2 tablespoons jam, any flavor


Directions
For the Cake:
Preheat the oven to 325 degrees Fahrenheit.

Sift together the flour, baking powder, and salt.

Cream together the butter, sugar, and cream cheese with an electric mixer until fluffy. Add the eggs one at a time, beating well after each. Gently beat in the milk and vanilla.

Add the dry ingredient to the wet, and mix well.

Line a jelly roll pan with foil, and grease it well. Pour the batter in the pan, and spread it evenly.

Bake for about 15-20 minutes, until a toothpick inserted in the center of the cake comes out clean.

Let the cake cool completely.

For the Fondant:
Melt the white chocolate chips, either over a double boiler, or in the microwave on LOW power.

Mix together the powdered sugar, corn syrup, hot water, and vanilla extract. Mix the white chocolate into the powdered sugar mixture. Add food coloring if using.

Assembly:
Trim the edges of the cake, and cut it into 3 even sections. Gently heat the jam. Brush two sections with jam, and stack the three layers of cake.

Cut the cake into small, roughly 1.5 inch, cubes. Freeze the cubes for about 10 minutes while you make the fondant.

Dip the sides of the cakes in fondant, then spoon a little of fondant over the tops to cover. The fondant sets quickly, so you will need to gently microwave it to reheat.

Drizzle extra fondant over the top for decoration, if desired. Let the fondant dry, and serve!


In cake
← NewerOlder →

Search Posts

Post Archive
  • "easy"
  • "breakfast"
  • "chocolate"
  • "cookie"
  • cake
  • cookie
  • "fruit"
  • "summer"
  • "bread"
  • "Cheesecake"
  • "Oreo"
  • "dessert"
  • "fancy"
  • "Cake"
  • "blueberry"
  • pie
  • "cinnamon"
  • savory
  • breakfast
  • "berry"
  • "brownie"
  • "cupcake"
  • "holiday"
  • "nutella"
  • bars and brownies
  • "apple"
  • "birthday"
  • "pastry"
  • "pie"
  • "scone"
  • bread
  • candy
  • cheesecake
  • "banana"
  • "biscuit"
  • "citrus"
  • "ganache"
  • "lemon"
  • "macaron"
  • "muffin"
  • "strawberry"
  • "vegetable"
  • "almond"
  • "buttercream"
  • "cake mix"
  • "cranberry"
  • "cream cheese"
  • "frosting"
  • "glaze"
  • "healthy"
 

Powered by Squarespace