Roasted Blueberry Basil Cornbread

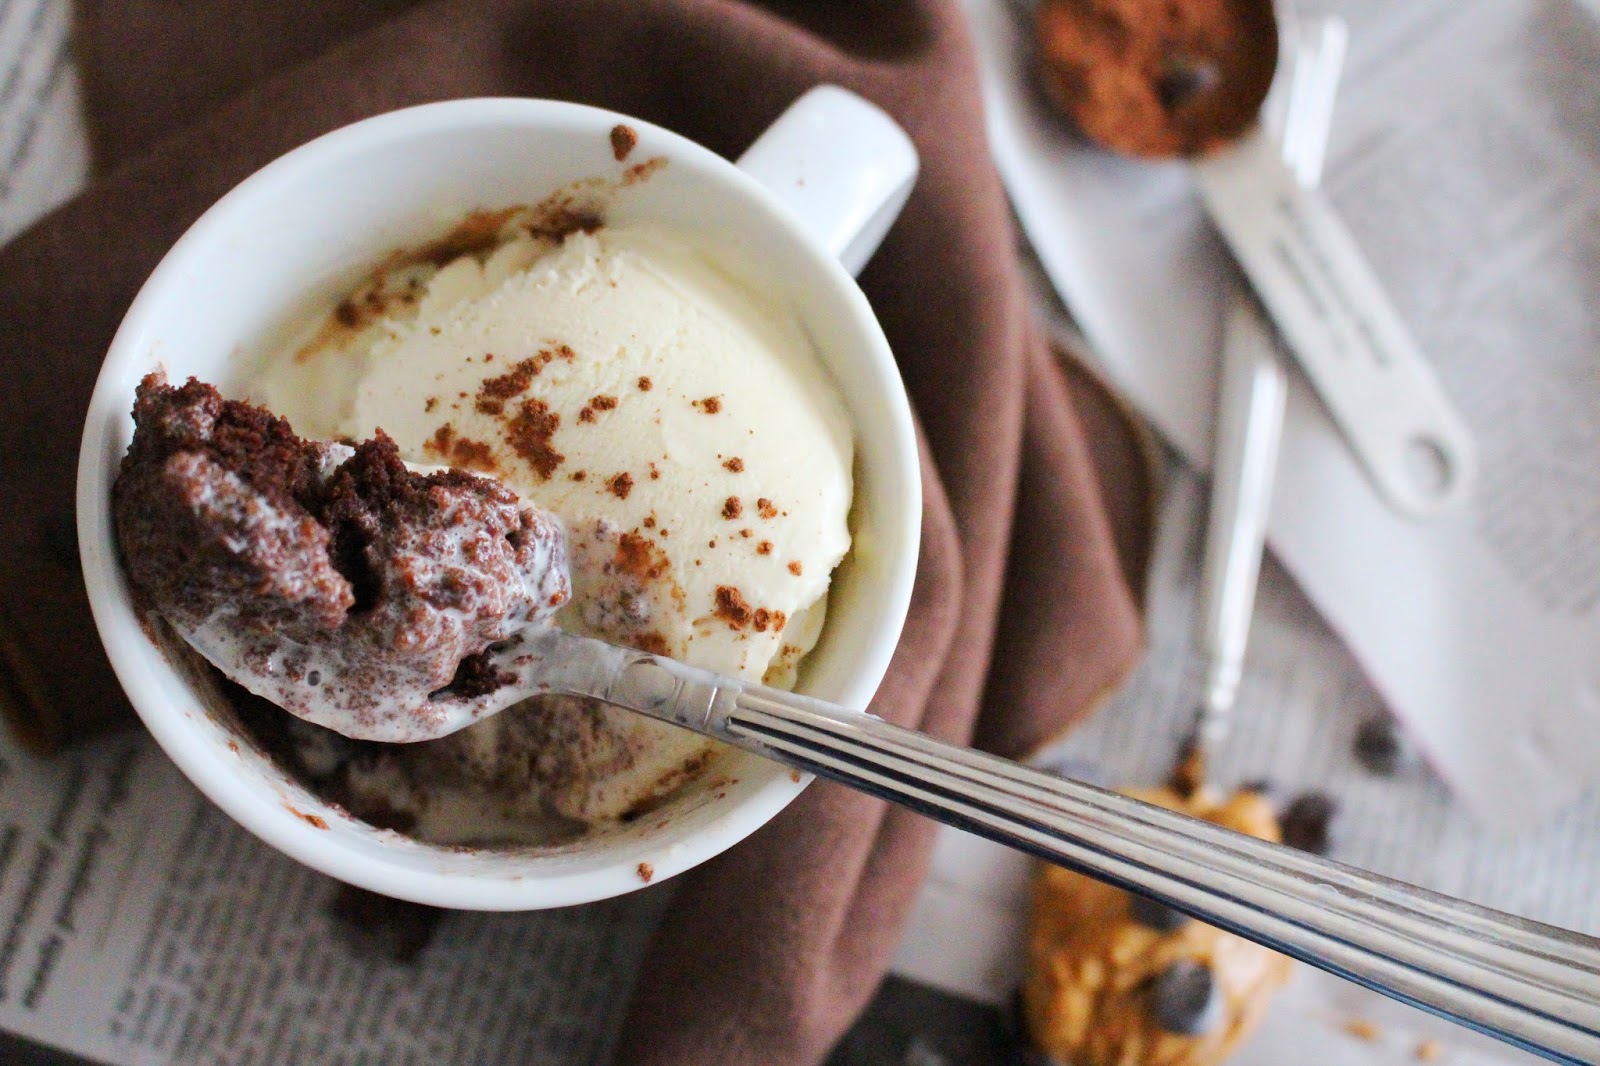
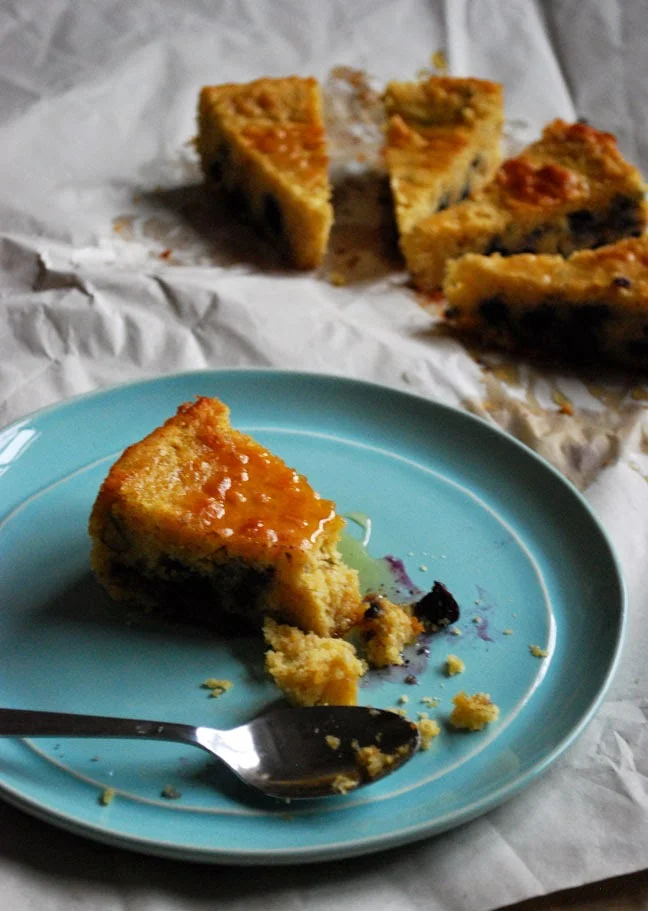
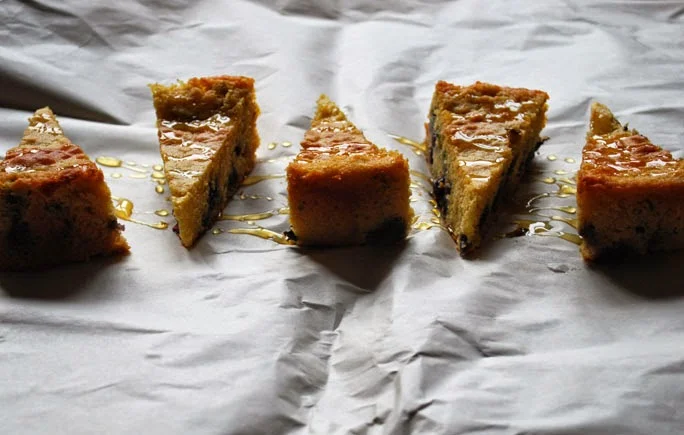
As you might have noticed, we really like blueberries around here. So of course, when I got Stephanie Wise's fabulous Quick Bread Love e-book, her recipe for blueberry cornbread caught my eye.

It definitely didn't disappoint, and stood out from a lot of ordinary cornbread recipes. The recipe calls for roasting the blueberries, concentrating the flavors of the berries and making them extra sweet. The blueberries are paired with fresh basil, and the yogurt and honey makes the cornbread very soft and moist.

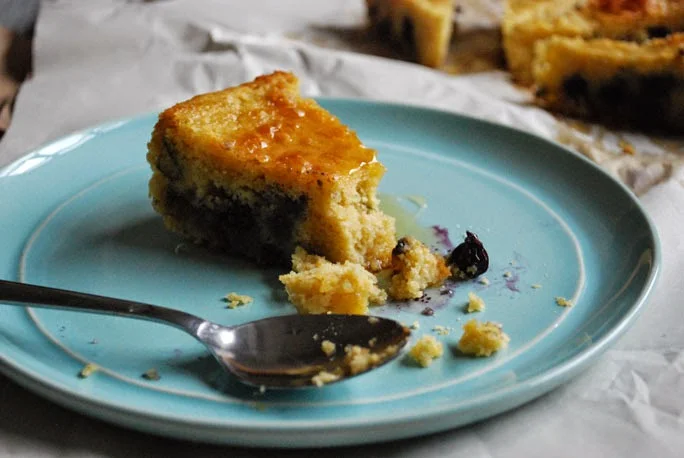
It's a perfect summer recipe. It only has a few ingredients and is really easy to put together which is great for me while I'm interning in D.C. this summer, with a tiny kitchen and a crappy gas stove and oven that kind of scares the crap out of me.

I won't include the recipe here, but will direct you over to where you can get Stephanie's e-cookbook. It's pretty inexpensive, very well put together, and definitely worth looking at!

Enjoy, all!

Caroline

Chocolate Peanut Butter Mug Cake

Those of you who have known me earlier this year during winter quarter...know that, if there's one combination in this world I couldn't live without, it's chocolate and peanut butter. I pretty much subsisted on my daily dose of chocolate peanut butter Haagan Daas ice cream. I had to have at least one pint in stock in my little dorm freezer, and I attribute all my winter quarter successes to the ice cream. At some point, I discovered a new flavor called Caramel Cone, which I dubbed my new favorite, but ultimately I reverted back to chocolate peanut butter. I get very attached.

Some call the flavor combination a polarizing juxtaposition. It's one thing to like chocolate, and it's one thing to like peanut butter. But for a non-peanut butter lover, this combination may seem rather horrifying.

Who are you?

I understand.

Actually I'm not sure if I do, hehe.

In that case, this dessert may not be the one for you. Maybe you'd like these nutella hand pies instead.

But for someone like me who has a special set of standards for her desserts, this simple on-the-go mug cake is a genius kind of invention. Perfect to satisfy my chocolate craving, and even better when served with chocolate peanut butter Haagan Daas ice cream. Too bad I only had vanilla ice cream on hand at the moment for photographs.

It tastes fabulous. Try it.

Cheers,
Monica

Chocolate Peanut Butter Mug Cake

From The Novice Chef Blog

Ingredients
3 tablespoons all-purpose flour
2 tablespoons granulated sugar
1 1/2 tablespoons cocoa powder
1/4 teaspoon baking powder
Pinch of salt
3 tablespoons whole milk
1 1/2 tablespoons vegetable oil
1 tablespoon creamy peanut butter

Directions
In a large mug, whisk (with a small whisk or large fork) together the dry ingredients (flour, sugar, cocoa powder, baking powder and salt). Add the milk, vegetable oil and peanut butter. Whisk until smooth.

Cook in the microwave on high for 1 minute and 10 seconds. This recipe will rise a lot and then deflate. Serve immediately. Enjoy!

Roasted Rhubarb Scones

Let's talk about the super thrilling topic of grocery shopping for a bit: as in, shopping for baking supplies at school is usually a pain. The closest grocer store is one subway stop away--which, okay, isn't that far, but it still involves getting on the T or walking for 20 minutes--definitely more inconvenient than what we Mid-westerners are used to. The other two options closer to campus are CVS and Broadway, a fancy health food store.

a. roasted rhubarb scones 6.jpg

I would go to Broadway this year whenever I needed groceries for baking but was too lazy to actually make my ways to Shaws. That's where I found this rhubarb a few weeks ago, sitting in a cardboard box next to the way over-priced blueberries and raspberries. I had planned to make these scones with strawberries, but the rhubarb was a much cheaper option, and the sight of this seasonal reddish celery thing made me happy. It seemed like a promising sign of summer.

While a lot of recipes recommend making scones by grating in frozen butter or using a pastry cutter, I always make scones with my hands. I don't think it causes the butter to melt too much much if you work quickly, and I like to actually feel the texture of the dough with my hands. I think it's one of the reasons I like making scones so much.

Anyways, this scone recipe isn't too different from the others I've posted here; I lightened up the texture a bit with the cake flour and buttermilk, but kept it pretty similar to the original. Don't skip out on roasting the rhubarb: I don't think just throwing in raw rhubarb lets them cook long enough or become sweet enough to be really good. Also, make sure the rhubarb is thoroughly chilled before adding it to the dough! Chilled dough makes fluffier scones.

Apologies for the inconsistent posts for the past couple of weeks. Monica and I have both been in crazy final exam / move-out mode. I actually made these a week or two ago right after finals ended when I was supposed to be packing up my baking equipment rather than making things with them. Alas. The travails of summer storage.

Enjoy, all!
Caroline

Roasted Rhubarb Scones

Click here for the printer-friendly recipe. | Yields: 12 scones

Ingredients
For the Roasted Rhubarb
1 pound rhubarb (about 4 to 5 stalks), washed and chopped into ½-inch pieces
⅓ cup granulated sugar
1 teaspoon lemon zest
Softened butter, for greasing

For the Dough
2 cups flour
2 ½ teaspoons baking powder
½ teaspoon salt
2 tablespoons granulated sugar
8 tablespoons butter, cold
½ cup buttermilk, cold
1 egg
1 teaspoon vanilla extract

For assembly
1 egg, beaten
¼ cup raw sugar (granulated sugar can be substituted)


Directions
Preheat the oven to 375 F. Roast the rhubarb. In a large bowl, mix together the rhubarb, sugar, and lemon zest.

Thoroughly grease an oven-proof pan with butter, and pour the rhubarb into the pan. Bake for about 10-15 minutes, or until the rhubarb is tender. Let cool thoroughly, then refrigerate overnight.

Preheat the oven to 375 F. In a large bowl, whisk together the flour, baking powder, salt, and sugar.

Cut the butter into ½-inch cubes. Make sure it remains cold. Add the butter to the dry ingredients.

Using a pastry cutter, a fork, or your hands, cut the butter into the flour. It’s okay if a few lumps remain. Work quickly so that the butter doesn't melt.

In a separate bowl, mix together the buttermilk, egg, and vanilla extract. Add the wet ingredients to the dry and stir until barely combined.

Mix in the rhubarb, including the juices, until it is incorporated. Be careful while stirring since the rhubarb is very soft. Do not over-mix.

Turn the dough onto a floured surface. Shape the dough into a 6 inch x 8 inch rectangle. Cut the dough into 6 rectangles, and then cut each of the rectangles in half to form 12 triangles.

Brush the scones with the beaten egg and sprinkle raw sugar on top. Bake the scones for 15-18 minutes, or until the edges have turned golden. Let cool slightly, and serve with whipped cream or yogurt.

Marbled Cheesecake Brownies

Who wouldn't want marbled cheesecake brownies for their birthday? 

Yep, it's my 20th birthday (: Unfortunately, it's the same day as my organic chemistry midterm in the evening. Buuut my friends and I have already made plans for this upcoming weekend to celebrate in a Chicago neighborhood called Wicker Park. Lots of food and shopping involved. In fact, after laying down the plans for the day, one of my friends commented on why there seems to be a disproportionate amount of dessert involved in the day's planned activities. Hmm...honestly, if you knew me, could you be surprised?

It's at this point now that I'm starting to realize that everyone who's on the semester system is already long done with school while I have like 3 more weeks to go thanks to Northwestern's quarter system. Last year, I remember feeling pretty jealous of all my friends who were free to enjoy the summer, but I don't really mind too much this year. Maybe it's because I've gotten used to it, or maybe the fact that I know I'm going to be coming back to Evanston anyway to take summer classes...and prep for the MCAT! (It feels kinda crazy just thinking about it.)

Originally, I super wanted to make a mini chocolate peanut butter cake (like, an actual, miniature-sized layered cake) to post on my birthday, but when I tried a chocolate cake recipe using a ramekin, thinking that it would actually work...Well, it didn't. The result was more like a chocolate souffle than an actual miniature chocolate cake, so I topped it with vanilla ice cream and served it to my brother and Dad. They loved it, of course.

What I made instead was Marbled Cheesecake Brownies! Pretty and classy. I've always been enamored by the marble effect. It's also surprising that Pass the Cocoa doesn't have a single true brownie recipe, yet dozens of cakes or cookies and fancy pastries.

I hope you all have a lovely day and give these brownies a try. They're moist and chocolate-y, with half-melted chocolate chips folded inside and a thick golden ribbon of cream cheese weaving through the middle. The combination is unbeatable, and it'll make anyone's day more fabulous. I'm going to be thinking of these when I'm taking my (last ever!) organic chemistry midterm later tonight. Maybe it'll bring me luck!

Cheers,
Monica

Marbled Cheesecake Brownies

Adapted from King Arthur Flour
Yield: 12 servings
Time: 1 hour 30 minutes

Ingredients

For the Brownie Layer:
3/4 cup (1 1/2 sticks) unsalted butter
1 1/2 cup granulated sugar
1 1/4 cup unsweetened cocoa powder
1/2 teaspoon salt
1 teaspoon baking powder
1 teaspoon baking soda
1 tablespoon pure vanilla extract
4 eggs
1 cup all-purpose flour
2 cups (12 ounces) chocolate chips

For the Cheesecake Layer:
16 ounces cream cheese (two 8-ounce packages), softened
1/2 cup granulated sugar
1/2 cup all-purpose flour
2 teaspoons pure vanilla extract
1/4 cup heavy cream
2 eggs

Directions
Preheat the oven to 350°F. Line a 9 x 13 inch baking pan with parchment paper.

To make the brownie batter: In a large saucepan, melt the butter, then stir in the sugar until mixture is smooth and shiny. Remove from heat and stir in cocoa, salt, baking powder, baking soda, and vanilla. Whisk in eggs and flour, stirring until smooth. Fold in chocolate chips.

To make the cheesecake batter: Whip cream cheese until smooth. Add sugar and flour, and mix until incorporated. Add vanilla and heavy cream, then eggs. Mix until combined.

Transfer half of the brownie mixture to the prepared baking pan and spread into an even layer. Top with cheesecake layer and spread evenly. Dollop remaining brownie mixture on top and swirl into the cheesecake layer using a knife. Bake for 35 to 40 minutes, or until edges pull slightly away from pan and brownie center is no longer jiggly. Do not overbake. Cool to room temperature before slicing and serving. Enjoy!