Strawberry and Peach Cornmeal Coffee Cake

I first started baking in middle school by following recipes from Kraft magazine, recipes shamelessly calling for Miracle Whip, Philadelphia brand cream cheese, Velveeta (heaven forbid you try to use real non-Kraft cheese), Bakers chocolate. (This was before they started charging for the magazine. Are they really trying to make people pay for what amounts to 60 glossy pages of Kraft advertising convincing them to go out and buy even more Kraft products? And who would actually buy it..?)

That being said, Kraft did teach me a lot. I baked my first cheesecake with one of their recipes, learned to cook lunch for myself, and borrowed heavily from them for my first recipe on this blog.

One of the first things I baked (and one of their more blatant self-promoting recipes) was this strawberry peach crisp. The recipe wasn't bad; it was easy and tasted okay. It also made very little sense; it made you go out and buy Post Honey Bunches and Oats (the almond one, mind) for the topping, yet also had you go through the process of making a traditional crumble topping, cutting in a tiny bit of butter in a minuscule amount of flour, sugar and cinnamon to create a tiny amount of streusel that got lost in all the cereal. 

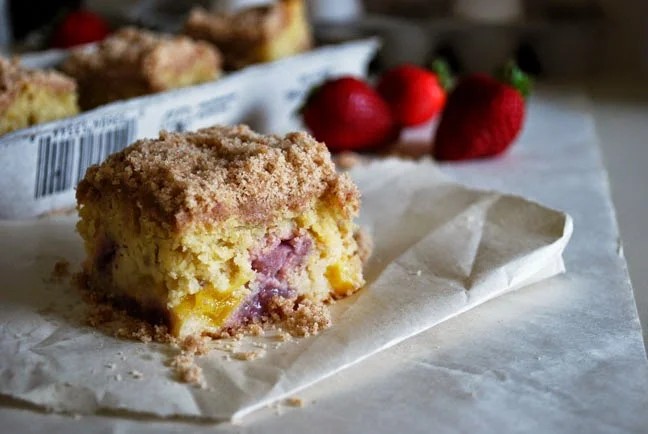
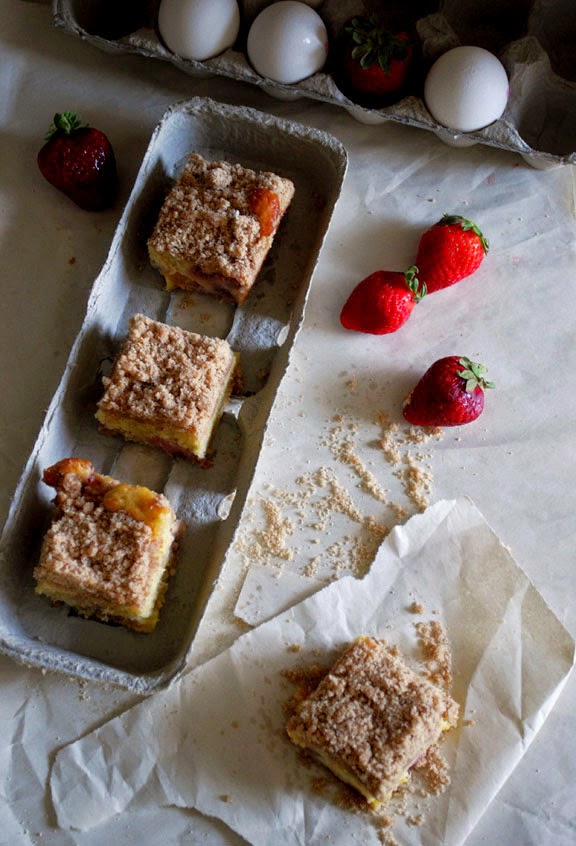
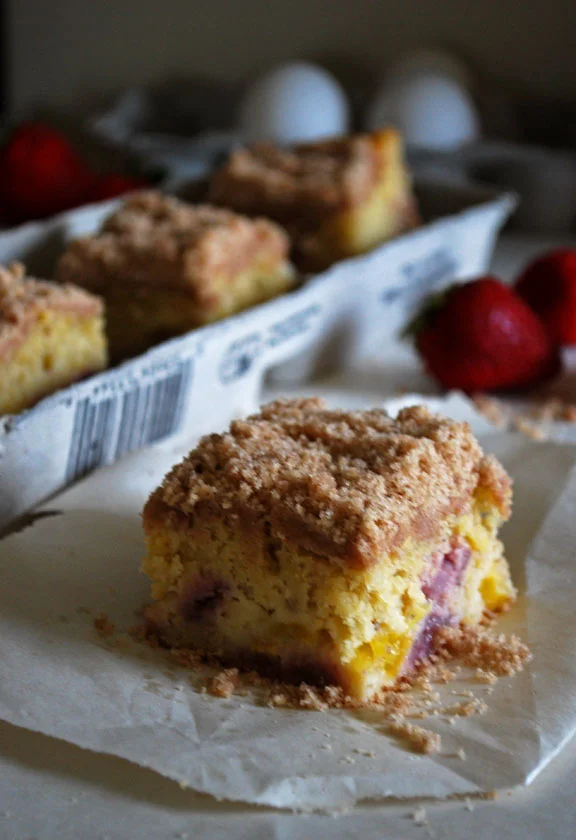
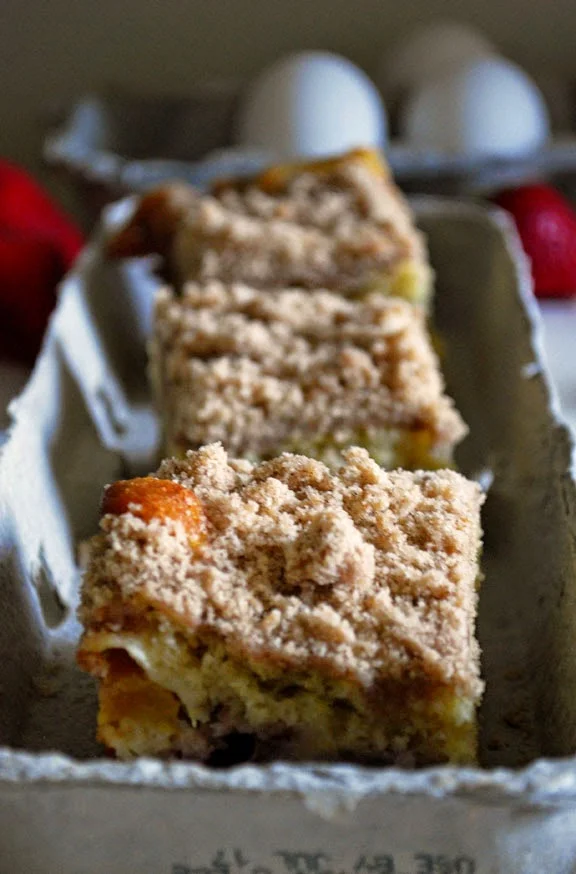
This coffee cake is a more sophisticated, less fake version of that crisp,  playing off the same flavors of peach, strawberry, cinnamon, and cornflakes. It's about as easy, tastes way better, and is a great summer version of traditional coffee cake. The yogurt in this recipe gives the cake a nice dense crumb, and the cornmeal gives it a little more texture than normal coffee cake. 

It's great for breakfast (I think the cornmeal and fruit makes it seem extra acceptable to eat this cake for breakfast) or a snack, warm from the oven or chilled in the fridge.

But for God's sake, find something to serve it with besides Cool Whip.

-Caroline

Peach and Strawberry Cornmeal Coffee Cake

Click here for the printer-friendly recipe. | Yields: One 13x9 inch cake

Ingredients
For the Streusel Topping
1 cup flour
½ cup granulated or light brown sugar
2 teaspoons cinnamon
¼ teaspoon salt
6 tablespoons butter, softened

For the Cake:
1 ⅓ cups all-purpose flour
⅔ cup cornmeal
1 ½ teaspoons baking powder
1 teaspoon baking soda
½ teaspoon salt
½ cup butter, softened
⅔ cup granulated sugar
2 eggs, at room temperature
2 teaspoons vanilla extract
1 cup plain Greek yogurt
2 tablespoons milk
3-4 medium peaches, peeled and cubed
2 cups fresh strawberries, diced


Directions
Preheat the oven to 350 F.

Make the streusel topping. Mix together the flour, sugar, cinnamon, and salt. Add the butter, and use your fingers or a pastry cutter to rub the butter into the flour mixture.

In a large bowl, mix together the flour, cornmeal, baking powder, baking soda, and salt.

In a separate bowl, beat together the butter and sugar until light and fluffy. Beat in the eggs one at a time, then the vanilla extract.

Whisk in the yogurt and milk.

Pour the wet ingredients into the dry ingredients, and mix until just combined. Fold in the chopped fruit. 

Pour the batter into a greased 13x9 inch pan.

Bake the cake for 45-50 minutes, or until a toothpick inserted into the center of the cake comes out clean.


Easy Kit Kat Cheesecake Bars

I moved into my summer apartment yesterday, and it's pretty awesome. I'm sharing it with two other girls, one of whom I haven't met before and the other who is one of my best friends! (We picked out the apartment together.) The kitchen is nice, my room is spacious, and I even have a walk-in closet! Sweet.

kit kat cheesecake 2.jpg

Naturally, the first thing my friends and I did after I finished unpacking is...go swimming! In the outdoor pool on the 6th floor of the apartment! Who cares if it's 60 degrees outside and the low-hanging fog cloaks us all and I have two summer classes that begin in two days and I have to study hardcore for the MCAT like there's no tomorrow...

It's summer! (At least for today. I can't guarantee anything for tomorrow.)

Speaking of which...I did some careful thinking over this one week's break since the end of the school year and start of summer school, and I came to the realization that unfortunately I may not be able to blog as often as I'd like over the summer...Blogging is a real time commitment (and you may be well aware of this if you're a blogger yourself), and each post takes great time and consideration to prepare for and compose (case in point, this post). As Pass the Cocoa has moved along, I've taken so much joy in baking and sharing the recipes with all of you (who tolerate my ramblings and unhealthy obsession with desserts). Caroline and I are so happy to provide quality posts with recipes we have tried and love. But considering the 300+ hours of MCAT studying and two important science courses and shadowing and volunteering that I have ahead of me in this short span of two months, I'm not sure that I'll have much time for doing my regular posts. Which breaks me to pieces, I tell ya.

Good news is, I'll be back and baking in August hopefully. In the meantime, I hope you enjoy this recipe and at least one more I have planned for July. And of course, look forward to some awesome recipes Caroline has lined up for you guys (: I'm drooling.

Okay, time to talk cheesecake.

These Kit Kat Cheesecake Bars are a lovely and -- get this --simple

dessert. Graham cracker crust, layered with whole Kit Kat bars and luxurious dark chocolate cheesecake, and topped with silky smooth chocolate ganache with elegant white pin stripes. It's drop-dead gorgeous (Is that an appropriate descriptive? Well, now it is.), and tastes freaking de-li-cious after an overnight refrigeration. So. Good. I really must make these again because they disappeared way too quickly.

The chocolate ganache infuses with the dark chocolate cheesecake, and makes for a rich chocolate experience. You definitely want a glass of milk with this slice of cake. The best part, I think, is the caramelization that occurs between the Kit Kat layer and graham cracker base. That subtle caramel flavor, paired with the chocolate cheesecake, is simply sublime.

I had a lot of fun making this with Katie during our brief time together. We make it a goal to bake at least onebreathtakingdesserteach time we see each other during the year, since we are separated by states in colleges using different semester or quarter systems.

Caroline and I try so hard to do the same in the rare occasion that we are both in town at the same time (plus the fact that we also attend different colleges using different semester/quarter systems), but it's kind of hard when one of us is interning in D.C. and the other is taking classes in Chicago -- at least for this summer. Perhaps find a date to reunite and bake together in August before school starts (for Caroline, not me). Because...how could you not love the things we make together? Like this and this and this??

Let's see how this cake is made!

First is the graham cracker layer, which is simple enough. Graham crackers, sugar, and melted butter.

Next, layer on the Kit Kat bars on top of the pre-baked graham cracker crust.

Make the chocolate cheesecake batter. We decided to add a couple more tablespoons of sugar to the batter to make it more palatable (and sweeter), but honestly I recommend that you taste the batter to make sure that you have the right amount of sweetness that you prefer. Remember that the cheesecake will be topped with a pretty sweet chocolate and white chocolate ganache layer, so don't go overboard with the sugar (no more than 3 - 4 tablespoons, I'm estimating).

Layer it on top of the Kit Kats. The batter was surprisingly thick, so creative liberties had to be taken...aka using hands to smooth it out.

Next is the chocolate ganache.

The trick to getting the ganache perfectly smooth is to lightly tap it against the counter. Melt the white chocolate, snip a small hole on the corner of a zip lock bag and fill it with the melted chocolate. Pipe across the chocolate ganache like so.

Hold up there.

Hold it.

Stop right there. Look at that gif. Don't you love it? I love it.

Honestly, this cake is the stuff that makes dreams come true (maybe). Kind of like fairy dust. Except not really. Sorry, bad metaphor.

Being the impatient fool that I am, I couldn't wait more than 30 minutes before slicing into this cake, and it was of course delicious. But if you can control yourself, I really highly recommend waiting for at least 4 or 5 hours to let it set in the fridge. You will thank yourself later.

Also, no one ever told us it how hard it is to cut through the entire cake in one clean slice. It's the Kit Kat layer that's being so difficult :P

Monica

Easy Kit Kat Cheesecake Bars

Adapted from Bakers Royale | Yield: 8 servings

Ingredients

For the Crust
:1 1/2 cup graham cracker crumbs
1/2 cup granulated sugar
8 tablespoons unsalted butter

For the Chocolate Cheesecake Layer
12 ounces cream cheese
3/4 cup Hershey’s Special Dark cocoa powder
1/3 cup + 2 tablespoons granulated sugar
1 egg
6 Kit Kat packages

For the Chocolate Ganache Layer
10 ounces chocolate
8 tablespoons unsalted butter

For the White Chocolate Striping
4 ounces white chocolate


Directions
Heat oven to 350 degrees F. Line pan with a "sling" foil (see photos).

For the Crust
Combine graham cracker crumbs, granulated sugar, and melted butter in a bowl. Press mixture onto bottom of prepared pan. Bake at 350 degrees F for 7 - 10 minutes. Remove from oven and set aside to cool while making cheesecake portion.

For the Chocolate Cheesecake
Place all ingredients in a bowl and beat until fully combined and smooth; set aside. Place Kit Kat bars on top of crust. Pour cheesecake mixture over Kit Kat bars and bake for 30 - 35 minutes at 350 degrees F. Remove from oven and set aside to cool. Preferably place in refrigerator when cool enough to touch.

For the Chocolate Ganache and White Chocolate Striping
Melt chocolate and butter together and combine until smooth. Pour chocolate over baked cheesecake.
Melt the white chocolate, snip a small hole on the corner of a zip lock bag and fill it with the melted chocolate.

Pipe across the chocolate ganache in horizontal rows from top to bottom. Use a toothpick and drag vertically through the lines of white chocolate (see photos). Refrigerate for at least 4 or 5 hours, but preferably overnight for best results (:
Serve & enjoy! For nice clean edges while cutting, run hot water over the knife’s blade and wipe away the moisture before cutting. Along with that, wipe the blade down between cuts.

Storage Note: This can be prepared 3 days in advance and stored tightly covered in the refrigerator.


Nutella-Filled Cupcakes

A confession: I don't like buttercream. I love whipped cream, I adore ganache, but to me butterream just tastes like a mouthful of crusty, overly sweet, powdered sugar. I usually scrape the buttercream off my cake. Cupcakes in particular highlight everything that's wrong with buttercream: the proportion of frosting to cake is so high, and on top of that, it's hard to get that visually pleasing towering swirl of frosting using alternatives. When you eat them, all you taste is frosting and the actual cake is completely neglected

So as much as I like looking at them, I usually pass cupcakes by. Alas, all food bloggers have their faults...

So anyways, that's why this is my first cupcake post on the blog after two and a half years. While Monica has created some pretty fabulous cupcakes (such as thesethese, and these), I've been pretty quite on this front.

But I do recognize that other people really like cupcakes and that dollop of buttercream, so here goes!

I will say that this cake is quite good, though. It's based on the Cupcake Project's Ultimate Vanilla Cupcake

recipe; it's light and fluffy, and quite good on its own (I can vouch for this since I did indeed scrape the frosting off of all the cupcakes I ate.) I've had too many cupcakes that were dry, flavorless cake drowned in a pile of buttercream.

I also love the aesthetics of these cupcakes. People usually pair white cake with chocolate frosting, but I really like the look of the white on white, but with the dark, chocolate-y filling hidden in the center.

Filling the cupcakes is quite easy, and it also keeps the cake moist for longer--plus, hello, Nutella! Just create a divot in the cupcake, fill with Nutella, cut off the top of the divot, and replace the top of the cupcake.

The buttercream is also very good, as far as buttercream goes. I've added a little bit of salt to temper the sweetness, and a large does of vanilla to give it flavor.

I made these cupcakes a few weeks ago to celebrate making it out of my tutorial's oral exam in one piece and to procrastinate on the rest of my exams, but you don't need an excuse to make these guys. I will say this about cupcakes: they are really cute, and have a way of brightening up your day. And take it from someone who doesn't like cupcakes; these are pretty good!

Caroline

Nutella-Filled Cupcakes

Click here for the printer-friendly recipe.
Yields: about 16 cupcakes
 | 
Cake recipe adapted from The Cupcake Project


Ingredients
For the Cake
1 ¾ cups cake flour (see notes)
1 ½ teaspoons baking powder
½ teaspoon baking soda
½ teaspoon salt
1 cup granulated sugar
¼ cup butter, softened
2 eggs, room temperature
⅓ cup full-fat sour cream
¼ cup vegetable oil
1 tablespoon vanilla extract
⅔ cup whole milk or buttermilk

For the Vanilla Buttercream
½ teaspoon salt
1 cup butter, at room temperature
3 cups powdered sugar
1 teaspoon vanilla extract
1 tablespoon milk

Assembly
⅔ cup Nutella
Shaved White Chocolate, to decorate (optional)


Directions
Preheat the oven to 350 F.

Mix together the flour, baking powder, baking soda, salt, and granulated sugar.

Add the butter and mix until combined. It should resemble coarse crumbs.

In a separate bowl, whisk together the eggs, sour cream, oil, andvanilla extract.

Add the egg mixture to the flour mixture, and stir until just combined.

Stir in the milk, until just combined.

Pour the batter into the cupcake liners until about ⅔ full.

Bake for 12-15 minutes, or until a toothpick inserted into the center of a cupcake comes out clean; the cupcakes should not turn brown at all.

Let cool completely.

For the Vanilla Buttercream
In a small bowl, add the salt to the milk and stir until dissolved.

Beat the butter in a large bowl until smooth.

Whisk in the powdered sugar, ½ cup at a time. Whisk well after each addition, so that the sugar is entirely incorporated.

Whisk in the vanilla extract and milk. The frosting should be fluffy and creamy.

If it is too thick, whisk in more milk. If it’s too thin, whisk in more powdered sugar.
Assembly

Cut a small circular 1-inch deep divot into the middle of the cupcake. Remove the piece you just cut, and cut off the tip of the divot.

Add about 2 teaspoons of Nutella to the hole in the cupcake and replace the top part of the piece you removed. Repeat with the other cupcakes.

Frost the cupcakes with the buttercream.

Sprinkle with shaved white chocolate, if desired.