• About
  • Food Photography
  • Portraiture
  • Contact
Menu

Caroline Zhang Photography

  • About
  • Food Photography
  • Portraiture
  • Contact
×
Egg Tart | Pass the Cocoa

Egg Tarts

Caroline Zhang February 19, 2015
Egg Tart | Pass the Cocoa
Egg Tarts | Pass the Cocoa

Though I could wax poetic about the many joys of living in Indiana (see: cornfields, cow manure, and fattening pies), it does mean that we're rather far from anywhere that made actual Chinese food. My mother always refused to eat out, insisting that she could always cook it better at home (I did inherit my food snobbery from somewhere!) 

If they did feel like store-bought food, my parents would stop by Chinatown in Chicago on the way home from business trips for meat, groceries, and of course, dessert. It was always exciting to find the white paper box from St. Anna's bakery on the kitchen counter, with grease already starting to seep through the flimsy cardboard bottom. It would open with a puff of air scented with that wonderfully distinct smell of shortening and sugar, revealing little cakes, pastries, and of course, egg tarts. 

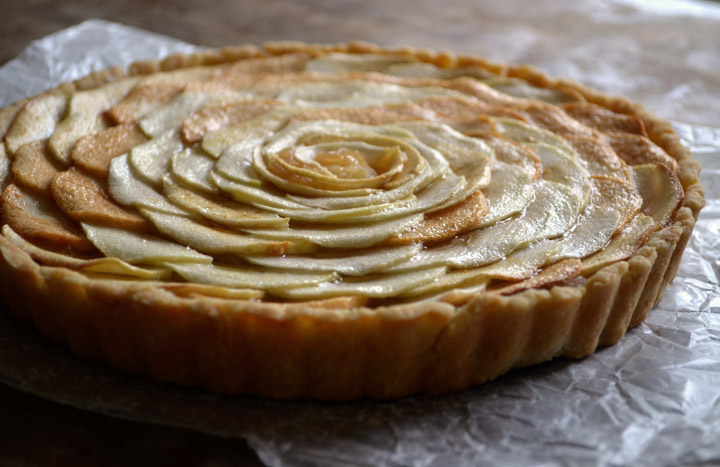
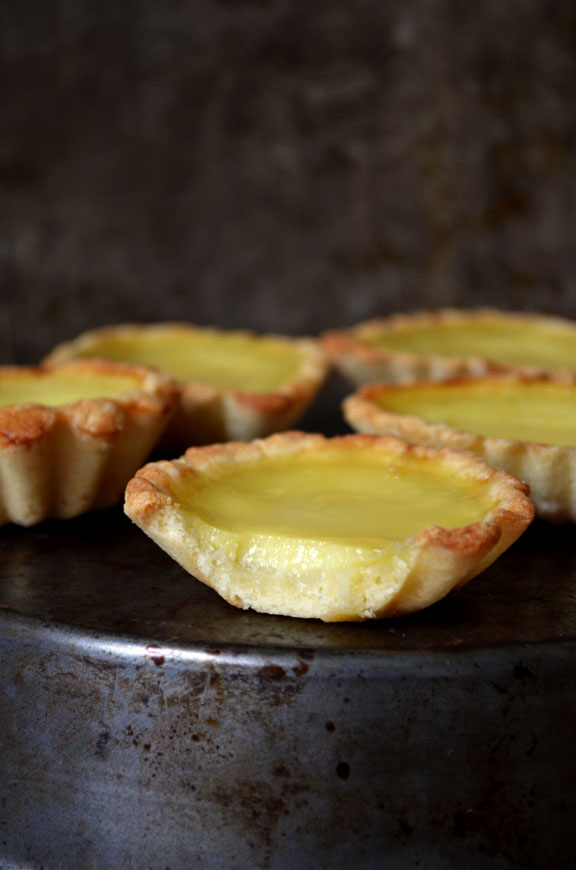
Maybe it's nostalgia, but those egg tarts remain one of my favorite desserts. While egg tart is the literal translation from Chinese, it really is a custard tart, composed of a flaky crust with a creme brulee-like filling. Traditional egg tarts usually have a puff pastry crust, but egg tarts to me always should look like the ones from Chicago, oblong with a thick, sweet, shortbread crust.

Egg Tarts | Pass the Cocoa

Out of all the recipes I've posted on this site, these tarts are probably the ones I've made the most. I meant to share them more than two years ago, but I was never quite satisfied with the photos, and didn't feel they did these tarts justice. The pictures here are from two different times (I burned them slightly the second time, oops), but I've made them much more than that.

What with all the recipes I share here, there's very few things that I actually repeat. This is one of them, and that really is the highest recommendation I can give.

Happy Chinese New Year!
-Caroline


Egg Tarts

Yields: 12-18 tarts
Adapted from ourfamilyfoodadventures.com
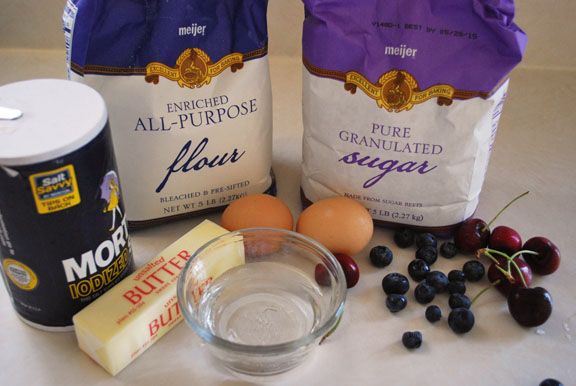
Ingredients
For the Crust
½ cup butter, cubed, room temperature
¼ cup sugar
1 egg
½ teaspoon vanilla
1 ¼ cup flour
¼ teaspoon salt

For the Filling
1 ½ cup water
⅔ cup sugar
4 eggs
¼ cup whole milk
1 teaspoon vanilla extract

Directions
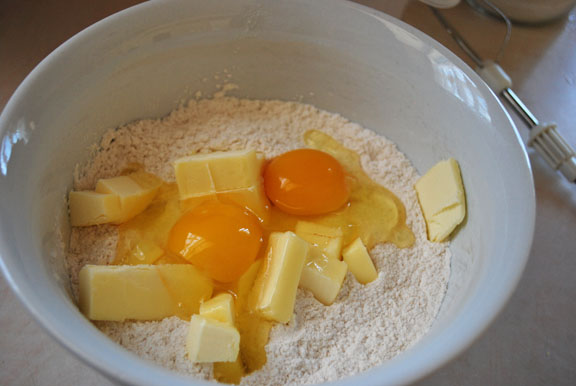
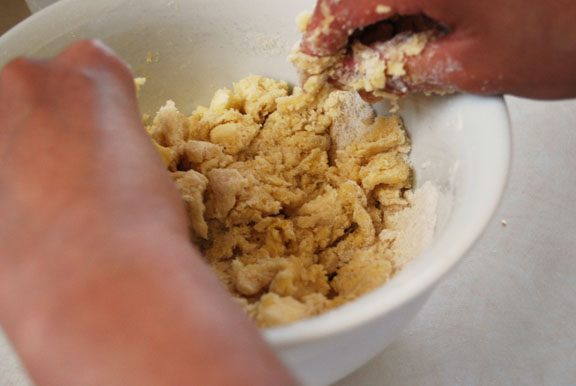
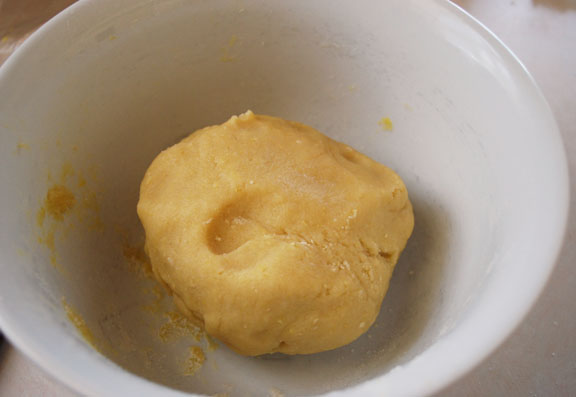
Make the crust. Beat together the butter and sugar until light at fluffy. Whisk in the egg and vanilla, then fold in the flour and salt. Shape the dough into a disk and refrigerate for 2 hours, or overnight. 

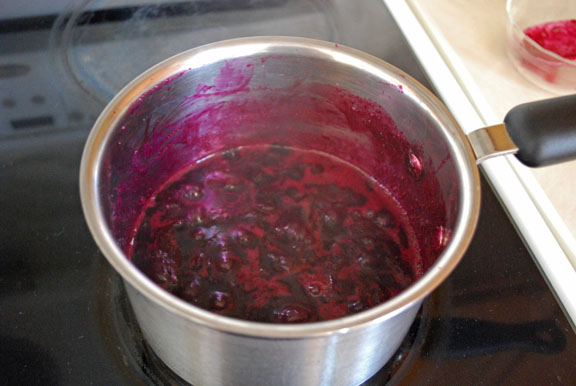
Preheat the oven to 400 F. Make the filling. Place the water and sugar in a saucepan, and heat until it begins to boil. Let boil for for 2-3 minutes, take off the heat, and let cool to room temperature. 

Beat together the eggs, milk, and vanilla extract. Whisk in the sugar syrup mixture from the previous step. Pour the filling through a strainer into a measuring cup.

Divide the dough for the crust into 12-18 equal pieces, depending on your large or small you tart molds are. (If using a muffin tin, divide it into 12, if using smaller tart tins, you can divide the dough into more pieces). Generously grease the tart tins with vegetable oil or butter, and shape the dough along the inside of the molds.

Place the tart molds onto a cookie sheet, then pour the filling into the molds, almost to the top. Bake for 15-18 minutes, or until the center is set but still slightly jiggly. Let cool to room temperature and serve. 


Related Posts

e.pigbread17.jpg
a.french apple tart 5.jpg
a.panna cotta 8.jpg
a. Rhubarb Cobbler 11.jpg
In pie Tags chinese, pie, tart, custard
French Apple Tart | Pass the Cocoa

French Apple Tart

Caroline Zhang November 11, 2014

Last Friday, I finally gave in and got a big slice of caramel apple pie from a local cafe. It was welcome, if not entirely needed; it's just been one of those weeks. 

I admit I'm guilty of stress-eating sometimes. Like this week, for instance, I've gone through quite a bit of sugar (let's not even talk about the chocolate) and have been craving pie. To me, pie is one of the ultimate comfort foods. Warm, sweet, buttery. Crumbly and homely, so you don't have any qualms about just digging in with a fork.

Mid-November always brings a few weeks of extreme stress at college; I think it's the combination of the last round of papers and midterms of the semesters, the onset of final exam and final papers preparation, plus a slew of elections for most of the major student elections. It's one of those moments when it hits me that I really am at Harvard, surrounded by people who are used to having straight As and being president of all their extracirriculars. It's generally quite inspiring, but at times like this, it can all seem rather overwhelming.

French Apple Tart | Pass the Cocoa

Anyways, I'm posting this recipe for French Apple Tart that I made a couple of months ago, right before I came to school, in the last lazy days of summer. It's a lighter, more sophisticated take on American apple pie. I hesitate to use the word "light" - it implies some sort of tasteless diet food, which this is not. It simply tastes like...apple. Apple, and buttery pastry. If you're looking for an alternative to traditional Thanksgiving pie, this is it. It's sure to impress, yet surprisingly easy to make.

Give this one a try; it's definitely a keeper. It's perfect for a fancy dinner, or if you're looking for a tart without the sticky syrup of apple pie filling. Or simply because you could really do with a slice of something sweet and warm.


French Apple Tart

Click here for the printer-friendly recipe.
Yields: One 9-inch tart
Crust adapted from David Lebovitz, Filling adapted from Tartelette


Ingredients
For the crust
½ cup butter, cubed
4 teaspoons vegetable oil
¼ cup water
4 teaspoons sugar
¼ teaspoon salt
1 ⅓ cups all-purpose flour

For the Apple Compote Filling
6 medium apples, such as Gala, Golden Delicious or Honeycrisp
⅓ cup water
2 tablespoons sugar
1 teaspoon vanilla extract

For the Topping
3 medium apples
1 tablespoon lemon juice
2 tablespoons apricot jam
1 teaspoon hot water

Directions
Preheat the oven to 410 F.

Place the butter, vegetable oil, water, sugar, and salt in an oven-proof bowl. Bake in the oven for 15 - 20 minutes, until the mixture is boiling and the edges turn golden brown.
Carefully take the bowl out of the oven, and even more carefully, add the flour and mix until incorporated and it forms a soft dough. (The butter/water mixture will spit when you add the flour, so do not lean directly over it!)

Let cool for about 15 minutes. Scoop the dough into a tart pan, and let cool for another 15 minutes or so.
Meanwhile, make the apple compote. Peel and dice the apples, then place them in a medium pot with the water and sugar. Cook the apples over low heat for 45 minutes to 1 hour, until the apples have stewed down to a paste. Stir every 15 minutes or so and add some water if the mixture becomes too dry.  Stir in the vanilla and let cool until just warm.

Using your hands, shape the dough around the tart pan. Prick the bottom all over with a fork. Bake the tart at 410 degrees F for about 15 minutes, until the edges are slightly golden-brown.

Lower the temperature of the oven to 350 F. Spread the apple compote evenly over the crust.

Thinly slice the three apples for the topping. Toss the slices in lemon juice. Arrange them on top of the compote; start from the outer edge, overlapping the slices slightly, and work your way in . Bake the tart for about 20-25 minutes, or until the edges of the apple slices on top turn golden brown. 
Mix together the apricot jam and hot water, and brush over the top of the tart. Let cool until warm, then serve.


In pie Tags tart, pie, apple, thanksgiving

Nutella Hand Pies

Caroline Zhang February 5, 2014

There are many things I love about this recipe.

The crust, to start with. It's tender and flaky, and so, so incredibly easy. I try not to gush about food too often, but this crust really is something, people. You can make it in 1 minute flat. There's no cutting in of butter, no chilling, no fraisage. (If you don't know what that means, good for you. Although who knows, I might talk about that in a recipe one day.) It's made with vegetable oil instead of butter, but it is just as flaky and flavorful.

And then there's the filling, which is so incredibly easy and versatile. I mean, they're filled. with. Nutella. It doesn't get better than that. (By the way, happy Nutella Day!) Just add a dollop of Nutella and any other add-ins you want. I added a slice of banana to each pie, but you could do lots of different kinds of fruit.

Plus there's just their sheer cuteness. I might have said this before, but I love. mini. desserts. These pies would make a perfect treat for Valentine's Day.

All in all, these pies are pretty irresistible. In the words of my roommate, 4 out of 4 roommates agree that these pies are delicious. (And that includes the one that doesn't like chocolate. I know. Please feel sorry for me.)

Anyways, give these a try sometimes, and happy Nutella Day!

-Caroline

P.S. Many thanks to Sara from Ms. Adventures in Italy and Michelle from Bleeding Espresso for hosting World Nutella Day!


Nutella Hand Pies

Yields 12-15 Hand Pies

Ingredients
For the Crust
2 ¼ cups all-purpose flour
2 tablespoons granulated sugar
1 teaspoon salt
⅔ cup vegetable oil
¼ cup cold water

For the Filling
⅓ cup Nutella
1 medium ripe banana, sliced (⅓ cup sliced strawberries or blueberries would also work)

Assembly
1 egg, beaten
¼ cup raw sugar (see notes)

Directions
Preheat the oven to 425 degrees. Make the crust. Whisk together the flour, sugar, and salt. Add the vegetable oil and water and mix until just combined. Do not over-mix.

Roll out the dough on a floured surface. Cut out heart shapes with a cookie cutter.
Place half of the hearts on an ungreased baking sheet, leaving about 1 inch between each.

Place about 2 teaspoons of Nutella on the hearts. Place a slice of banana on top of the Nutella (or a slice of strawberries or 3-4 blueberries.)

Cover each of the hearts with the remaining hearts. Seal the edges of the hearts by pressing with a fork. Brush the tops of the pies with the egg, and sprinkle with the raw sugar.

Bake at 425 degrees for 5 minutes, then lower the oven temperature to 350 degrees. Bake for another 5-10 minutes, or until the pies are golden brown.

Let cool and serve.


In pie Tags pie, nutella, valentine's day, world nutella day, banana, easy
Italian Jam Crostata | Pass the Cocoa

Italian Jam Crostata

Caroline Zhang September 3, 2013

Guess what? It's my first day of school! Yippee, sophomore year. And so, while Monica is enjoying one more month of summer break (lucky butt), Boston has been drilling it into me that it is most definitely not summer anymore.  It was 90 degrees when I left Indiana, and 64 degrees when the plane landed in Boston the same afternoon.

And so, instead of finishing unpacking or figuring out my classes, I'm going to talk about this crostata, which I made a few days ago, which reminds me of summer and hot, humid Italy and its vicious mosquitoes that eat you alive. Take that, Boston weather.

Italian Jam Crostata | Pass the Cocoa

This is pretty different from the Blueberry Crostata

that Monica posted a couple of months ago. While hers was more of a pie, this is a shortbread tart filled with jam, and is more cookie-like.

I love the beautiful simplicity of this tart that yields such a rich and delicious flavor. The jam filling is thick and sweet, but not too sweet, and goes perfectly with the buttery shortbread.

See? These are all the ingredients you need to make this crostata.

You can either use store-bought jam or make your own.  I would suggest making it yourself if you have time, so that you have more control over the sweetness. You'll be spreading a lot of jam on the tart, and the sweetness becomes more concentrated through the baking process.

For the dough, whisk together the flour, sugar, and slat, and work in the butter and eggs with your hands, or a pastry cutter.

Refrigerate it for about an hour.

And now, make your jam! If you're using store-bought jam, I'd suggest mixing in about a tablespoon of lemon juice so that it's not too sweet. Cook your jam ingredients in a pot until it thickens.

To test for thickness, place a dollop of jam on a chilled plate and refrigerate for about 3 minutes. You should see that a think skin has formed on top that wrinkles when you touch it with your finger.

Divide your dough in half, with one half being slightly bigger, and roll out the larger half into a 10-inch circle. 

Place it onto a greased baking sheet, spread the jam on it, and roll out the rest of the dough and cut it into 3/4-inch strips.

Lay four strips on the jam:

Fold back every other strip, and lay down a strip across the remaining two strips. 

Return the two strips to their original position so that they are now lying on top of the strip you just laid down, and fold back the other two strips.

Lay down another strip.

Keep on doing this until the lattice covers the whole tart...

Then roll the edges of the circle towards the center, until it touches the jam.

Bake at 350 degrees Fahrenheit for 25-35 minutes until golden brown, and enjoy!

Italian Jam Crostata | Pass the Cocoa

Enjoy, all!

-Caroline

Italian Jam Crostata

Click here for the printer-friendly recipe.
Adapted from Tuscan Recipes


Ingredients
1 ½ cups all-purpose flour
⅓ cup granulated sugar
¼ teaspoon salt
8 tablespoons butter, cold, cut into cubes
1 egg and 1 egg yolk
1 cup jam (see below for homemade jam)
1 tablespoon lemon juice

For homemade jam:
4 cups fresh fruit (such as blueberries,  pitted cherries, apricots, or peaches)
⅔ cup granulated sugar, or to taste
½ cup water
1 teaspoon lemon juice


Directions
Make the crust.  Whisk together the flour, sugar, and salt.

Add the butter, egg, and egg yolk. Using your hands or a pastry cutter, incorporate the butter and eggs into the flour to form a smooth dough. Refrigerate for an hour.

Prepare the jam. If you are using store-bought jam that is very sweet, mix in 1 tablespoon of lemon juice, since the baking process will intensify its sweetness.

If you are making the jam, place the fruit, sugar, water, and lemon juice in a large pot and bring to a boil. Boil for about 5 minutes, stirring constantly. Reduce to a simmer and cook until the jam has thickened. To check if it is thick enough, place a small spoonful onto a chilled plate and refrigerate for 3 minutes. When you push the jam with your finger, it should have formed a skin on top. Let the jam cool.

Preheat the oven to 350 degrees Fahrenheit. Assemble the crostata. Divide the dough in half, with one half slightly bigger than the other. Roll out the larger half into a 10-inch circle and place on a greased baking sheet. Spread the jam over the dough, leaving a one-inch border.

To make the lattice crust on top, roll the other half into a 10-inch circle. Using a pizza cutter or knife, cut the circle into about ¾-inch strips.

Lay four strips on top of the jam, parallel to each other and equally spaced. Fold back every other strip.

Lay another strip of dough on top of the two strips that are not folded back. Unfold the two folded strips and lay them down on top of the strip you just added. Fold back the two strips that were not folded over before, lay down another strip, and repeat until the top of the crostata is covered.

Roll the edges of the crostata towards the center, until they touch the jam. Bake the crostata for 25-35 minutes, until golden on top. Let cool until it is only warm, and serve.

In pie Tags tart, crostata, jam, Italian, blueberry, cherry, shortbread
← NewerOlder →

Search Posts

Post Archive
  • "easy"
  • "breakfast"
  • "chocolate"
  • "cookie"
  • cake
  • cookie
  • "fruit"
  • "summer"
  • "bread"
  • "Cheesecake"
  • "Oreo"
  • "dessert"
  • "fancy"
  • "Cake"
  • "blueberry"
  • pie
  • "cinnamon"
  • savory
  • breakfast
  • "berry"
  • "brownie"
  • "cupcake"
  • "holiday"
  • "nutella"
  • bars and brownies
  • "apple"
  • "birthday"
  • "pastry"
  • "pie"
  • "scone"
  • bread
  • candy
  • cheesecake
  • "banana"
  • "biscuit"
  • "citrus"
  • "ganache"
  • "lemon"
  • "macaron"
  • "muffin"
  • "strawberry"
  • "vegetable"
  • "almond"
  • "buttercream"
  • "cake mix"
  • "cranberry"
  • "cream cheese"
  • "frosting"
  • "glaze"
  • "healthy"
 

Powered by Squarespace