Abbracci Cookies

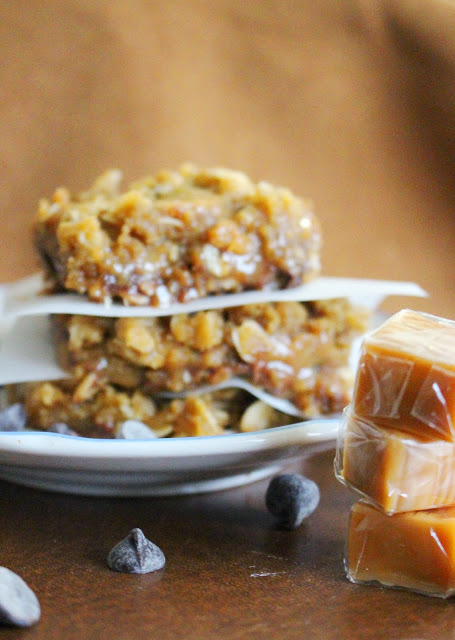
Last year I took a class called Interracial Literature; we read OthelloAbsalom! Absalom!, lots of other cool and somewhat bizarre stories, analyzed conceptions of racial difference. Every class, my professor would bring us black and white Italian cookies, which we liked to call interracial cookies.

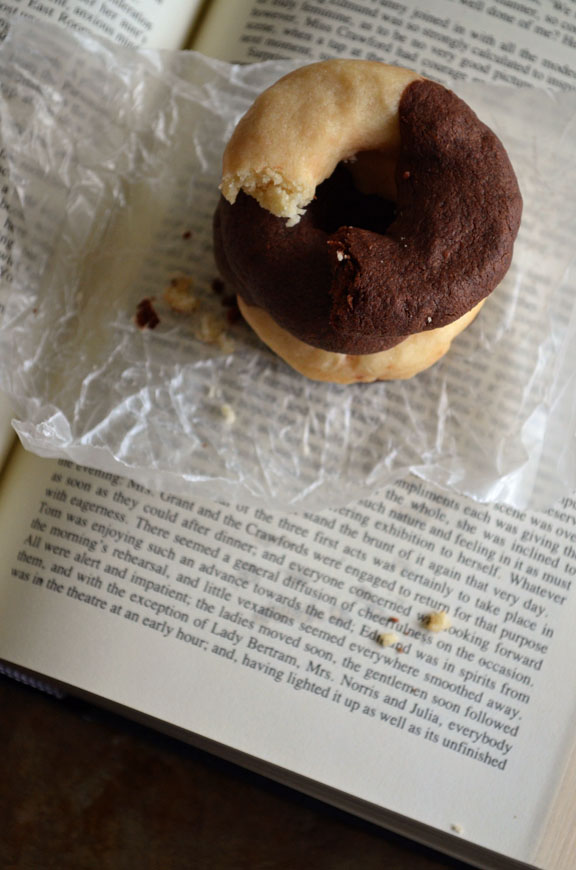
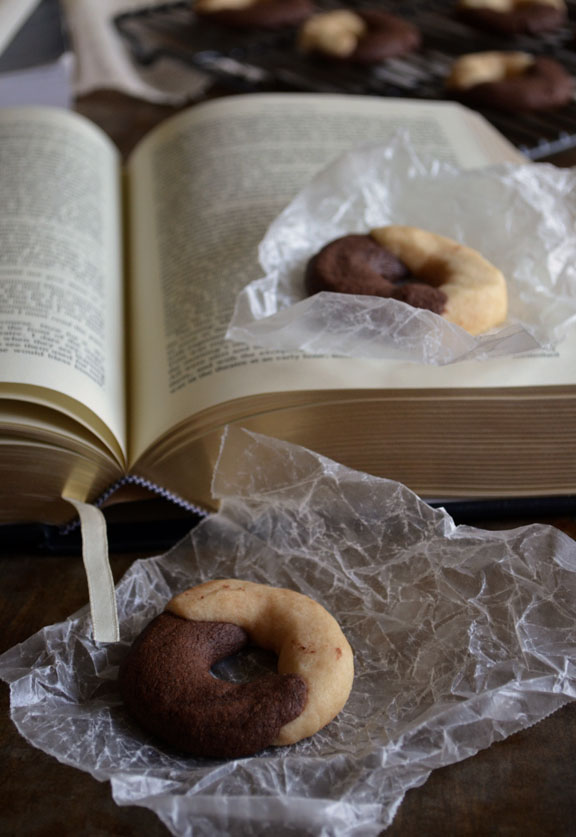
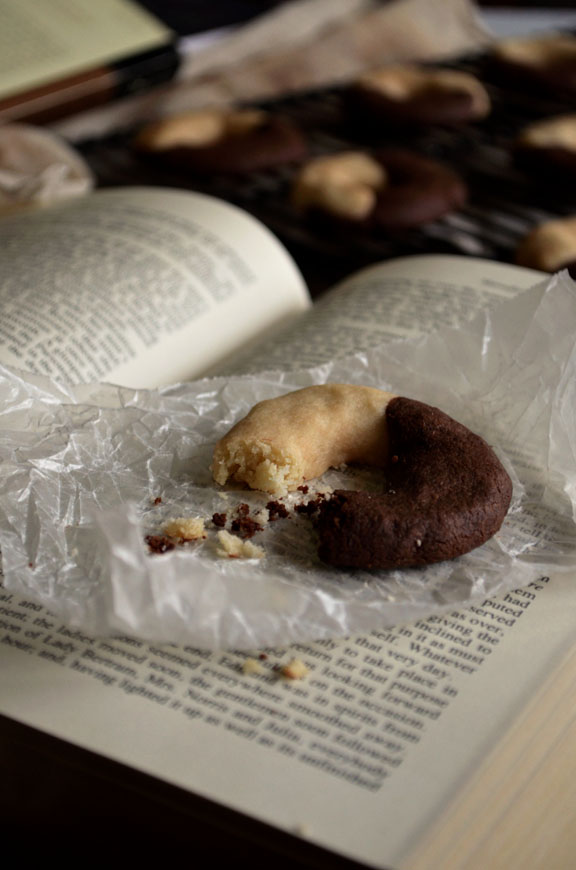
This particular variety is called Abbracci, which is Italian for "hug."

a. abbracci cookies 2.jpg

It's a simple shortbread cookie, a piece of chocolate dough intertwined with a piece of vanilla. Like they're hugging each other!

Shortbread is wonderfully easy to make, and if you're new to baking this is a great recipe to start with.

This cookie recipe also has slightly less sugar than most; you can increase it by another tablespoon or so, but I wouldn't recommend. The cookies I had in Italy were flaky, buttery, and had the perfect amount of sweetness, unlike their American counterparts, which tend to be too sweet. Along those lines, don't leave out the salt. I've found that salt adds a wonder complexity and depth of flavor to baked goods; they don't make things salty, but they help round out the sweetness.

Key techniques to making tender shortbread cookies is 1) not over-mixing the dough (especially when you're mixing in the cocoa and Nutella) and 2) refrigerating the dough before baking them.

There's nothing complicated or fancy about these cookies, aside from the cool shape. They're a wonderfully simple and delicious cookie, buttery and crumbly, perfect with a cup of tea and a good book.

Enjoy!
​Caroline


Abbracci Cookies

Ingredients
8 tablespoons (1 stick) butter, softened
⅓ cup granulated sugar
1 teaspoon vanilla extract
¼ teaspoon salt
1 cup all-purpose flour
¼ cup cornstarch
2 tablespoons cocoa powder
1 tablespoon Nutell


Directions
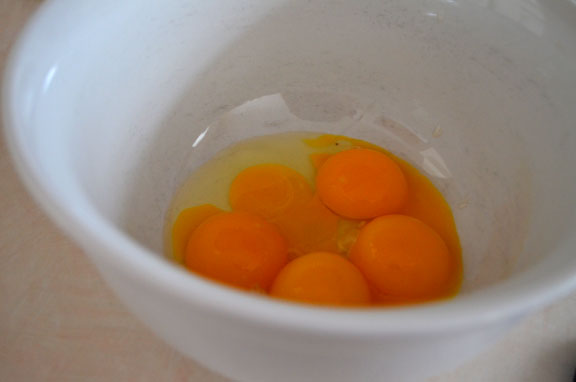
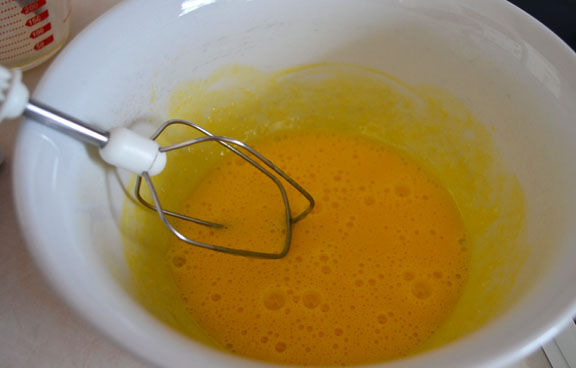
With an electric mixer, cream together the butter and sugar until light, pale, and fluffy. Whisk in the vanilla extract.

With a wooden spoon or spatula, stir in the salt. Add the flour and cornstarch and mix until just combined.

Remove about half of the dough from the bowl and set aside. To the remaining dough, add the cocoa powder and Nutella and mix until incorporated.

Divide the chocolate dough into 15 pieces. Do the same for the vanilla dough. With your hands, roll each piece of dough into a 2-inch log.

Join together one vanilla and one chocolate piece of dough with the ends overlapping, to form a circle. Do this for the remaining pieces of dough.

Place the cookies on a baking sheet and refrigerate for 30 minutes to 1 hour.

Preheat the oven to 350 degrees. Bake the cookies for 15-18 minutes. They will be barely golden around the edges.

Let cool and serve!

Carmelitas {Mystery Dish Challenge}

Trust me when I say these are the most delicious cookie bars ever. Carmelitas are a heavenly combination of gooey caramel and half-melted chocolate chips sandwiched in between oatmeal cookie crumbs. It's practically impossible to eat these by hand. You'll need the help of a fork and napkin, and a very strong will to control yourself from eating everything in sight.

This month, I am guest posting for the Mystery Dish Challenge. Basically, it's a monthly challenge hosted by Dani Carroll from See Hubby Cook in which 12 bloggers create a dish of their fancy, choosing a couple ingredients out of a list of 8 - 10. For these carmelitas, I chose chocolate and cream.

Admittedly, Carmelitas are rich and gooey, so I wouldn't recommend making every day...But it's nice to treat yourself to some once in a while, especially during these polar vortex days. Northwestern doesn't believe in canceling school, even if it drops 20 degrees below zero and the high is zero. Frostbite shuttles are my new best friend.

Here's how you make the Carmelitas.

First, melt the butter. Add vanilla to it. Then add brown sugar. Then add flour, oats, baking soda, and salt.

Hand mix it all together nice and good until it's a crumbly mixture. It may be appear moist at first because of the melted butter, but after letting it sit, it'll take on a more crumbly texture.

Press half of the oatmeal cookie mixture onto the bottom of an 8 x 8 inch pan (I used a 9 inch circular cake pan, and it worked perfectly well.). While this bakes for 10 minutes, melt the caramel and heavy cream mixture. Alternatively, you may make homemade caramel sauce. I went the shortcut way because it's faster.

Here's the caramel sauce, all melted and ready. And just in time! The bottom layer of the Carmelitas is ready. See the nice and golden edges?

Get those chocolate chips ready. I used a combination of milk chocolate and semi-sweet.

Add the caramel sauce and sprinkle the remaining oatmeal cookie crumbs on top. Beautiful.

And here's the finished product. The hard part is waiting for it cool enough to slice.

Serve and enjoy at room temperature, with a tall glass of cold milk!

Cheers,

Monica

*

Carmelitas

Adapted from Lulu the Baker
Yield: 12 servings | Time: 45 minutes

Ingredients

For Caramel Sauce:
32 caramel squares, unwrapped
1/2 cup heavy cream

Note: Alternatively, you may use 1 ¼ cup homemade or store-bought caramel sauce.

For the Oatmeal Cookie Layer:
3/4 cup unsalted butter, melted
1 teaspoon vanilla
3/4 cup brown sugar, packed
1 cup all-purpose flour
1 cup rolled oats
1 teaspoon baking soda
1/4 teaspoon salt
6 ounces semisweet chocolate chips

Directions
For the Oatmeal Cookie Layer:

Melt the butter, and then add vanilla to it. Then add brown sugar, flour, oats, baking soda, and salt. Mix by hand until combined. Pat half of the oatmeal mixture into the bottom of an 8 x 8 inch pan. 9 inch circular pan works too. (If using a 9 x 13 inch pan, simply double the recipe and adjust the baking time.)

Bake at 350 degrees Fahrenheit for 10 minutes.

For Caramel Sauce:
Meanwhile, use microwave to heat caramels and heavy cream in 30-second intervals, stirring well after each interval until melted and smooth. Alternatively, you may combine caramels and cream in a small saucepan over low heat. Stir constantly until completely melted and smooth. Set aside.

Remove pan from oven and sprinkle chocolate chips over crust. Pour caramel sauce over chocolate chips. Then crumble the remaining oatmeal mixture over the caramel layer.

Return the pan to the oven and bake for an additional 15 - 20 minutes, until the edges are lightly browned. Remove from oven and cool completely before cutting. Store in air-tight container, and serve at room temperature. Enjoy!

*

Here are the rest of the bloggers participating in January's Mystery Dish Challenge, if you're interested in checking them out!

1.  Carmelitas by Pass the Cocoa

2.  Strawberry Champagne Cupcake Trifles by The Dessert Chronicles

3.  Strawberry Orange Stuffed French Toast by I Dig Pinterest

4.  Strawberry Orange Ice Cream with Chocolate Chips by Joyful Healthy Eats

5.  Chocolate Strawberry Pudding by See Hubby Cook

6.  Chocolate Doughnuts with Strawberry Cream Cheese Icing by Chez CateyLou

7.  Champorado (Filipino Chocolate Rice Pudding) by The Pajama Chef

8.  Whole Wheat Orange Scones with Vanilla Cream Glaze by The Well Floured Kitchen

9.  Chocolate-Filled Cream Puffs with Strawberry Sauce by Culinary Couture

10.  Red Velvet Beet Cupcakes

by Yummy Healthy Easy

11.  Chocolate Covered Strawberry Milkshake by I Want Crazy

12.  Strawberry Rose Chocolate Verrines by Baking a Moment

Rosemary Lemon Macarons

What do you talk on a food blog when you don't feel like talking about food? I mean, don't get me wrong, I lovelovelove talking about food. But sometimes it gets a little boring just going on about what you made and how good it is.

These macarons are very, very, good, just to get that out of the way. It's not their fault I'm a little writer's block-y right now.

So instead, I'm going to talk about George Eliot. I just read Middlemarch, which was incredibly good, though I'm not sure why. The book is about this little imaginary English town called Middlemarch and the lives of its occupants, just them, going about their daily lives, doing business, losing money, getting married, getting old. Completely unremarkable yet extremely compelling.

I guess as a lit major I'm supposed to be able to analyze the book better, but all I can say is that I was strangely into it. The characters are so very unremarkable yet so real, and it's a little bit unnerving to see bits of yourself in them.

So anyways, back to the macarons. It's actually kind of embarrassing how long these photos have been knocking around on my hard drive before I finally got around to posting them. I actually made these the same week I made these cherry profiteroles...back in August. The photography is the same style and everything, now that I think about it. Their flavor also inspired these rosemary lemon scones, even though they were posted first.

Well, now I'm really rambling, just like a 19th century English novel. Basically, you should make these macarons; they have this earthy herb-y flavor which pairs perfectly with the bright, sweet, and tart lemon curd filling. Don't let macarons intimidate you; they may take a few tries to get ones that look perfect, but they don't have to look pretty to taste great. (For more on macarons, you can find my step-by-step macaron tutorial here.)

So give them a try. Oh, and read Middlemarch.

-Caroline

Rosemary Lemon Macarons

Adapted from Bravetart

Ingredients
Shells
2 oz. (58 g) Almond Flour or Almonds (with or without their skins)
4 oz. (115 g) Powdered sugar
½ teaspoon Dried Rosemary
1.25 oz. (36 g) Granulated sugar
¼ teaspoon (1 g) Salt
2.5 oz. (72 g) Egg whites (about 2 eggs)

Assembly
Yellow food coloring (optional)
A few drops of water (optional)
1/3 cup lemon curd (recipe below)


Directions
If you’re using whole almonds, you’ll need to grind them. Place the almonds in a food processor and roughly grind them. It doesn’t need to be too fine, but there shouldn’t be any large chunks. Add in two or three tablespoons of powdered sugar and the rosmeary and continue grinding the almonds until they are very fine. Add the rest of the powdered sugar and grind for another 15-30 seconds. If you’re using almond flour, just pulse together the almond flour, powder sugar and rosemary.

Make the meringue. Mix together the granulated sugar and salt. In a very clean bowl, begin beating the egg whites on medium-low speed until frothy, about 1-2 minutes. Increase speed to medium, and gradually add the granulated sugar-salt mixture, and beat until soft peaks form, about 2-3 minutes. Increase speed to high, and beat until the meringue is very stiff and shiny, about 2-3 minutes.

Hold a mesh strainer over the meringue, and sift the almond mixture over the meringue. Return any pieces that don’t pass through the strainer to the food processor, and grind them some more, and sift them again. There may still be a few bits that are too big (less than a tablespoonful); just add them to the meringue.

Begin folding the dry ingredients into the meringue. Be sure to scrape the edges of the bowl. When done, the batter should be think, but somewhat fluid. Do the ribbon and/glop test to check.

Ribbon test: hold a spatula-full of batter over the bowl, and it should fall into the bowl in a thick ribbon. The ribbon should re-incorporate into the batter within about 30 seconds.

Glop test: drop a spoonful of batter onto a plate. The peak should smooth out within 10 seconds.

Line a cookie sheet with parchment paper or Silipat.

Put the batter into a pastry bag with a round tip about ¼-inch wide. Pipe out 1-inch wide circles, leaving around 1 inch between circles.

Rap the baking sheet against a counter or tape several times to release any air bubbles trapped in the batter. You should see bubbles rise to the top and pop.

Preheat oven to 300 degrees Fahrenheit. Allow the batter to rest in open air until the tops are set; when you lightly touch the circles with a finger, no batter sticks to it.

Put the macarons in the oven and bake for 18-20 minutes, until the cookies can come cleanly off the parchment paper, and the insides are done. (They should be slightly damp on the inside, but not wet and sticky.)

Allow the macarons to cool, and fill with lemon curd. (See recipe below). Spoon about ½ tablespoon of curd onto a macaron, and top with another macaron.

(Optional) Mix together about ¼ teaspoon yellow food coloring with a few drops of water. Use a pastry brush to brush on some food coloring on the top of the macarons.


Lemon Curd

Adapted from Bakers Royale

Ingredients
½ cup lemon juice
Zest of 2 lemons
½ cup granulated sugar
5 tablespoons butter
3 egg yolks


Directions
Put the lemon juice, zest, and sugar into a saucepan and heat over medium heat until the sugar is dissolved. Add the butter and continue cooking until the butter is melted.

Whisk the egg yolks until fluffy.

Slowly pour about ¼ cup of the juice mixture into the yolks, while continuously whisking.

Pour the yolk/juice mixture back into the sauce pan, and continue cooking until the curd thickens and a spoon leaves a clear trail in the curd.

Take the curd off the heat and allow to cool. Store in the refrigerator.

Fig and Candied Walnut Ice Cream

"Fig and Walnut ice cream?" you might ask. "Ew, figs," you might say. But before you pass judgement on this slightly unusual ice cream flavor, make it and see how fast it'll disappear. Because it is fabulous.

I love trying new ice cream flavors, and while I was in Italy, this was one of my favorites, though it could only be found in a couple of places. (You can read more about my gelato and Italian food ramblings here.) I learned almost zero Italian in the two months of my stay, and could barely manage a "what's your name?" But pointing at a tub of this wonderful ice cream and saying, "una pallina di noce e fichi"? I had it down pat.

This ice cream is rich, smooth, and creamy, with sweet and tender pieces of fig and crunchy walnuts swirled in. The sugar coating the walnuts dissolves a little in the ice cream, giving it little golden-brown streaks of caramel, while the fig flavor is not at all strong, and only gives the ice cream a nice warm, fruity flavor.

This is a basic custard ice cream, with figs and caramelized walnuts thrown in. It's a three-step process of making the ice cream base, fig sauce, and candied walnuts. (I heard that! Don't say ew to the fig sauce. It makes the ice cream magical and yummy.) I used an ice cream maker to make this, which probably gives the smoothest results, but here are a few ways you can make ice cream without a machine.

The only tricky part of making this ice cream is cooking the custard. which requires tempering the eggs, and gently heating them so that they don't scramble. This is the same process you'd use to make other custard-based desserts, such as pastry cream.

You start by heating the milk in a saucepan.

While that's heating, separate the egg yolks from the whites. Save the whites to make other desserts, such as these macarons.

Whisk the egg yolks with the sugar.

Slowly pour about half of the hot milk into the egg yolks while whisking constantly.

Pour the egg yolk/mixture bake into the pot, and continue to cook it, stirring constantly. It's important to keep on mixing, or else the custard will be lumpy.

The custard is done when it is thick enough to coat the back of a wooden spoon, and your finger leaves a clean trail in the custard on the spoon.

Now pour this mixture into a large bowl and mix in the whipped cream. Chill this for several hours in the refrigerator for several hours, and then churn it in the ice cream maker. In the last 5 minutes of churning, add the fig sauce. In the last minute of churning, add the walnuts.

Serve in a large bowl along with a cup of hot coffee. No one says you can't enjoy ice cream in winter (:

-Caroline

Fig and Candied Walnut Ice Cream

Yields: about 1 quart of ice cream

Ice cream base adapted from David Lebovitz, candied walnut recipe adapted from The Food Network

Ingredients
For the custard base
1 ½ cup milk
5 egg yolks
⅓ cup sugar
⅛ teaspoon salt
1 ½ cup heavy cream, chilled

For the fig sauce
8 ounces dried figs, roughly chopped
⅓ cup water
2 tablespoons honey
1 tablespoon brown sugar
1 teaspoon almond extract
1 teaspoon vanilla extract

For the candied walnuts
1 ½ cup walnut halves
⅓ cup powdered sugar
2 tablespoons brown sugar
¼ teaspoon salt


Directions
Make the custard base. Place the milk in a saucepan and bring it to a simmer.

While the milk is heating, whisk together the egg yolks, sugar, and salt.

Slowly drizzle about half of the hot milk into the egg yolks while whisking constantly.

Pour the egg/milk mixture back into the saucepan and continue to cook it until it is thick enough to coat the back of a spoon. When you run your finger through the custard on the spoon, it should leave a clean trail. Let the custard cool.

Pour the heavy cream into a large bowl and pour in the custard. Mix well and refrigerate for several hours, preferably overnight.

Make the fig sauce. Place the figs, water, honey, and sugar in a saucepan and cook until it forms a thick paste. Take the saucepan off the stove and stir in the almond and vanilla extracts. Let cool.

Make the candied walnuts. Preheat the oven to 350 degrees Fahrenheit.

Blanche the walnuts. Bring a medium pot of water to boil. Boil the walnuts for 3 minutes, then drain well.

Mix together the powdered sugar, brown sugar, and salt.Roll the walnuts in the sugar mixture.

Place the walnuts on a baking sheet, and bake for about 10 minutes, until the walnuts are a deep golden brown. Let cool.

Break the walnuts into the smaller pieces.

Churn the ice cream in an ice cream maker according to the manufacturer’s directions. In the last 5 minutes of churning, add the fig sauce. In the last minute of churning, add the candied walnuts.

Scoop the ice cream into a container and freezer for several hours until firm before serving.